
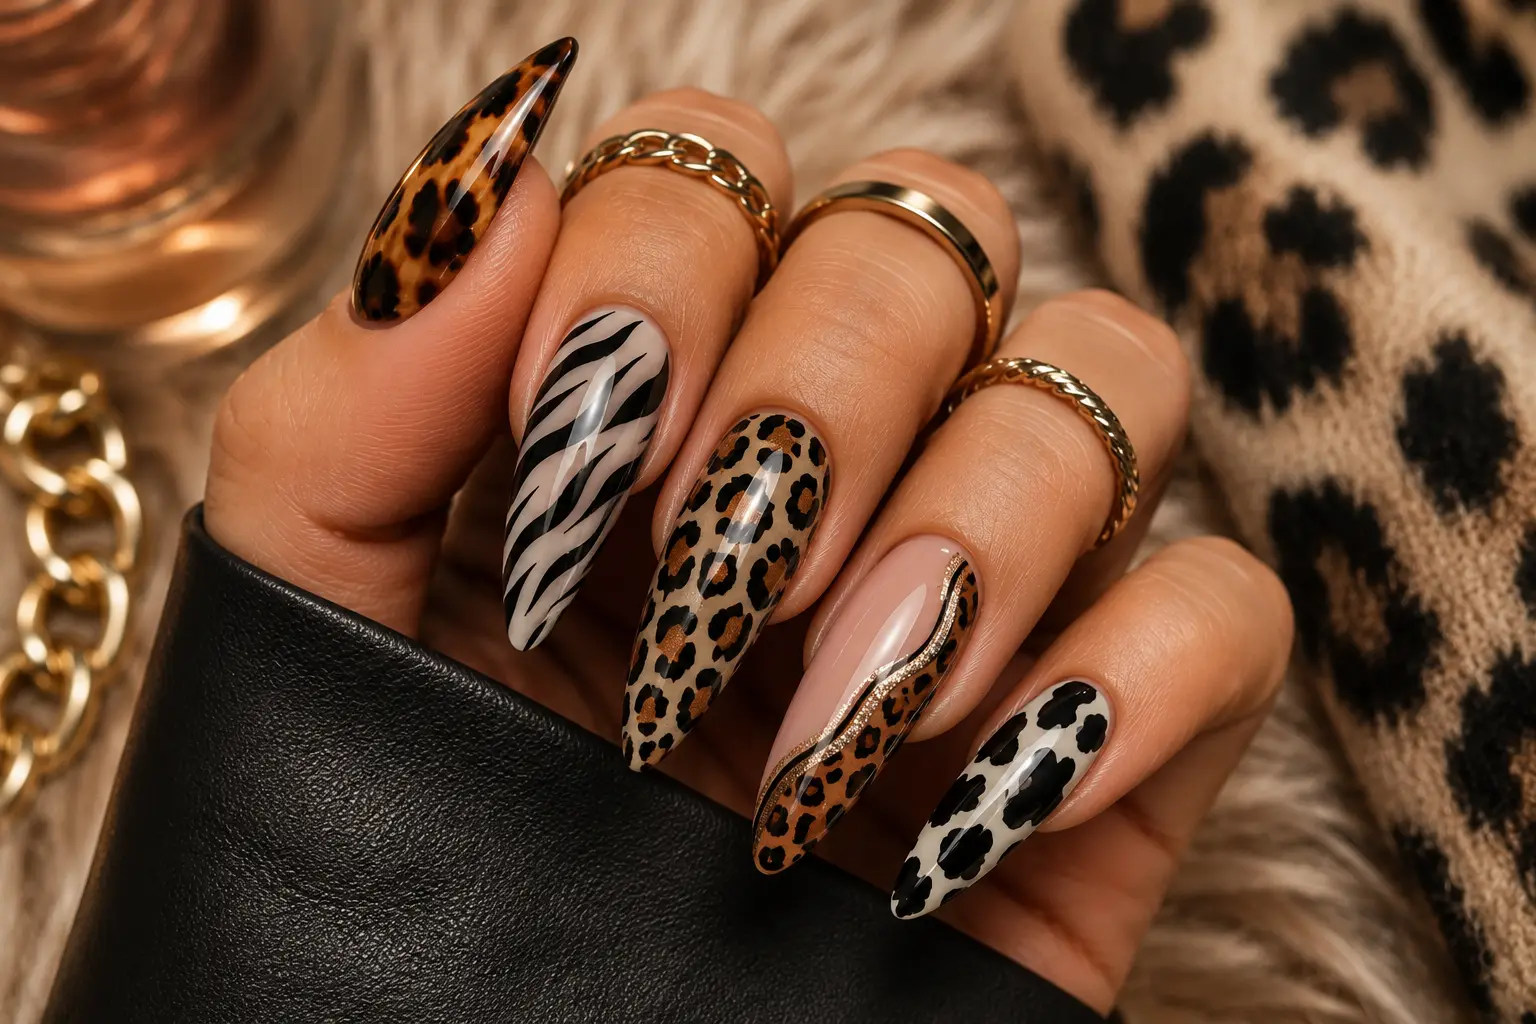
Unleash Your Wild Side: 12 Modern Animal Print Nail Ideas for a Fashion-Forward Edge
Are you ready to unleash your wild side with the latest nail trend? Animal print nails are back and better than ever, with modern wild patterns that add a fashion-forward edge to any look. From classic leopard to bold zebra, these 12 modern animal print nail ideas will inspire you to try something new and exciting.
1. Sophisticated Leopard: Matte & Negative Space
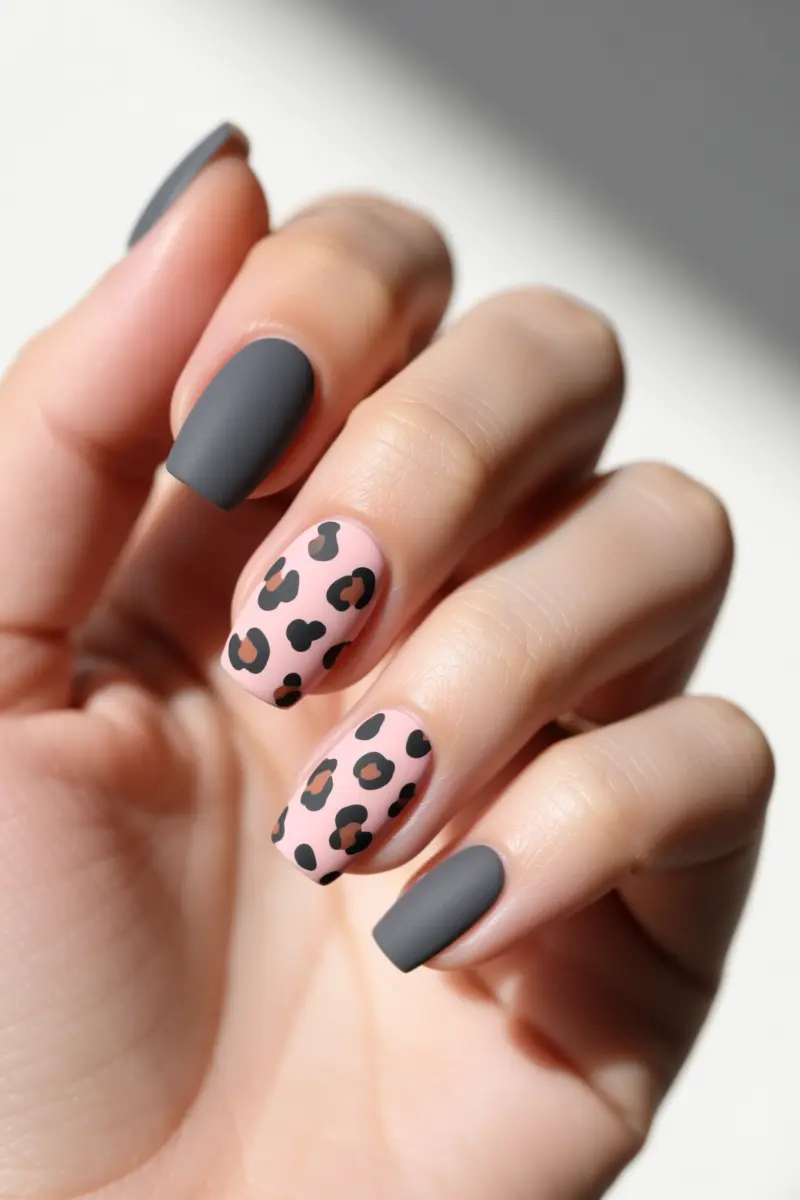
To modernize classic leopard print, try adding a matte topcoat for a sophisticated twist. This finish gives the design a subtle, understated look that’s perfect for everyday wear. For crisp spots, use a small detailing brush or a stamping plate with leopard print patterns.
Konad or MoYou London plates work well for this. Freehanding spots can be tricky, but a steady hand and a thin brush make it easier.
A matte finish completely alters the perception of the design, making it look more edgy and modern compared to glossy. Skin tone plays a big role in choosing base and spot colors – cool tones look great with pale pink and dark grey, while warm tones suit golden brown and beige.
For shorter nails, smaller spots and a lighter base color work best, while longer nails can handle larger spots and a bolder base. Layering spots in different sizes creates added depth and visual interest.
2. Reimagined Zebra: Colorful & Metallic Accents
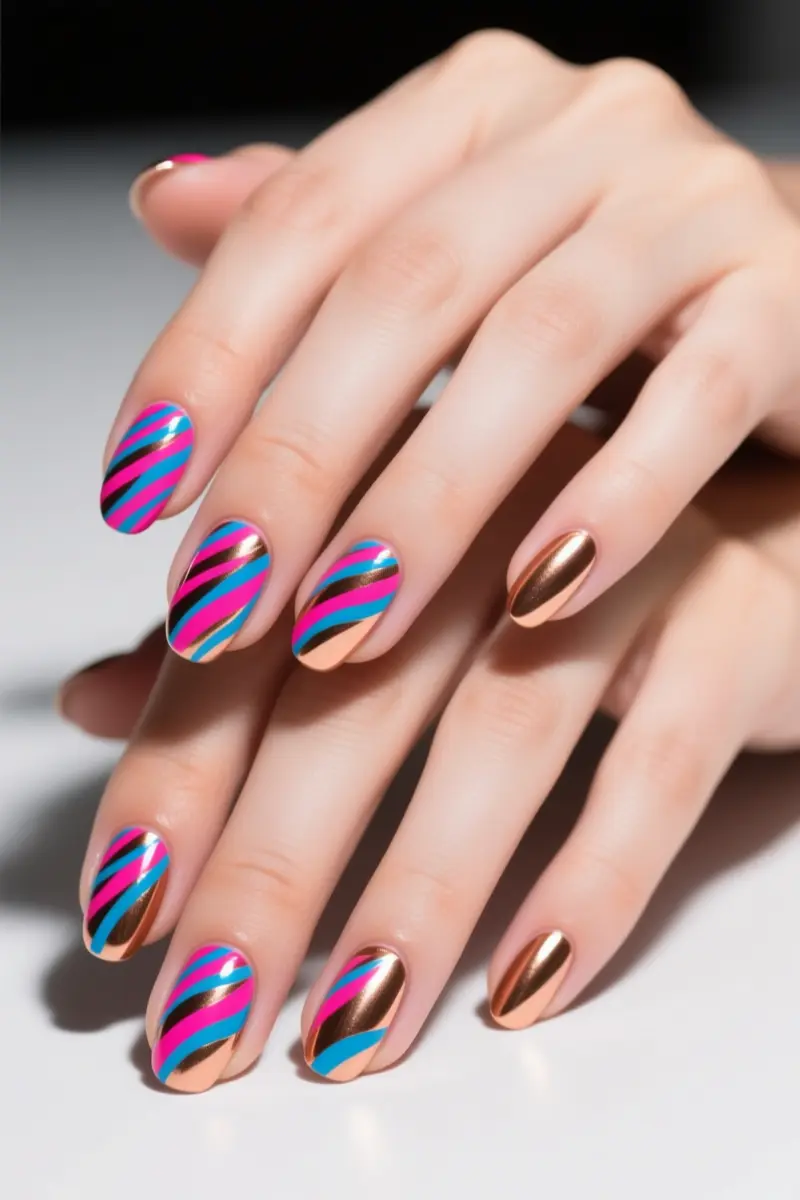
To give traditional zebra stripes a modern twist, try pairing bold colors like hot pink and electric blue. Metallic polishes in rose gold or chrome silver add a sleek touch. For sharp lines, use a striping brush or nail tape to create crisp edges.
On almond-shaped nails, this design creates a lengthening effect, while square nails make the pattern appear more graphic. Metallic accents catch the light, giving the illusion of movement.
Avoid uneven stripe thickness by using a steady hand and a thin brush. Practice makes perfect, so don’t be discouraged if it takes a few tries to get it right. With practice, you can achieve a vibrant, fashion-forward zebra print that’s uniquely yours.
3. Chic Snake Skin: Textured & Subtle Gradient
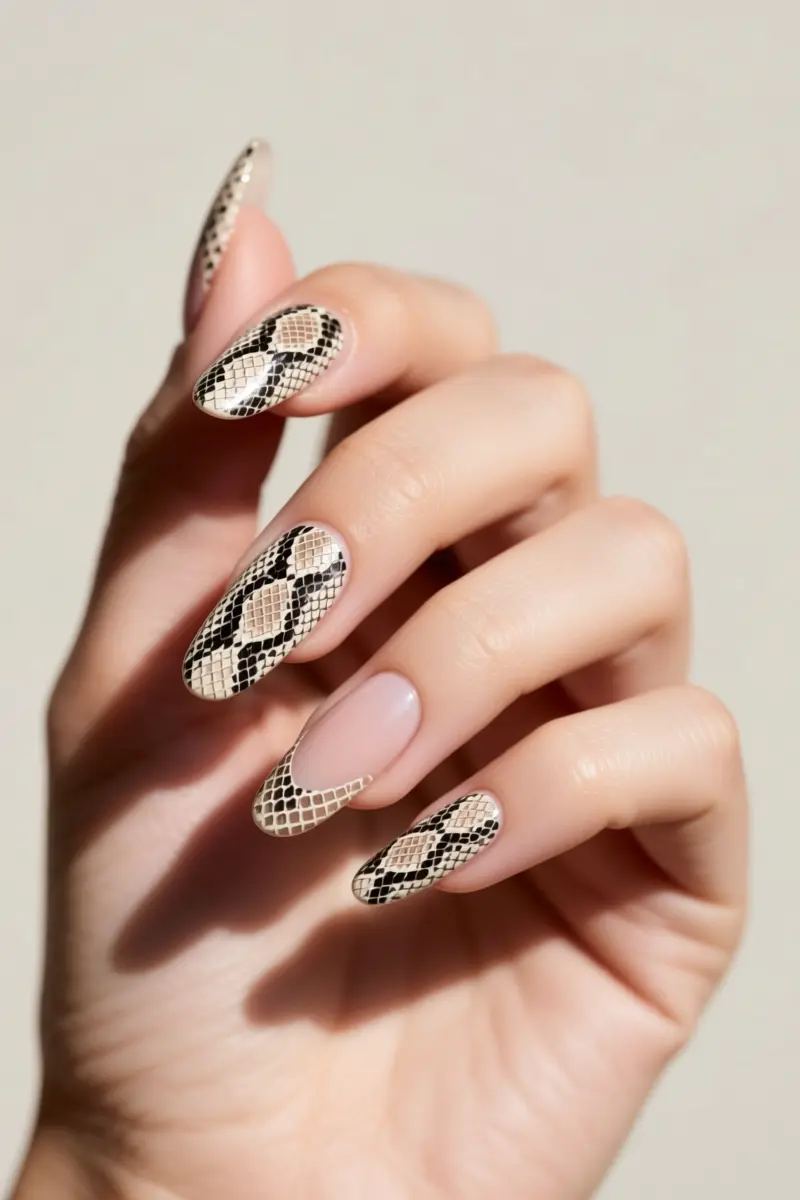
To achieve a luxurious snake skin effect, start by applying a base coat. Then, use a mesh stencil to create a scale-like texture. This technique works well with gel polish, as it allows for a more precise application. For a more subtle look, try stamping with a snake skin pattern.
Specialized gels can also be used to create a textured finish. When blending gradient colors, choose shades that are close together for a seamless transition. Apply the lightest shade at the tip of the nail and the darkest at the cuticle.
The textured finish feels slightly raised to the touch, giving the illusion of real snake skin. The gradient creates depth, making nails appear longer.
When using gel polish, make sure to cure each layer properly to avoid a sticky finish. Regular polish can also be used, but it may not provide the same level of texture and durability as gel.
4. Edgy Tiger Print: Abstract & Neon Pop
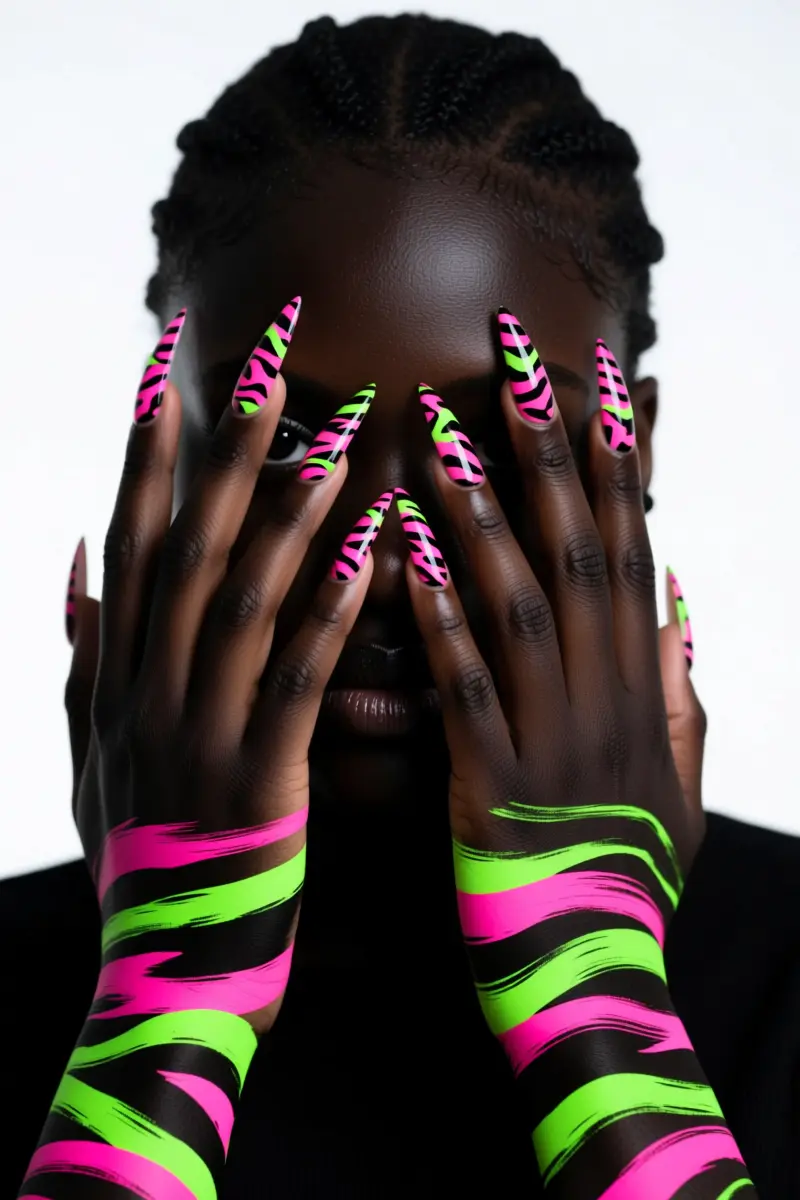
To create edgy tiger print nails, start with a bold base color like black or dark grey. This allows neon accents to really pop. Use a thin brush to paint fluid stripes, varying line thickness for a more artistic look. A detail brush is best for fine lines, while a flat brush creates thicker, more abstract stripes.
Layering colors is key to a dynamic effect. Begin with a light layer of neon paint, then build up to bolder colors. Neon pink or green work well over dark bases, producing a vibrant contrast. For a wilder style, add bold neon accents to the tips or centers of the stripes.
Different base colors affect neon vibrancy. White or light bases make neon colors appear more pastel, while dark bases make them seem more electric. Experiment with layering to find the perfect balance. This edgy tiger print style adds a fashion-forward edge to any outfit, perfect for those who like to make a statement.
5. Minimalist Cow Print: Monochromatic & Negative Space
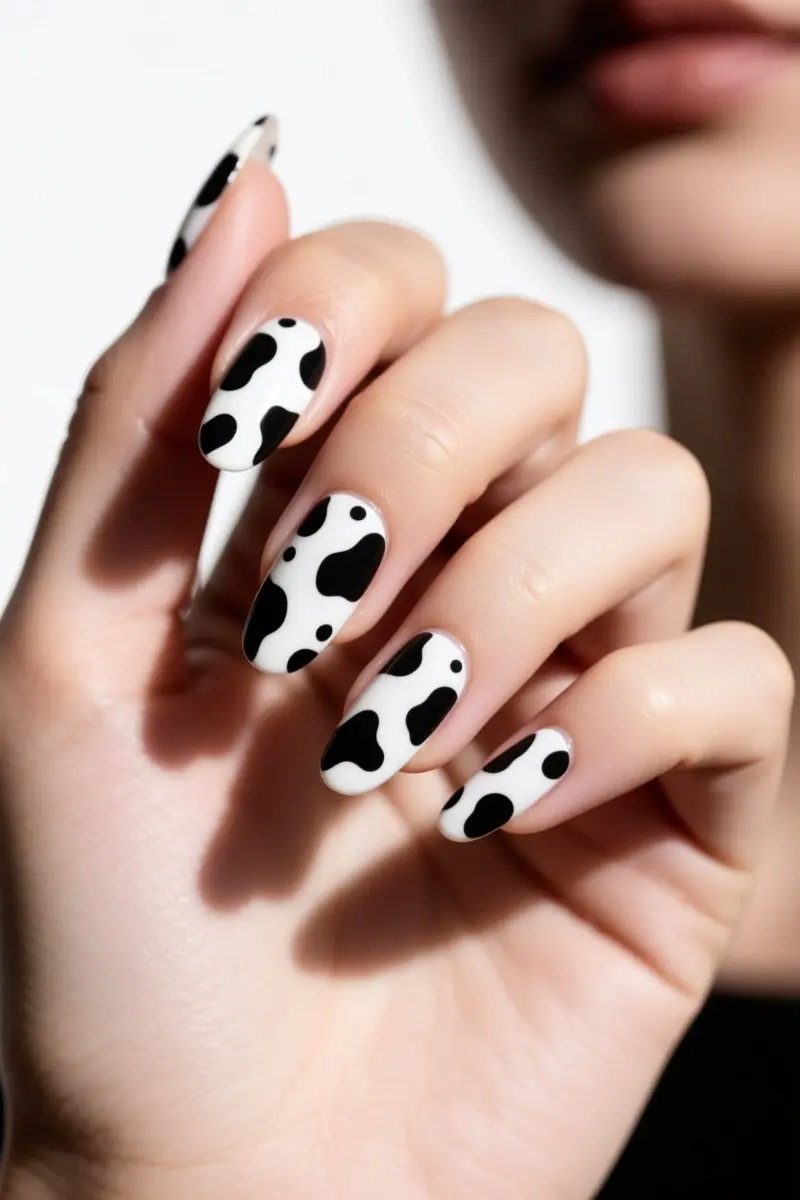
For a chic twist on cow print nails, try a minimalist approach with a monochromatic palette. This modern take features irregular, organic spots in a single color. To achieve this look, you can use freehand application or dotting tools. Freehand application allows for more flexibility, while dotting tools provide precision.
Irregular spots can be created by varying the pressure and movement of the brush or tool. This technique adds a natural, artistic feel to the design. To take it to the next level, play with spot size and placement. Smaller spots near the cuticle and larger ones towards the tip create a sense of depth.
This simple yet effective pattern can elevate an everyday look and works well on both short and long nails. The negative space around the spots adds a touch of sophistication, making it perfect for those who want a subtle wild touch. By varying spot size and placement, you can achieve a unique, eye-catching design that’s perfect for any occasion.
6. Playful Dalmatian Dots: Micro & Irregular Placement
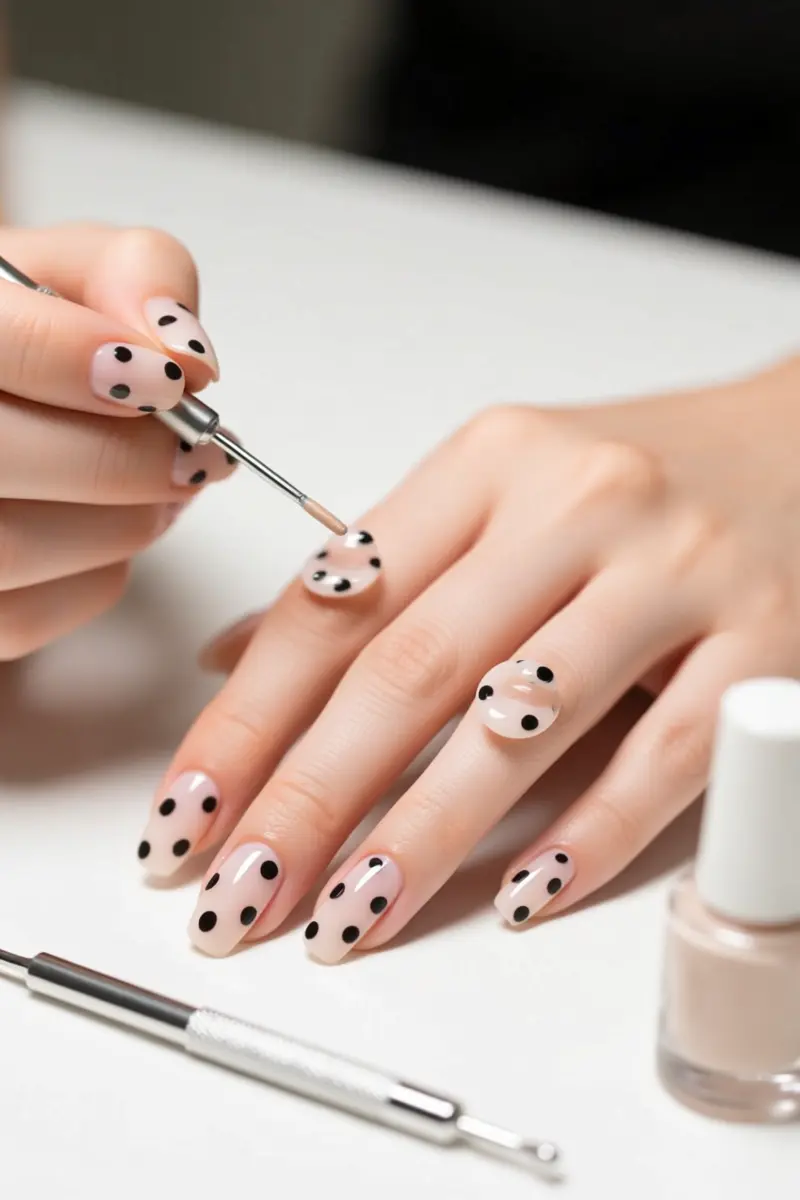
To create a fun Dalmatian dot design, use a dotting tool to make micro dots. Vary dot sizes with different tools or toothpick ends. For a more artistic feel, place dots irregularly, avoiding perfect patterns.
Layering dots adds depth, but be cautious not to clutter the design. Start with a base color, then add dots in a contrasting shade. White or light base colors give a clean look, while darker bases add edge.
This playful pattern suits casual outings or semi-formal events. It’s also great for beginners, as minor mistakes won’t ruin the overall look.
Different base colors change the mood: pastel for soft, bold for dramatic. With the right tools and a little practice, you can achieve a unique, eye-catching Dalmatian dot design.
7. Mixed Animal Prints: A Harmonious Blend
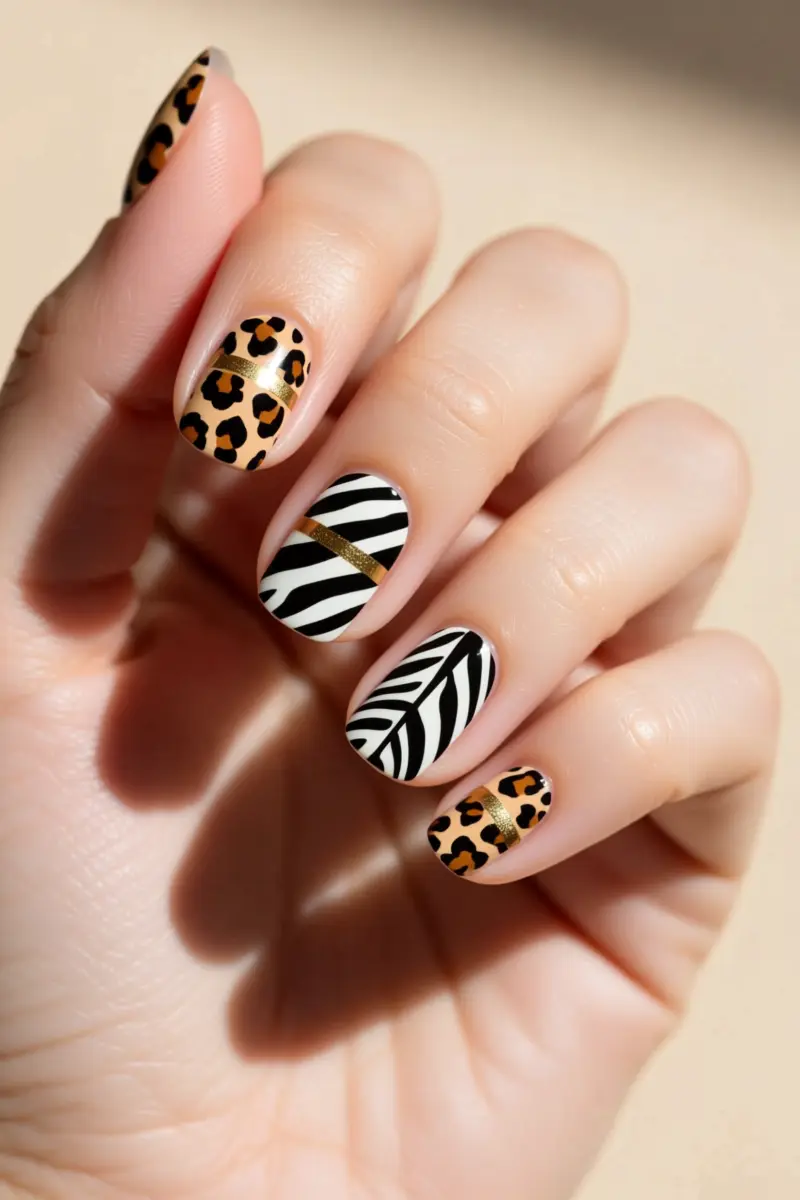
To create a cohesive look with mixed animal prints, choose two or three patterns that share a common color or texture. Leopard and zebra prints work well together, as they both feature black and white hues. For a bolder look, combine snake and tiger prints, which share a similar scale-like texture.
When transitioning between patterns, use a neutral color as a bridge to prevent clashing. A thin stripe of gold or beige can separate leopard and zebra prints, creating a seamless transition.
Balance boldness with elegance by limiting the number of colors used. Stick to two or three main colors and use different shades to add depth. Avoid using too many patterns on one nail, as this can create a busy look.
By mixing animal prints thoughtfully, you can create a unique and eye-catching nail design that showcases your personality. Pairing prints like cheetah and giraffe can add visual interest, while a simple background color can help tie the look together.
8. French Tip Animal Print: Subtle Wild Accents
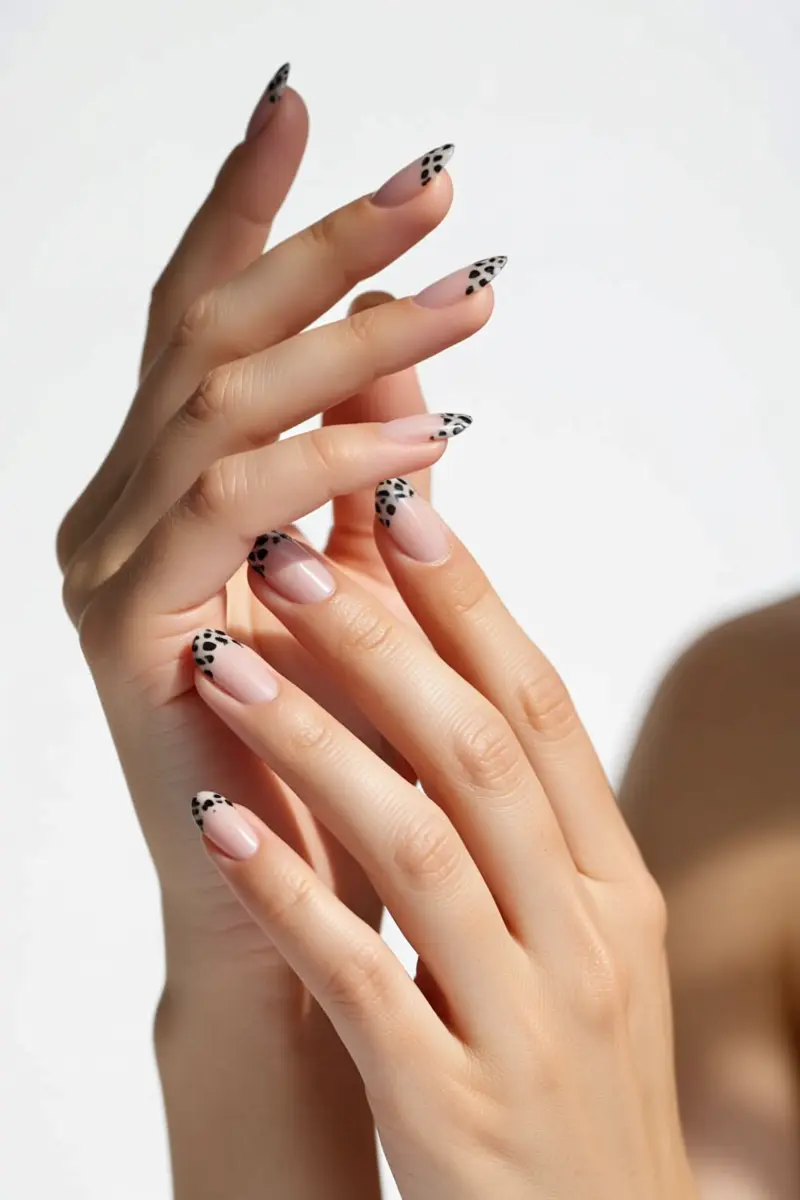
For a sophisticated twist on classic French tips, try adding an animal print overlay. This subtle detail can elevate your manicure from basic to bold. To achieve clean French tips, focus on brush control, using light strokes to create fine lines. A steady hand is key to avoiding smudges and uneven edges.
Animal print on the tips adds a touch of wild to an otherwise classic design. This look is surprisingly suitable for professional settings, as the subtle accent doesn’t overwhelm the overall aesthetic. To make the print pop, use a neutral base color, allowing the animal print to take center stage.
Durability is also important, so be sure to finish with a top coat to seal in the design. With proper application and finishing, French tip animal print nails can last up to a week without chipping. This chic and modern take on animal print nails is perfect for those who want to add some personality to their look without going over the top.
9. Gradient Animal Print: Fading into Color
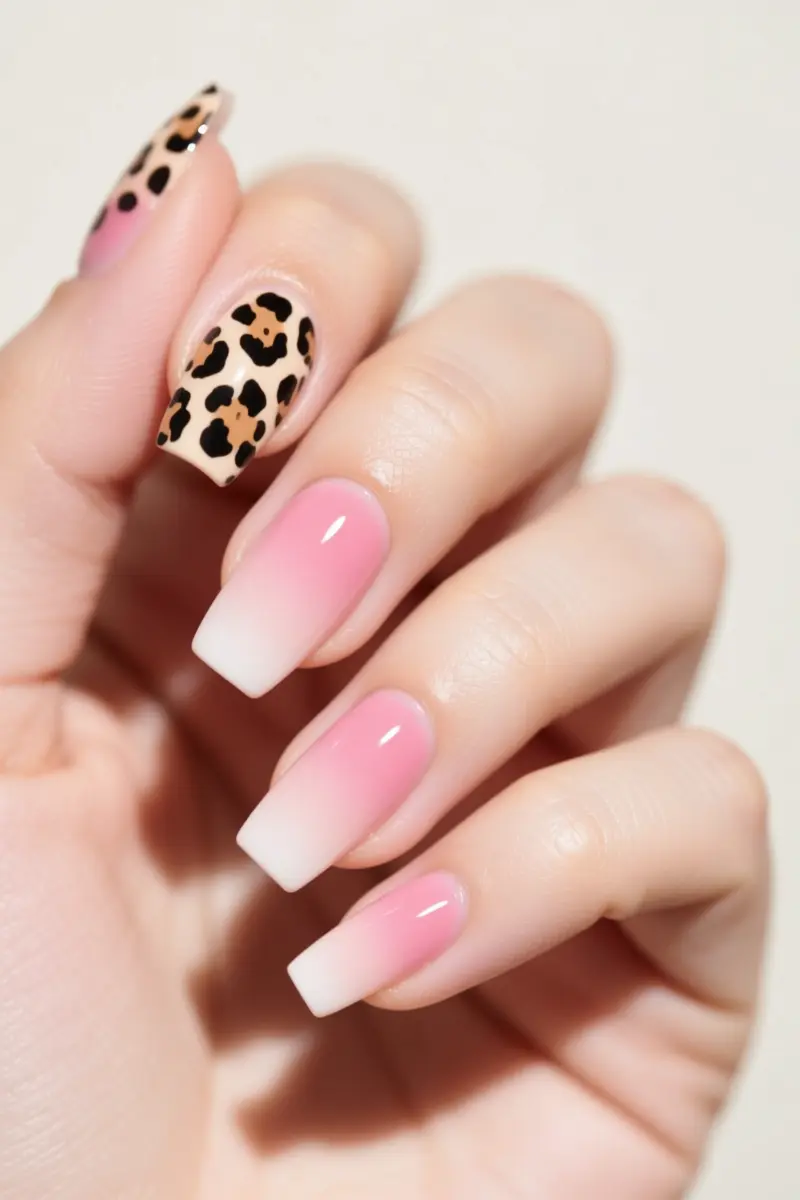
To create a gradient animal print design, start by applying a base coat. Use a sponge to blend colors, fading from a bold animal print to a solid color. This technique ensures a smooth transition between colors. Apply the animal print near the cuticle, allowing it to dissolve into the gradient.
For a seamless look, choose a gel polish for the gradient effect, as it provides more control over color blending. Lacquer can also work, but it may require more layers. The artistic appeal of this design lies in its soft transition, making nails appear longer.
By mastering the sponge application, you can achieve a beautiful, ombre-inspired animal print that adds a touch of wild sophistication to your nails.
Consider pairing a leopard print with a soft pink gradient for a chic, fashion-forward look. The key to this design is blending colors effortlessly, creating a unique and eye-catching effect.
10. Abstract Animal Textures: Artistic Interpretations
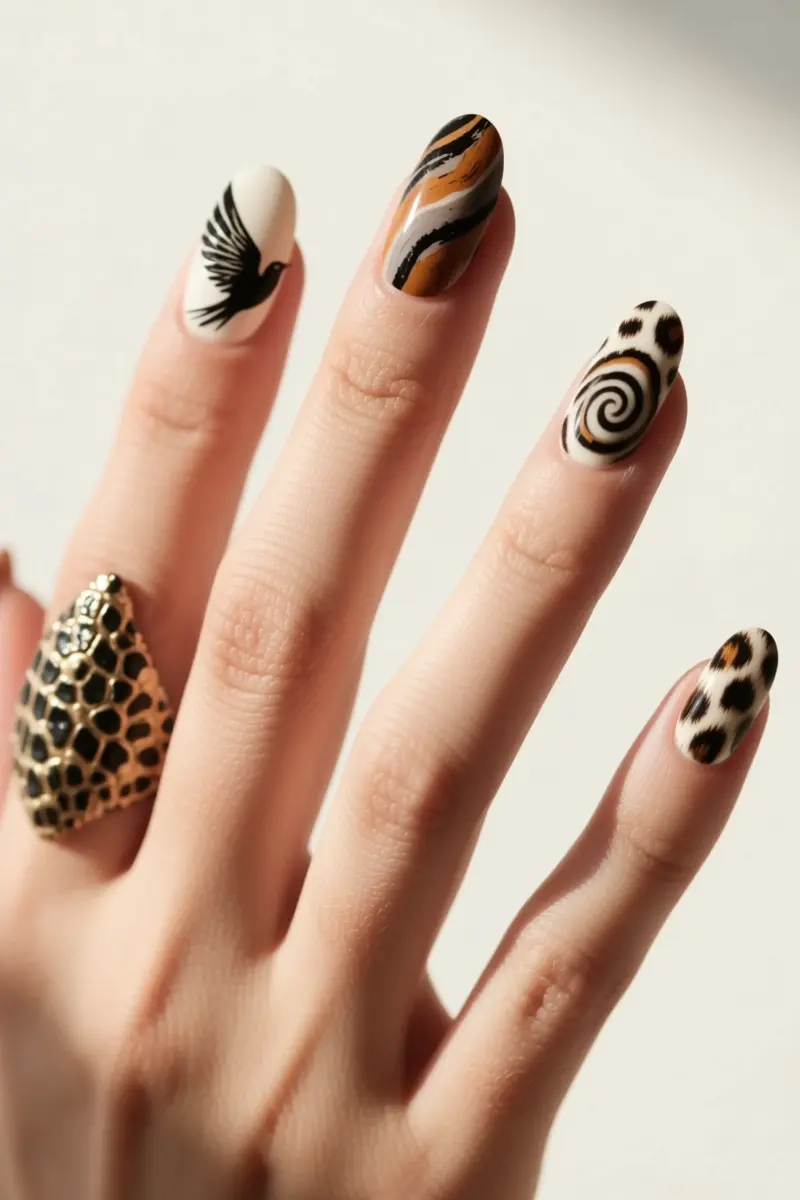
Abstract animal textures bring a new level of sophistication to nail art. Using a dry brush, you can create soft, feathery patterns that evoke the texture of bird wings. Plastic wrap can be used to generate organic, marbled effects reminiscent of reptilian skin.
Marbling tools allow for more intricate, swirling patterns that capture the essence of animal fur. By experimenting with different polish viscosities, you can achieve varied textural effects, from smooth and glossy to thick and matte.
This technique enables you to tailor your nail design to your personal style, whether it’s bold and edgy or understated and elegant.
Abstract animal textures can be paired with bold colors for a statement look or muted tones for a more subtle effect. They can add an edge to minimalist outfits or complement bohemian-inspired fashion.
The key to pulling off this look is to balance the texture with the overall aesthetic of your outfit. With practice and patience, you can master the art of abstract animal textures and unleash your wild side.
11. Glitter & Embellished Animal Prints
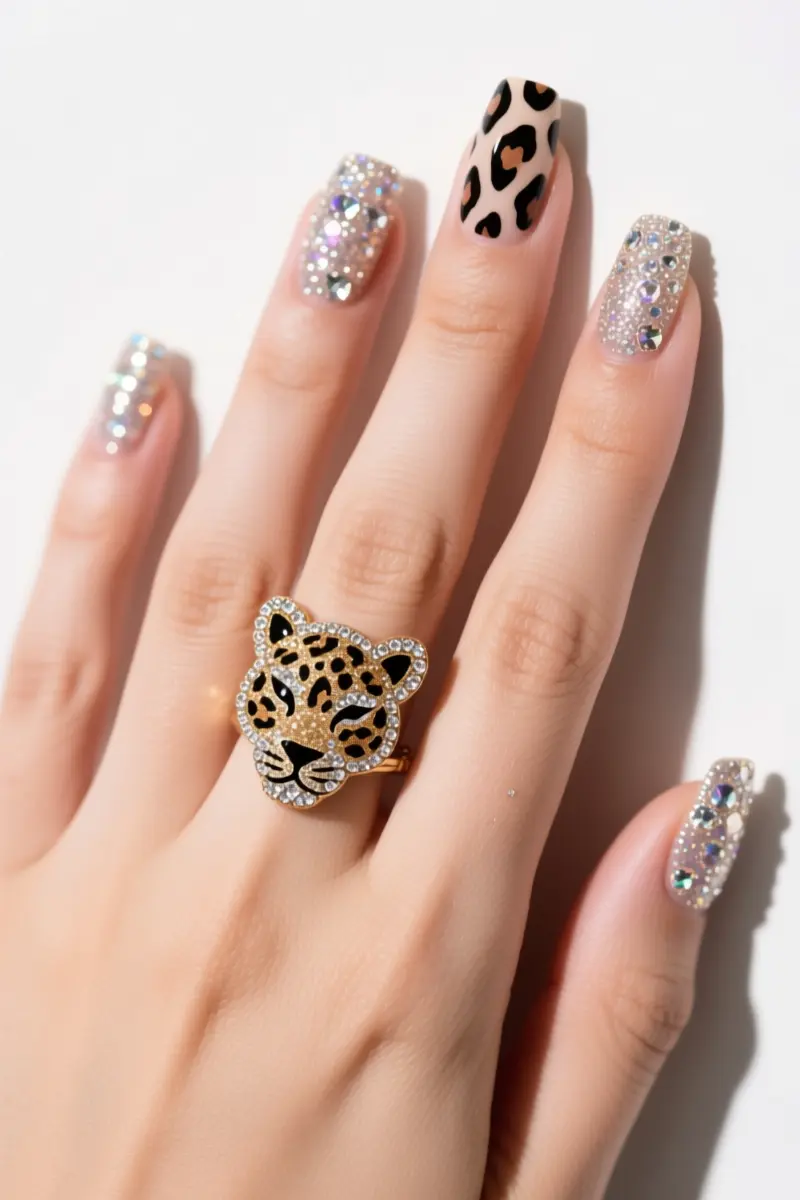
Glitter and rhinestones can elevate animal print nails to a whole new level. Fine glitters work well for subtle sparkle, while chunky glitters make a bolder statement. For durability, place rhinestones at the center of the nail, avoiding the tips and edges where they can easily chip off.
Seal embellishments with a thick topcoat to prevent them from coming loose. This adds a glossy finish and helps the design last longer. Sparkle can transform a simple animal print design into a show-stopping look perfect for special occasions. However, applying glitter and rhinestones requires care to prevent premature chipping or loss.
Remove embellished nails gently to avoid damaging the nail or surrounding skin. With the right technique, glitter and rhinestones can add a luxurious touch to your animal print nails. Pairing animal prints with the right amount of sparkle can create a truly eye-catching design.
To achieve this look, balance bold animal prints with understated glitter accents or vice versa. This contrast creates a visually appealing design that’s perfect for making a fashion statement.
12. Accent Nail Animal Print: A Pop of Wild
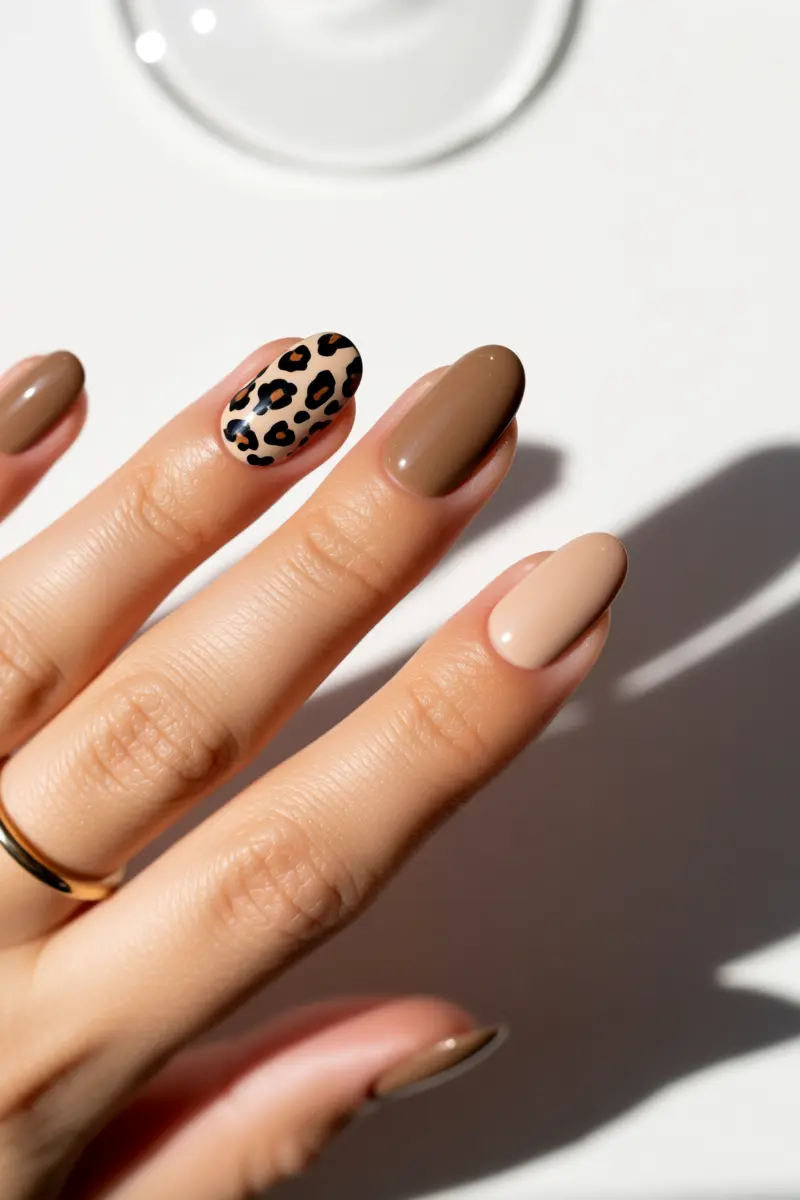
For a bold yet balanced look, try using animal print on just one nail. This accent nail design complements solid colors on the other nails.
Choose a print that contrasts with the solid color to make it stand out. A leopard or zebra print works well with neutral colors like beige or white.
This approach is perfect for those new to animal print nails. It allows you to experiment with wild patterns without committing to a full set. The accent nail can also draw attention to specific jewelry or accessories, like a bold cocktail ring.
To ensure the accent nail harmonizes with the rest of the manicure, balance it with a simple solid color on the other nails. This creates a fashionable and modern look that’s easy to pull off.
Time To Get Wild
With these modern animal print nail ideas, you’ll be sure to turn heads. Remember to choose a pattern that complements your personal style, and don’t be afraid to experiment with different colors and finishes. Save this post for your next nail inspiration, and share it with a friend who’s ready to unleash their wild side.
Frequently Asked Questions
How long do modern animal print nail designs typically last?
The longevity of animal print nail designs depends on the polish type and application quality. Gel polish designs can last 2-3 weeks, while regular lacquer may last 5-7 days. Proper nail preparation and a good quality topcoat are crucial for extended wear.
What nail shapes best complement animal print patterns?
Animal print patterns are versatile and can suit various nail shapes. Almond and coffin shapes can enhance intricate designs, while square and oval nails offer a classic canvas. Shorter, rounded nails are ideal for minimalist or micro-print designs.
Can I achieve professional-looking animal print nails at home?
Yes, simpler animal print designs like Dalmatian spots or basic zebra stripes can be achieved at home with practice and basic nail art tools. However, intricate patterns, fine lines, or textured designs often benefit from the precision and specialized tools of a professional nail technician.
What colors pair well with animal print nails for a modern look?
For a modern look, animal print nails pair excellently with neutral tones like black, white, nude, or gray. For a bolder statement, vibrant colors such as neon green, cobalt blue, or hot pink can be used as accents or base colors to make the print pop.
Are there specific nail art tools recommended for intricate animal print designs?
Yes, for intricate animal print designs, fine-tipped nail art brushes (liner brushes), dotting tools of various sizes, and stamping plates with animal patterns are highly recommended. A good quality matte or glossy topcoat is essential for finishing.