
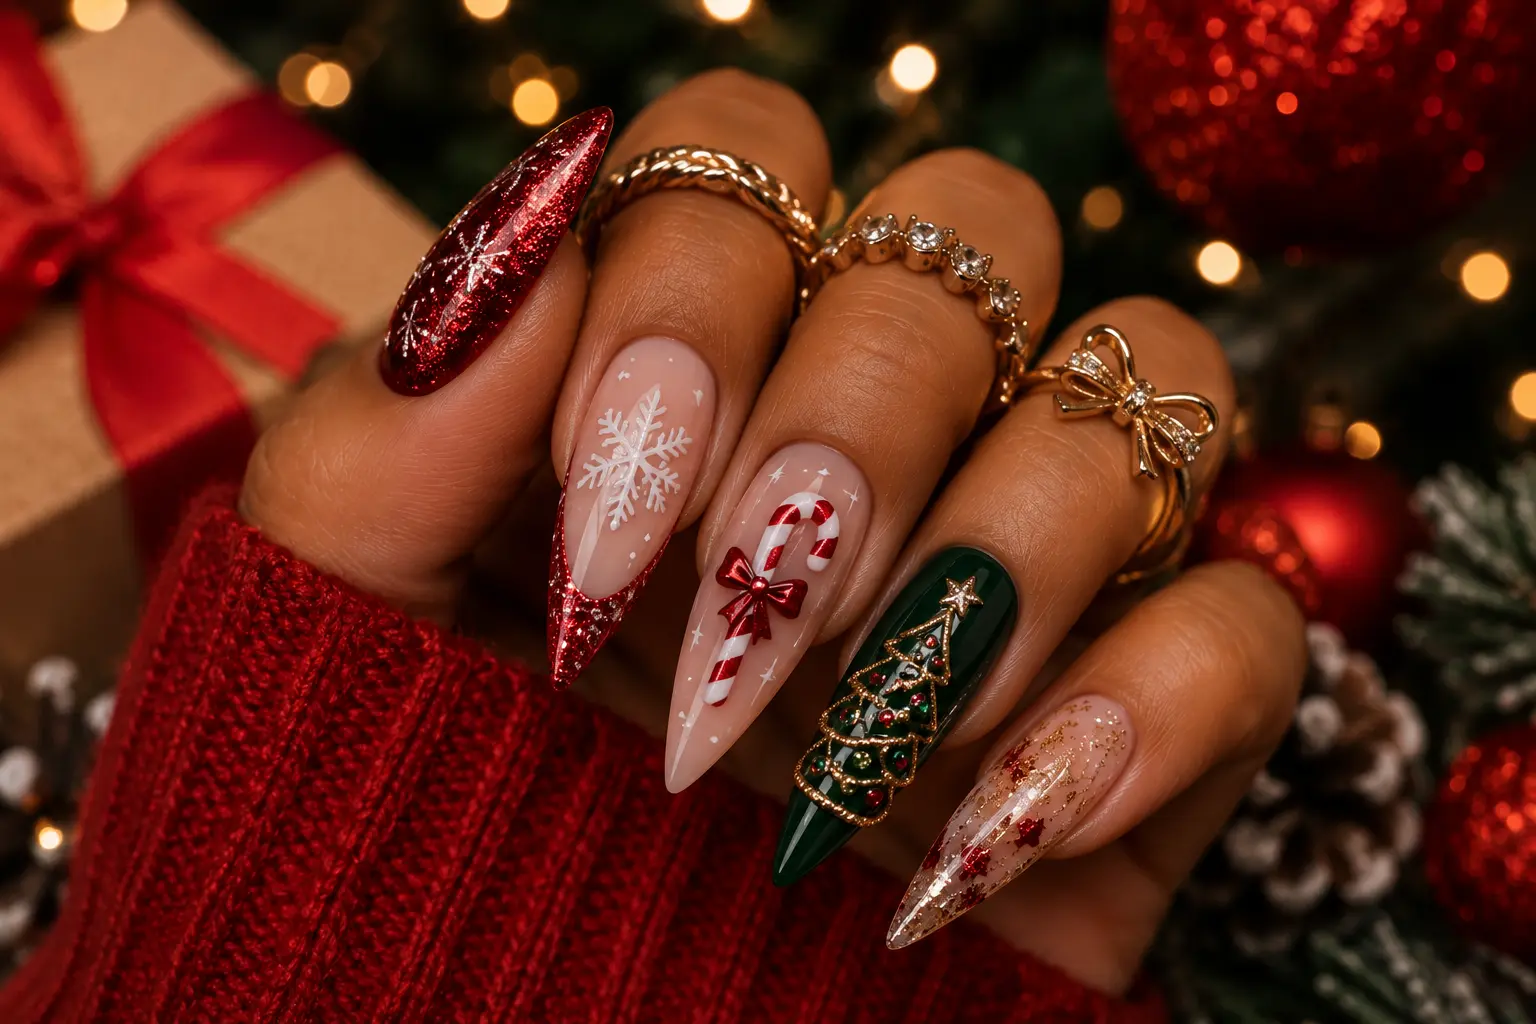
Slay the Season: 12 Baddie Christmas Nail Statement Sets That Steal Every Party!
Get ready to slay the holiday season with the most daring and chic Christmas nail statement sets. From bold colors to glamorous finishes, these 12 baddie Christmas nail sets are sure to turn heads at every party. Whether you’re a fan of classic red and green or prefer something more modern and edgy, there’s a look on this list for you.
1. Glitter Bomb Glam: The Ultimate Sparkle Statement
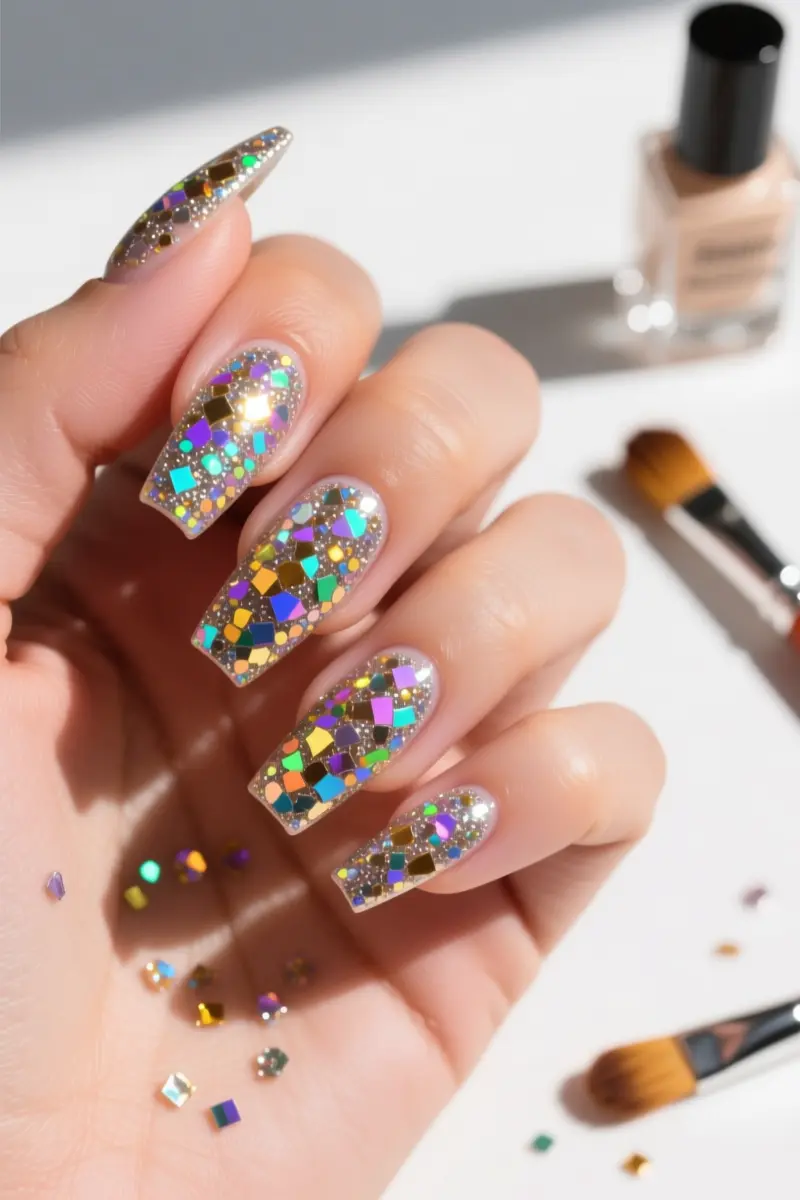
Glitter Bomb Glam nails are the ultimate party statement. To achieve this look, layer chunky glitters over fine ones for maximum impact. Iridescent glitters add a touch of luxury, while metallic ones bring a bold shine. When done right, these nails feel luxurious and attention-grabbing to wear.
A good topcoat is key to locking in glitter without dulling its shine. Look for a no-wipe topcoat to prevent glitter from getting stuck to the brush. To apply loose glitter, use a small brush to place it precisely, then seal with topcoat.
Uneven glitter application is a common mistake – to avoid it, start with a thin layer and build up gradually. Coffin or stiletto nail shapes complement this design perfectly, as they provide a large surface area for glitter to shine.
2. Velvet Vixen: Plush & Luxurious Textures
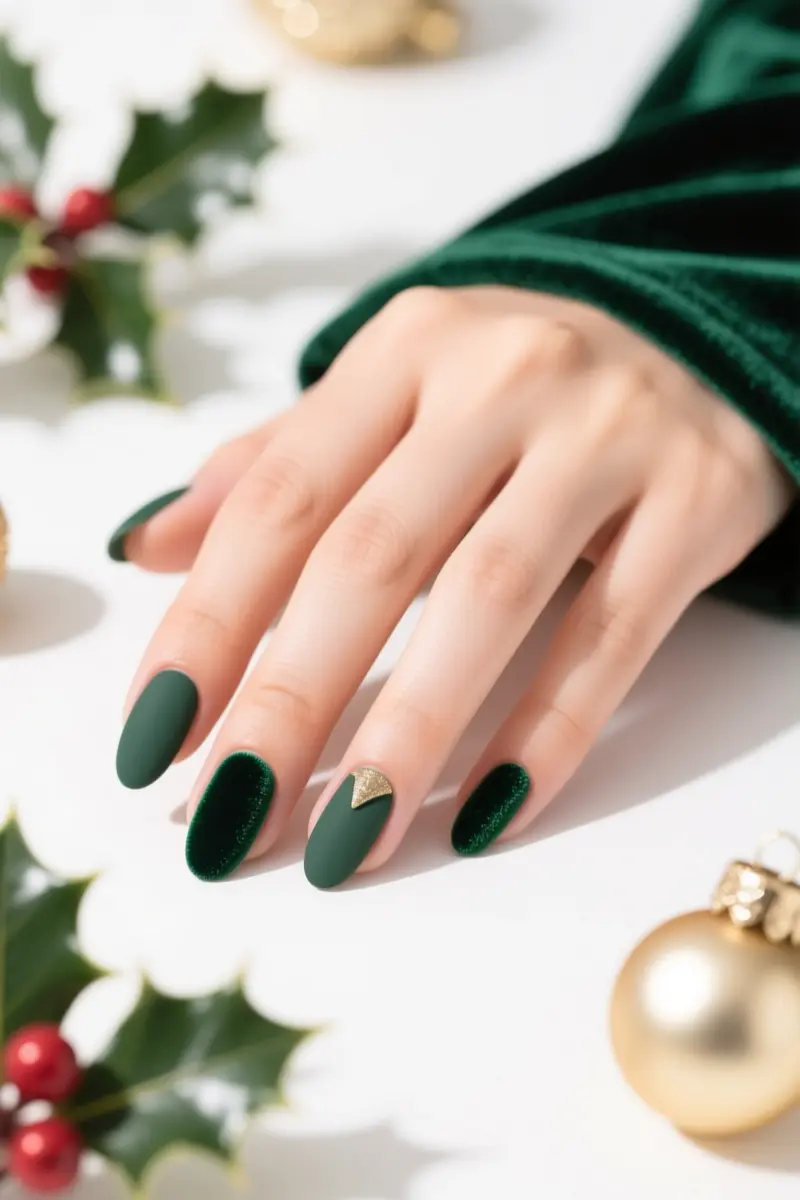
Velvet nails bring a luxurious touch to your Christmas look. Magnetic gel polish creates this unique texture. To achieve the best results, place the magnet close to the nail, but not touching it.
Deep greens and icy blues are great alternatives to traditional reds. Black with a subtle velvet shimmer is also a stunning option. The tactile sensation of velvet nails is undeniable – they add an elevated feel to any outfit.
For added texture contrast, try using a matte topcoat on accent nails. This pro tip can make your nails stand out even more. With velvet nails, you’ll be the center of attention at any party.
3. Edgy Holly & Ivy: Dark Academia Meets Festive Chic
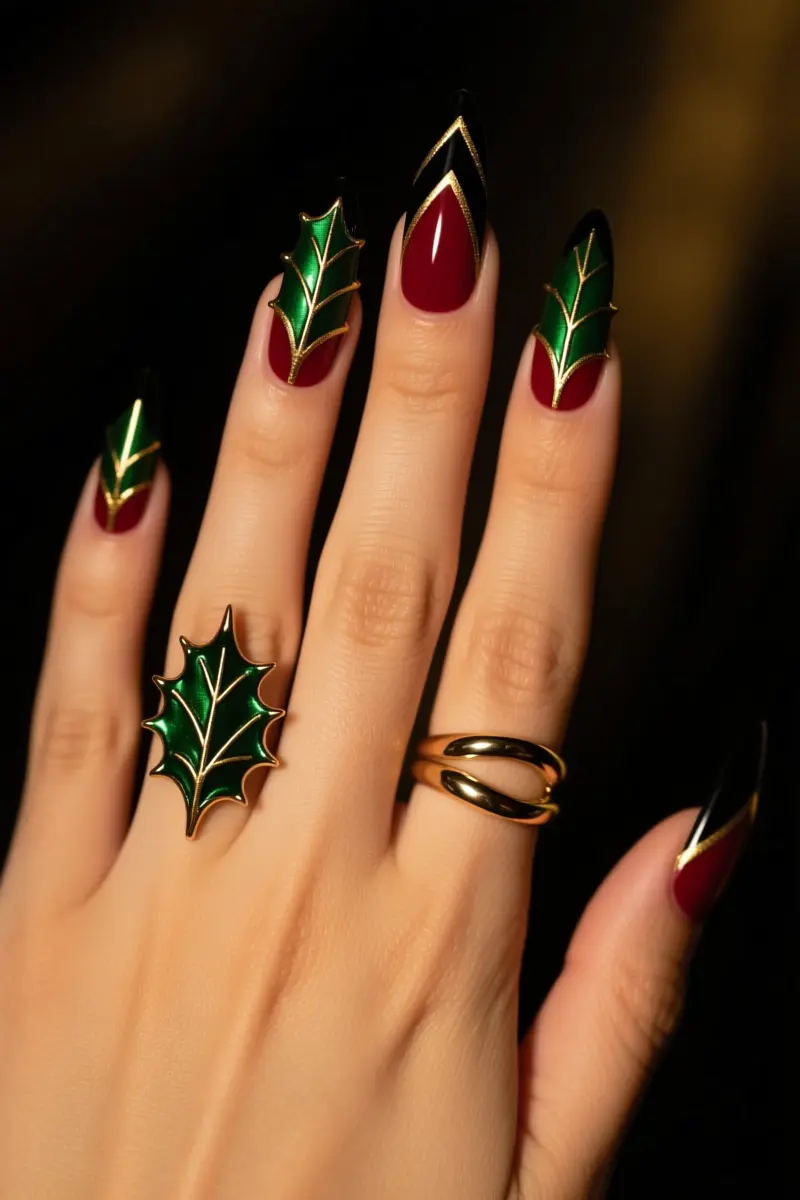
Deep forest greens and oxblood reds create a dramatic base for this edgy holly and ivy design. Stark black polish is also a great option, paired with subtle, intricate patterns. Fine liner brushes are essential for detailed work, allowing for precise lines and delicate touches.
For precise lines, use a polish with a high viscosity and a small brush. This will help you achieve sharp, clean lines. Metallic gold or silver chrome accents add a touch of luxury to this darker take on festive nails.
This design feels bold and mysterious, perfect for those who want a ‘darker glam’ holiday look. To balance dark colors, try strategic pops of festive shine, like a chrome accent on the ring finger. This adds visual interest and prevents the look from feeling too heavy.
4. Crystal Queen Frost: Icy Bling That Dazzles
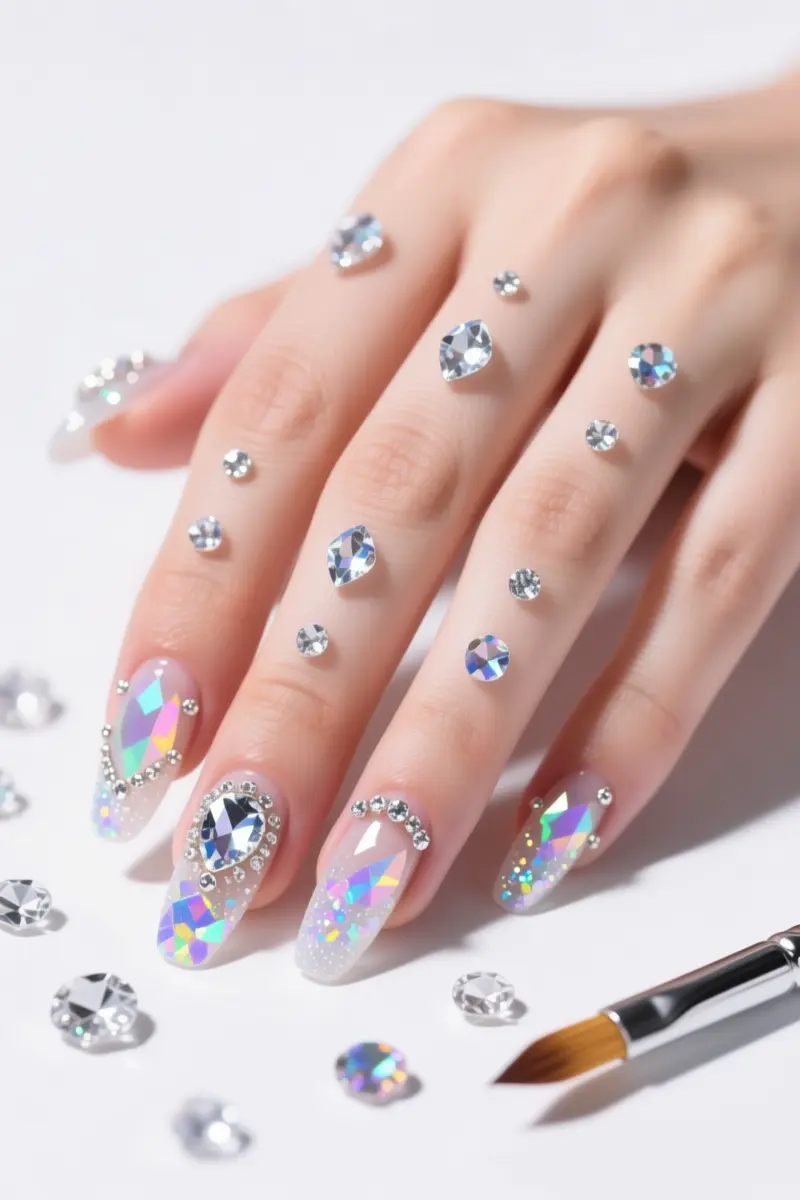
Crystal Queen Frost nails are all about extreme embellishment. Icy bling is achieved with crystals, rhinestones, and iridescent flakes in various sizes and shapes.
For maximum sparkle, arrange gems in a scattered pattern or create a gradient effect. Use gel glue or builder gel for proper adhesion, ensuring gems stay in place. A nail art brush and gem picker are essential tools for precise application.
Secure gems well to avoid snags or damage – it’s crucial for longevity. When done right, these nails physically sparkle under party lights, leaving a lasting impression.
The ‘wow’ factor is undeniable. For short nails, opt for smaller gems, while long nails can handle larger, more dramatic embellishments. With proper technique, Crystal Queen Frost nails will dazzle at any party.
5. Matte & Metallic Mix: Contrasting Finishes
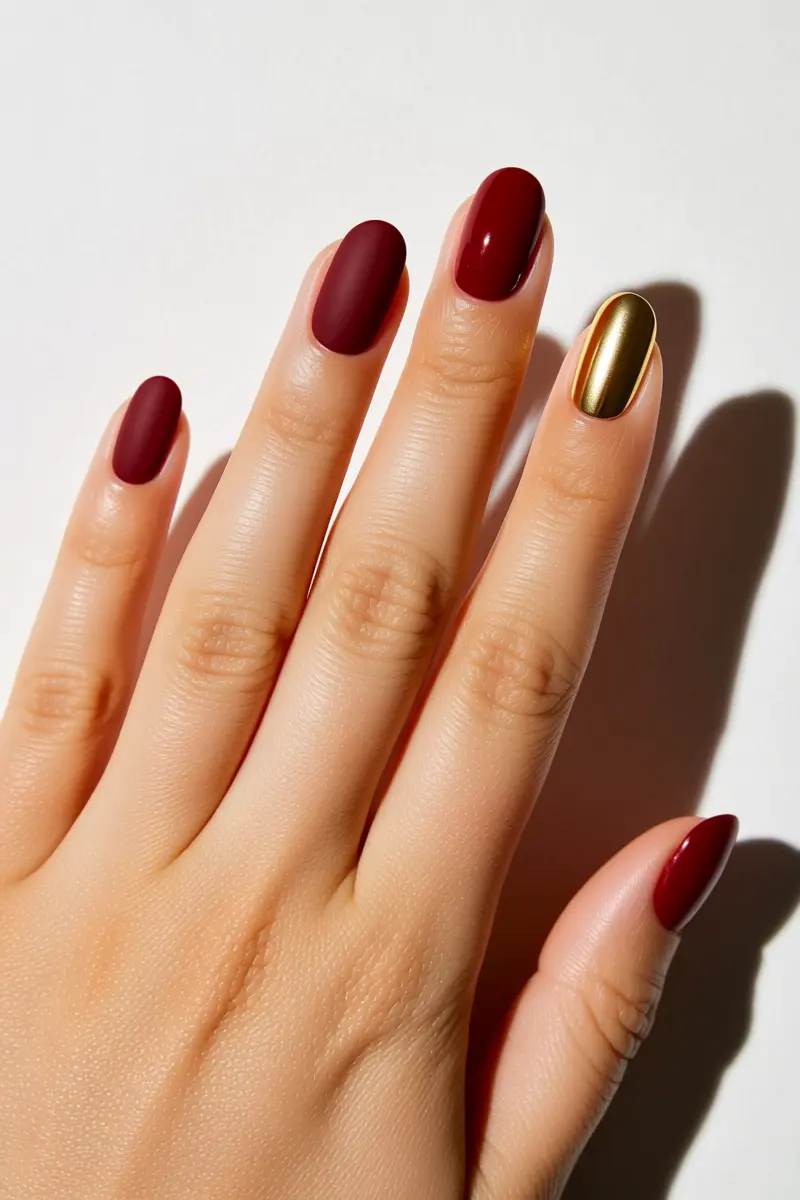
Matte and metallic finishes create a striking contrast for a modern baddie look. Combine matte deep reds or blacks with metallic gold accents for a chic vibe.
Metallic silver stripes can add an edgy touch to matte green nails. To achieve a flawless matte finish, use a high-quality matte topcoat and apply it in thin layers.
For a sophisticated look, pair matte nails with full chrome nails. Metallic elements can be protected with a clear topcoat to prevent chipping.
Avoid applying matte topcoat over metallic elements, as it can dull the shine. Instead, apply the matte topcoat selectively to the desired areas.
6. Festive French Tips with a Twist: Modernized Classics
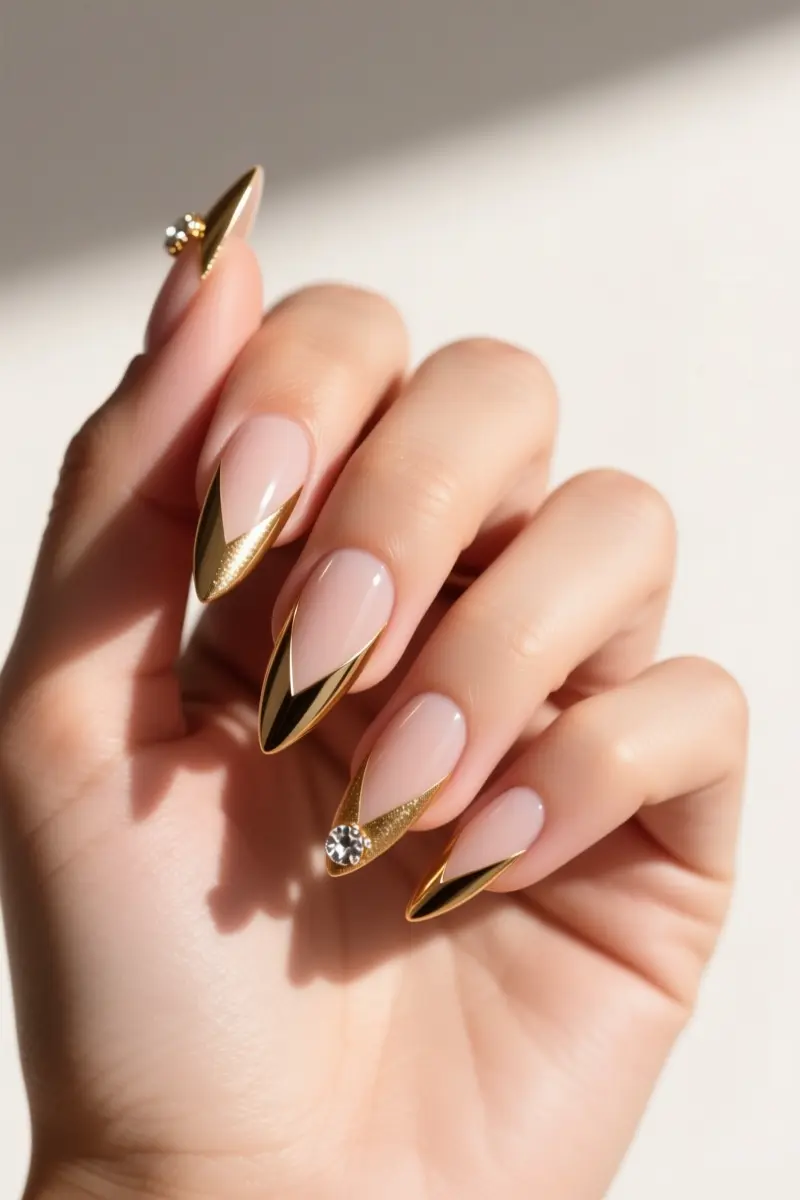
Festive French tips get a baddie makeover with chrome gold, glitter red, or emerald green accents. These modernized classics surprisingly exude elegance and modernity.
Deep V-cut tips or asymmetrical lines add an edgy touch. For crisp lines, use striping tape or specialized brushes. A reverse French tip with a pop of color at the cuticle is also a chic option. Adding a tiny jewel at the base of the tip elevates the look.
To take it up a notch, pair bold colors with shimmering finishes. With these updated tips, you’ll slay the party scene.
Achieving the perfect French tip requires patience and the right tools. Experiment with different colors and designs to find your unique baddie style.
7. Grinch Green Envy: Playful Yet Fierce
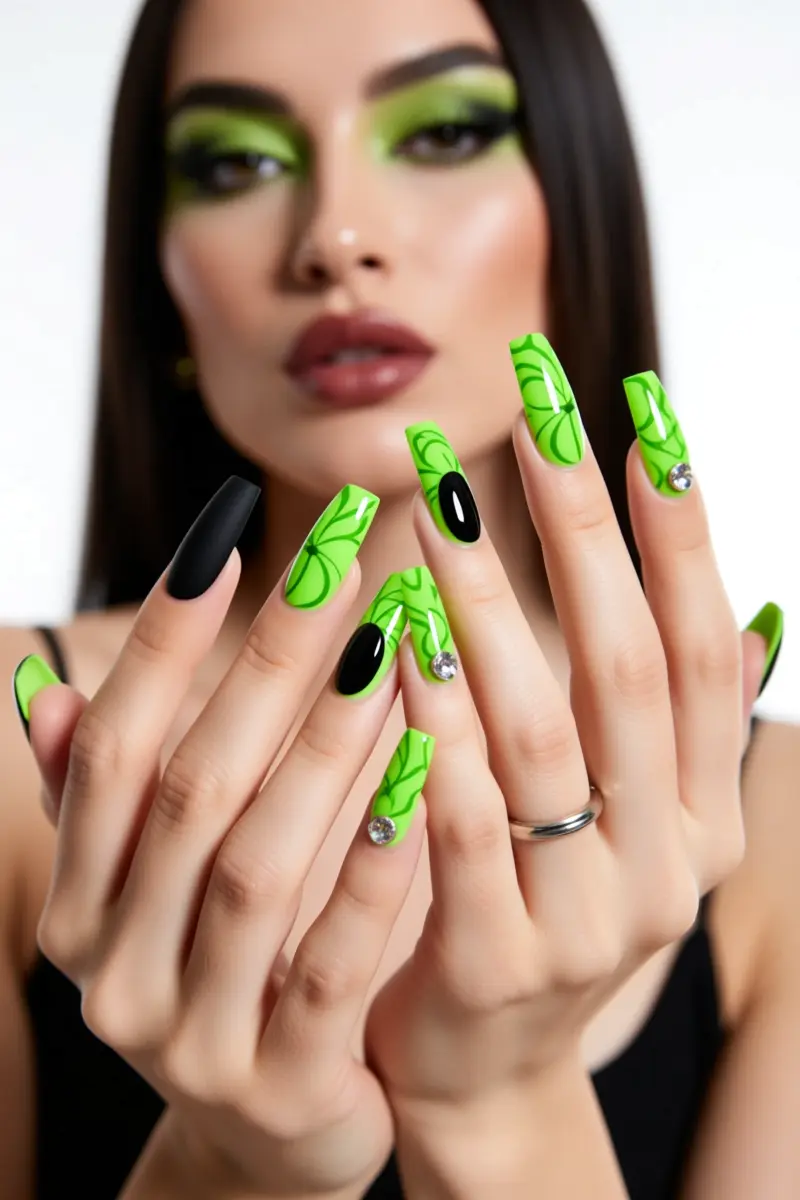
To achieve vibrant neon green nails, start with a white base coat. This helps the color pop. Neon green mixed with black or glitter adds a high-fashion edge.
For a Grinch-inspired look, opt for subtle patterns rather than cartoonish designs.
Black rhinestones can balance the playful green. A matte black accent nail also adds an edgy touch. This combination brings a fun, cheeky energy to any party.
The result is undeniably fierce. Pair neon green with dark accents for a baddie Christmas nail look that steals the show.
8. Snowflake Bling: Intricate & Icy Embellishments
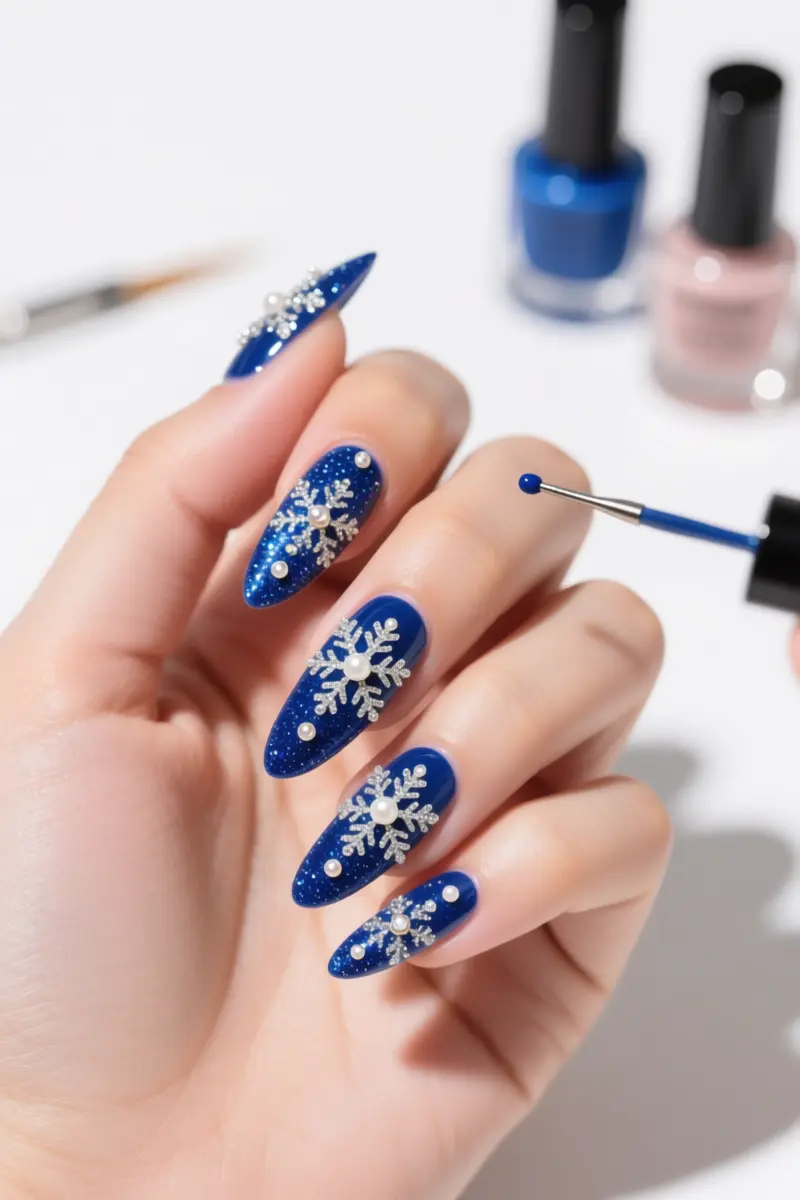
Intricate snowflake designs require precision application. Fine glitter, tiny pearls, and micro-rhinestones create a multi-layered look.
A deep blue or silver base sets the stage for these icy embellishments. To secure tiny details, use a small dotting tool and a light touch. This technique prevents smudging and ensures a crisp finish.
Wearing these miniature works of art is like having fresh snow on your fingertips. The sparkle is mesmerizing. Nail length influences the complexity of snowflake designs. Shorter nails can pull off simpler patterns, while longer nails can showcase more intricate details.
For a show-stopping look, pair intricate snowflakes with a black base and delicate micro-rhinestones. The result is a nail set that shines like frosty winter mornings.
With the right technique, these snowflake designs will make you feel like you’re wearing a winter wonderland on your nails.
9. Naughty or Nice Red: Classic Red with an Edge
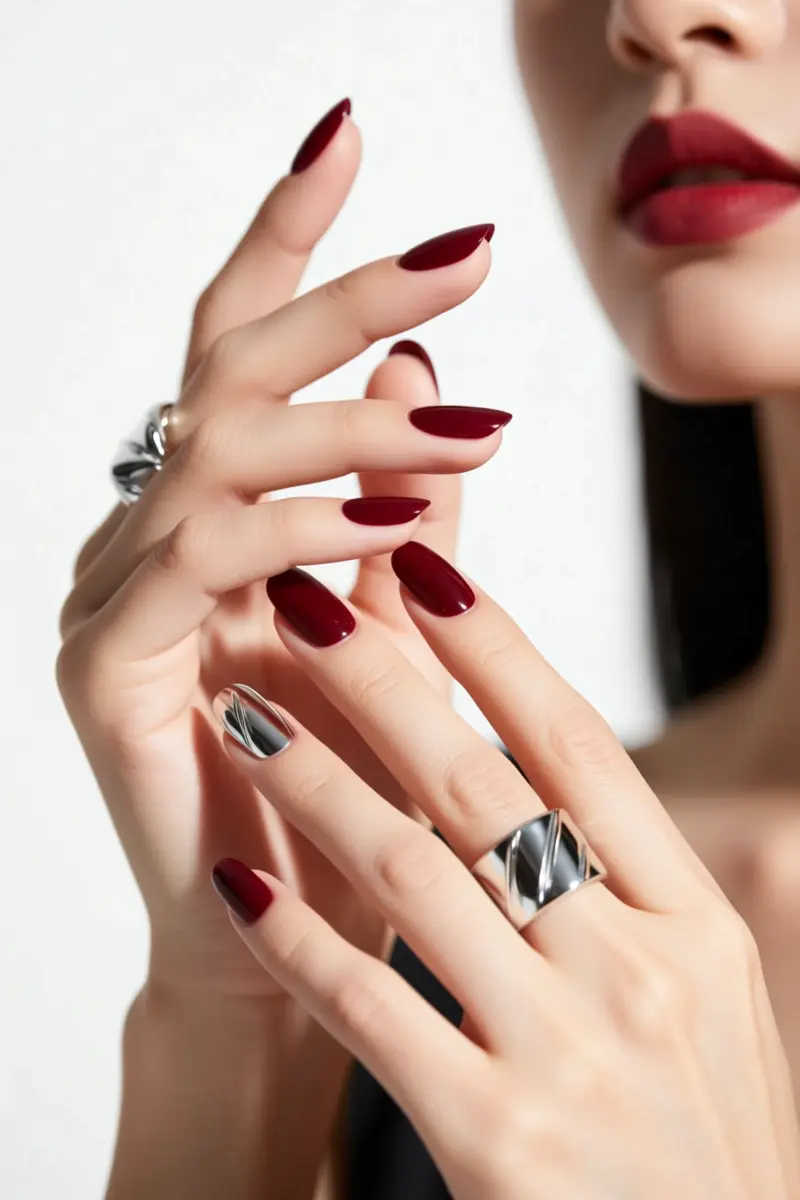
Deep oxblood red nails exude sophistication. Add chrome accents for a baddie twist. This combination feels timeless yet modern. Vibrant red is also stunning with holographic glitters. It adds a touch of fierce luxury.
Bright candy apple red is perfect for a bold look. Pair it with black negative space designs for edge. Glossy red paired with matte black accents creates striking contrast. Precise line work is key to this design.
Red and black is a classic combination. It works beautifully with abstract patterns too. To make this design pop, focus on clean lines and sharp edges.
A deep red base with metallic accents looks stunning. It’s perfect for the holiday season. This nail design is undeniably modern and fierce. It’s ideal for those who want to slay the party. For a unique touch, try combining different shades of red. It adds depth to the overall design.
10. Santa’s Sassy Swirls: Abstract Festive Patterns
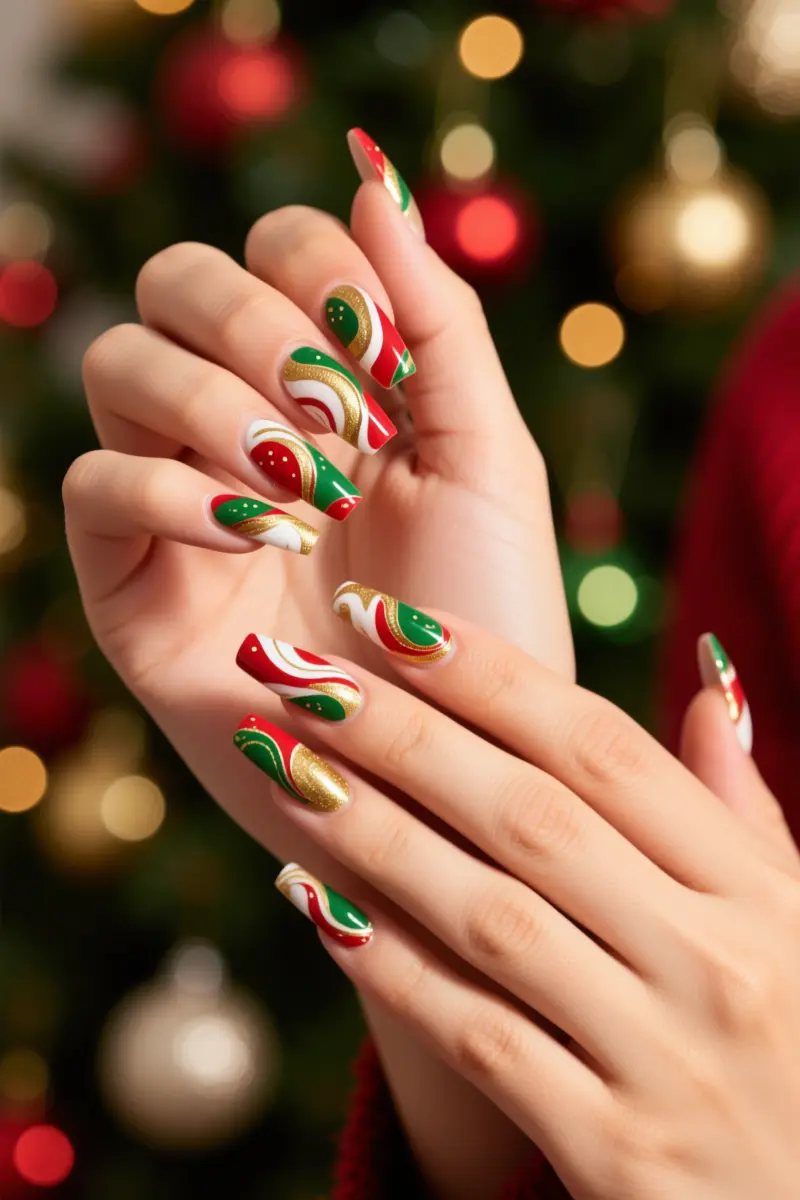
Santa’s Sassy Swirls bring a dynamic vibe to your Christmas nails. Abstract festive patterns in red, green, gold, and white create a unique look. To achieve this, try marbling or freehand swirls with a dotting tool or fine brush.
Marbling gives a soft, blended effect, while freehand swirls offer more control. Combine multiple colors by layering thin coats, letting each dry before adding the next. This prevents muddying and keeps the colors vibrant.
A common mistake is overworking the swirls, which can lead to a messy finish. To avoid this, work quickly and gently, using clean lines to define the design. The result is an artistic, effortlessly cool nail look that’s perfect for the holiday season.
For a more intricate design, use a fine brush to add delicate swirls and patterns. This technique requires practice, but the outcome is well worth the effort. With Santa’s Sassy Swirls, you’ll make a statement at any Christmas party.
11. Reindeer & Rhinestone Extravaganza: Animal Print Meets Bling
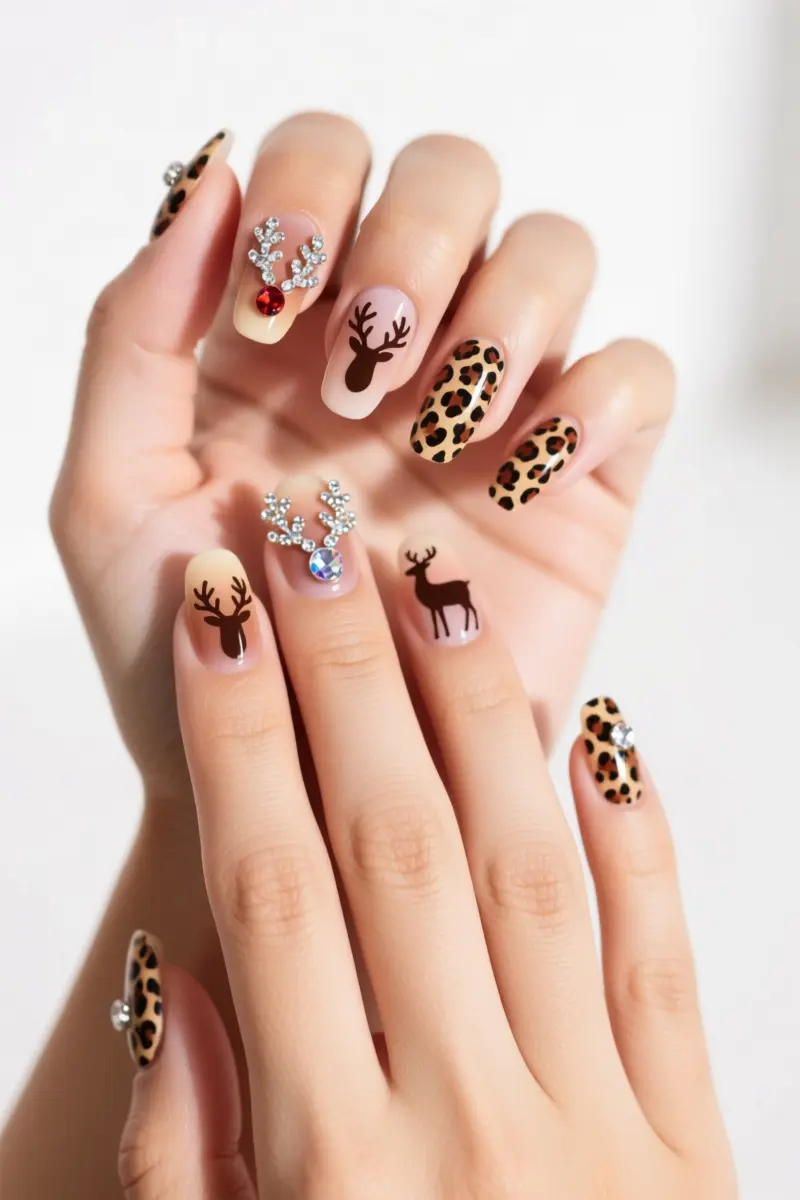
Reindeer antlers and rhinestones create a bold holiday look. This combo works best with a ‘more is more’ approach.
Balance complex patterns with heavy bling by focusing on one or two statement nails. Use leopard or zebra print on accent nails for a pop of personality.
Keep the rest of the nails simple with reindeer silhouettes and rhinestones. This look is perfect for those who want to make a statement. It’s bold, confident, and playful.
To avoid overwhelming the nail, use a limited color palette and let the rhinestones be the focal point. For a pro tip, apply rhinestones in a gradient effect to add depth and visual interest.
12. Candy Cane Kitsch, But Make It Baddie: Exaggerated Stripes
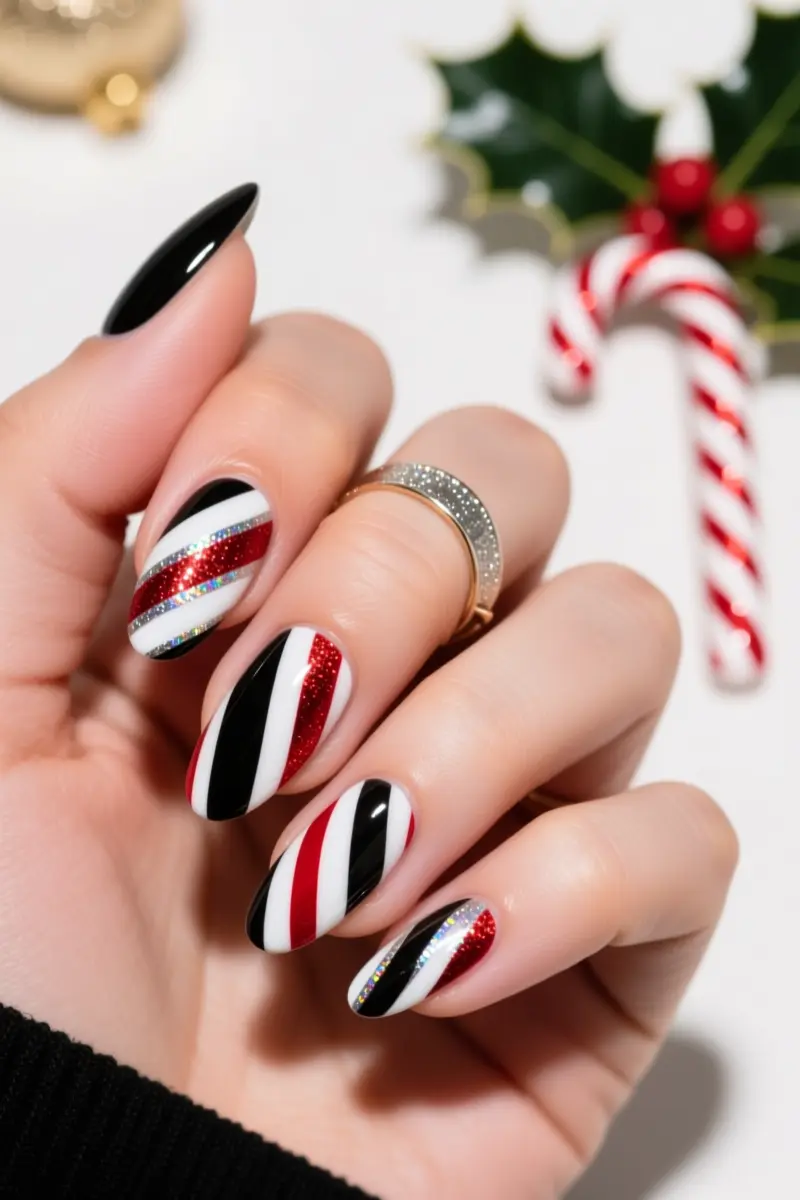
Exaggerated stripes give candy cane nails a baddie twist. Wide and narrow stripes mix for a playful look. Add chrome or glitter stripes for extra edge. Black and white with a pop of red is a chic combo. Holographic white and red is another bold option.
For clean lines, use striping tape or a fine brush. Apply tape carefully to avoid bubbles. Paint between the tape for sharp stripes. Fine brushes work well for small nails or intricate designs. Practice makes perfect for smooth, even lines.
Almond or stiletto nails showcase stripes beautifully. The curved shape enhances the stripe pattern. Square or round nails can also work with thinner stripes.
Experiment with different shapes to find your favorite look. These nails are fun, cheeky, and stylish – perfect for a baddie Christmas party.
Time to Shine
With these stunning baddie Christmas nail statement sets, you’ll be the life of the party. Remember to pair your nails with a bold outfit and confident attitude for a truly show-stopping look. Save this list for your next nail inspiration and share with a friend who needs a holiday glam boost.
Frequently Asked Questions
Where can I find a salon specializing in statement Christmas nail designs near me?
To find a salon, search online for ‘nail art salons near me’ or ‘gel nail specialists [your city]’. Check their social media portfolios for examples of intricate designs, glitter work, and crystal application to ensure they match the ‘baddie’ aesthetic you’re seeking. Reading reviews can also help identify salons known for detailed and long-lasting nail art.
How do I make my elaborate baddie Christmas nails last through all the holiday parties?
To maximize longevity, always start with properly prepped nails and use high-quality gel or acrylic products. Ensure your technician uses a durable topcoat, and consider a second layer for heavily embellished designs. At home, wear gloves for chores, avoid using nails as tools, and moisturize cuticles daily to maintain nail health and flexibility, preventing chips or lifting.
What should I do if a gem or embellishment falls off my statement nail before an event?
For a quick fix, if you have a strong nail glue (like a brush-on resin glue) and the fallen gem, you can carefully reattach it. Apply a tiny dot of glue to the nail, place the gem with tweezers, and hold firmly. If you don’t have glue or the gem is lost, consider a clear polish or a touch of glitter on the bare spot to camouflage it, or visit your salon for a professional repair.
Are ‘baddie’ Christmas nails suitable for all nail lengths and shapes?
Absolutely! While many statement designs are showcased on longer coffin, stiletto, or almond nails, most ‘baddie’ concepts can be adapted. Shorter nails can rock bold glitter, intricate single-nail accents, or stylized French tips. The key is selecting a design that complements your nail length and shape, focusing on proportional embellishments and patterns.
What’s the best way to remove heavily embellished or glittery baddie Christmas nails without damage?
For heavily embellished or glittery gel/acrylic nails, professional removal at a salon is highly recommended. Attempting to pick, pry, or forcibly remove them at home can cause significant damage to your natural nail plate. A professional can safely soak off or file down the product, preserving your nail health.