
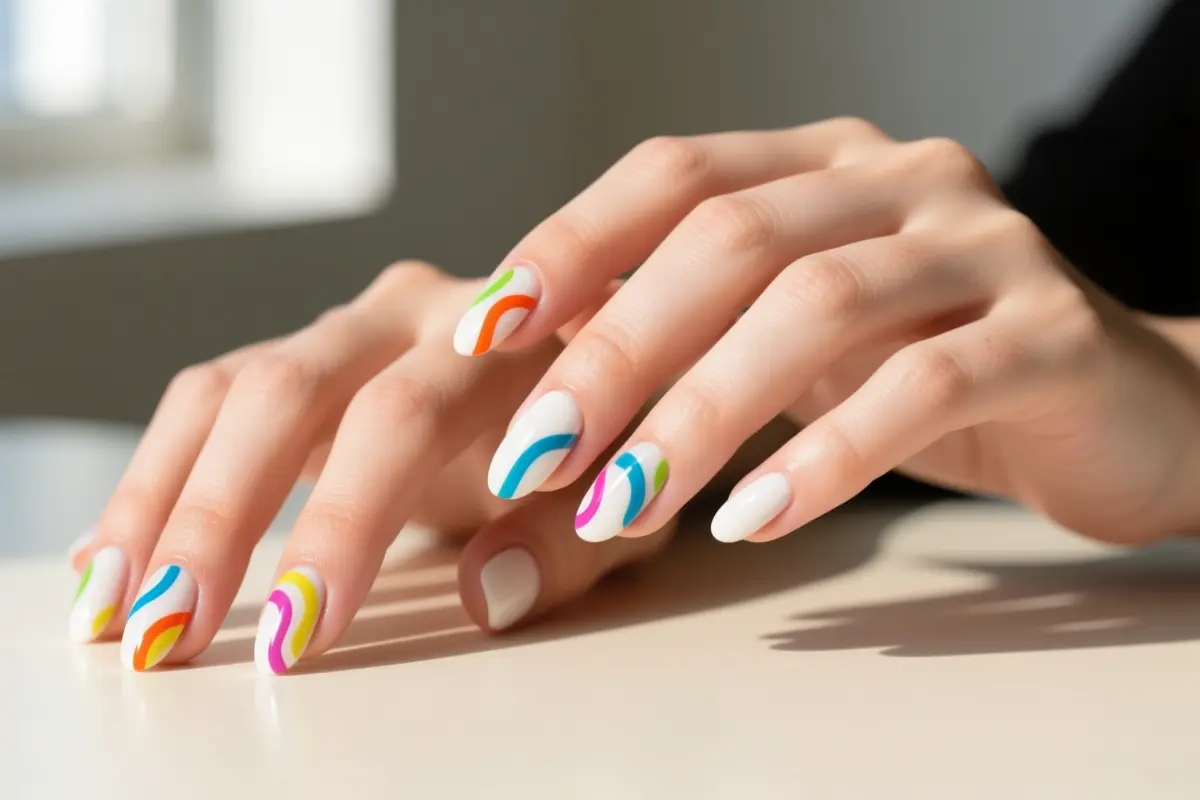
10 Funky Nail Art Ideas That Are Playful, Bright, and Actually Wearable
Those Instagram‑ready nail spreads that melt after a coffee break? They look perfect under studio lights but disappear the moment you try to live with them. The trick is to pick colors and shapes that pop yet can hide a bit of regrowth.
This list shows ten bright, playful designs that stay fun without sacrificing durability. We’ll focus on balancing loud patterns with negative space so growth is hidden, using gel for intricate lines or a solid top coat for polish, and the right tools- micro‑liner brushes and dotting pens- so you can DIY without a mess.
1. Negative-Space Neon Waves
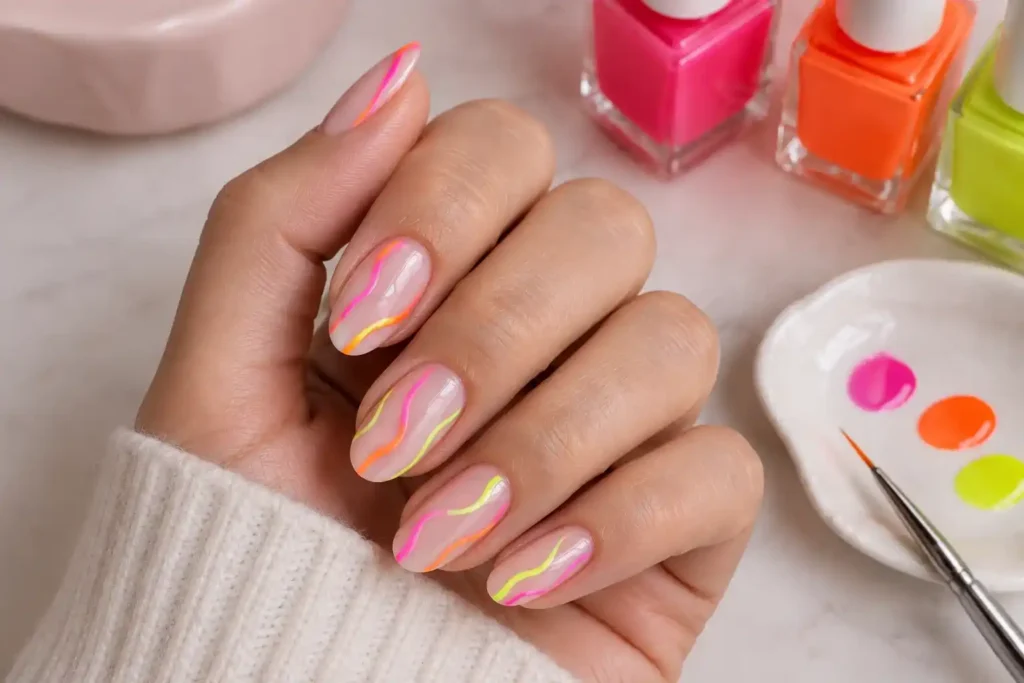
Negative-space neon waves combine wavy neon lines with a sheer pink or nude base for a bright, low‑maintenance manicure.
The natural‑toned base hides cuticle regrowth, so new growth stays invisible for up to three weeks, making the design ideal for busy schedules.
To achieve the look, paint the base with a sheer pink or nude gel, then use an ultra‑fine 00‑detailer brush and high‑pigment neon gel polish to draw organic, flowing lines.
A fine liner brush prevents streaks and keeps the neon vivid, while the gel formula avoids transparency that standard polish often shows.
Short, active hands benefit most because the waves stay crisp as the nail flexes; on long extensions, the design can look stretched and may require extra curing time.
Cure each wave separately to stop bleeding between lines; curing the whole nail at once often creates blurry edges.
A common mistake is applying neon lines too thick; the extra volume creates curing wrinkles that mar the sleek appearance. Keep the strokes thin and even for a smooth finish that holds up through daily wear.
2. The Mismatched Retro Grid
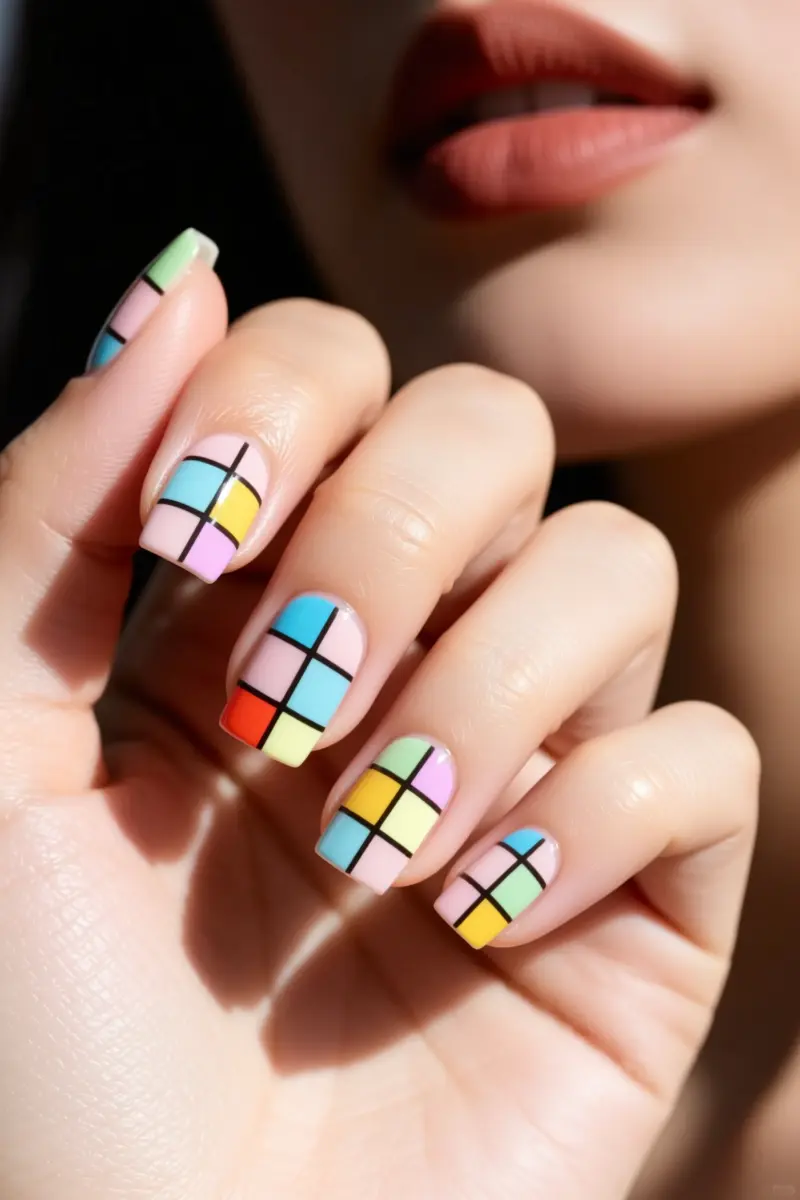
A mismatched retro grid alternates pastel and bright squares across each finger, creating a playful checkerboard. Square or squoval nails showcase the design best, as their straight edges mirror the grid pattern.
Striping tape or a stamping plate delivers razor‑sharp lines; professionals usually apply each stripe before curing.
At home, the tape can shift, making clean lines on the dominant hand difficult without a steady hand.
A quality press‑on set replicates the grid with salon precision, offering a realistic DIY alternative. If you choose a DIY route, use high‑quality tape and remove it while the polish is still tacky to avoid smudging.
Finish with a non‑wipe matte top coat for a modern ceramic sheen and extra chip resistance. Many people find the matte top coat extends wear to about a week before a touch‑up is needed.
The look can feel crowded on elongated or rounded nails, so stick to shorter square shapes for reliable wearability.
3. Abstract Pastel Blobs on Bare Bases
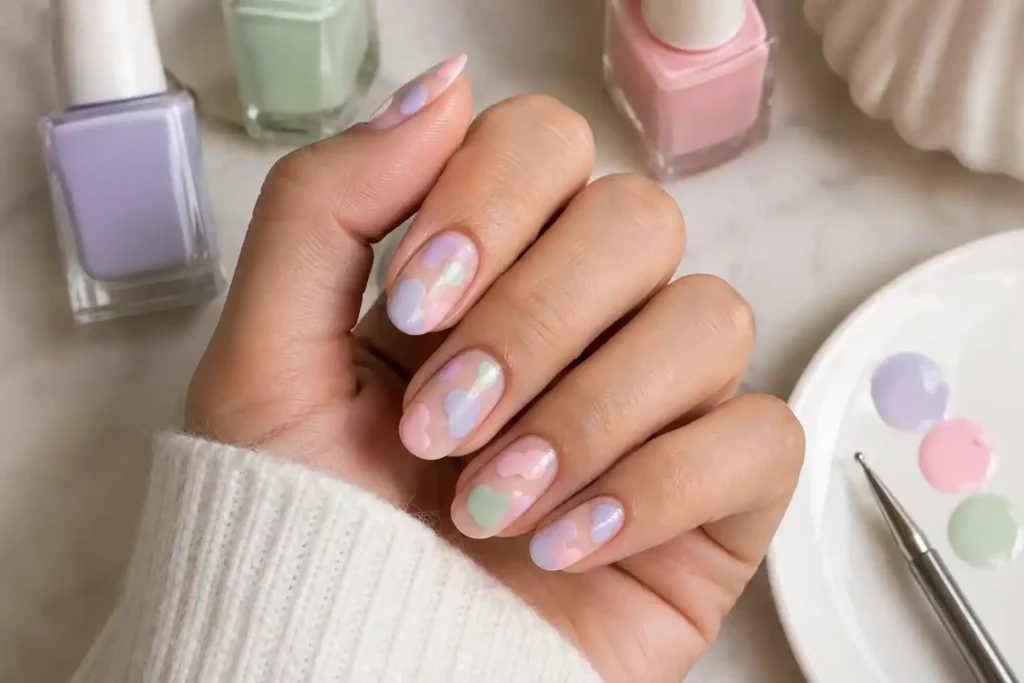
Abstract pastel blobs on bare bases give a free‑form, forgiving look that works even on uneven nails. The style thrives on imperfect, organic shapes, so beginners can relax about perfect lines.
Start with a ridge‑filling base coat to smooth brittle or ridged nail plates; this creates a uniform canvas for the pastel nail polish.
Next, choose a pastel pink, lavender, or mint shade and apply a thin coat over the bare nail bed. Many tutorials describe the process as super fun, quick, and easy.
Using a dotting tool, press lightly and drag the polish into fluid, rounded blobs instead of trying to paint them with the bottle brush.
This technique keeps the blobs soft and prevents streaks.
A common mistake is layering three or more colors in a single session, which builds up bulk and leads to early chipping.
Limit each nail to one or two pastel tones, and let the base dry before adding a second blob if desired.
The result is a quick, playful manicure that feels lightweight and stays intact for a week with normal wear.
4. Deconstructed Bright French Tips
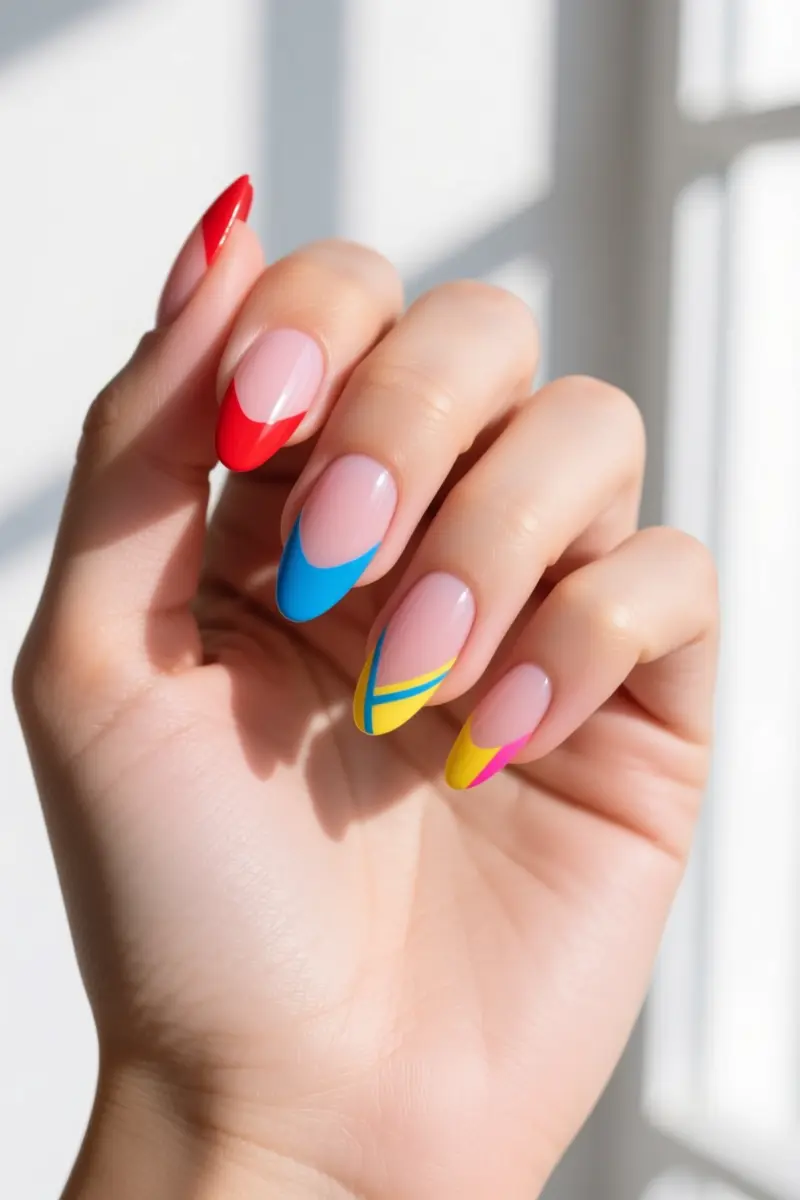
Deconstructed Bright French Tips replace the classic white tip with vivid primary colors or asymmetrical double lines for a playful, wearable look.
The bright accents create the elongating effect French manicures are known for, making almond nail shape and oval nails appear longer and slimmer.
Because the base stays sheer or neutral, nail growth and minor chips stay discreet, preserving the low‑maintenance feel of a traditional French manicure.
A flat acetone clean‑up brush dipped in acetone or isopropyl alcohol sharpens the smile line, erasing any stray pigment for a crisp edge.
Many people find that the colored tips chip faster than the base, so the design demands extra care.
Applying a flexible, high‑gloss top coat every three days forms a protective shield that reduces daily wear on the bright tips.
The style works best on nails with a natural or sheer pink base, allowing the bold colors to pop without overwhelming the hand.
It suits everyday wear and formal occasions alike, but those with very short nails may prefer a narrower line to keep the look proportional.
Regular top‑coat refreshes keep the tips looking fresh and extend the overall wear time.
5. Micro-Doodle Daisies and Happy Faces
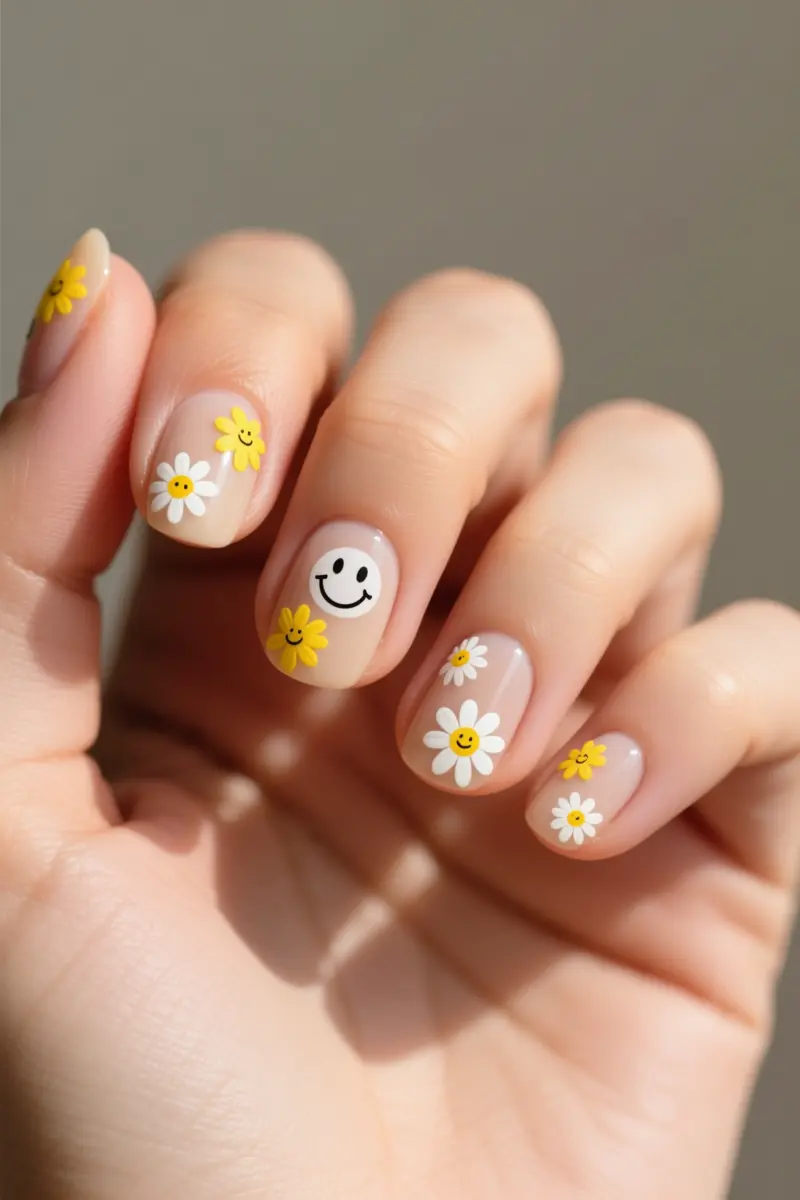
Tiny doodles like daisies and smiley faces turn a plain manicure into a playful statement.
The trick is to keep the base coat neutral, soft beige, pale pink, or sheer nude, so the bright yellow petals and white smiley accents really pop.
On short natural nails, the micro‑scale designs stay visible without feeling cramped, and the look stays chic even when the nail length is barely a millimeter.
Creators note that doodle nail art is a fun, expressive way to showcase personality on short nails, while micro‑French tips add an ultra‑thin line for extra polish.
For perfectly round daisy petals, use a bobby pin tool as a makeshift dotting pen; the curved tip creates consistent circles without buying a specialty brush.
Apply each doodle, let it dry completely, then seal with a smear‑free top coat. Rushing the drying time between doodle layers and the final top coat is a common mistake that turns crisp lines into a muddy blur.
A steady hand and a bit of patience keep the tiny details sharp, making the design wearable for everyday wear.
6. The Half-and-Half Colorblock
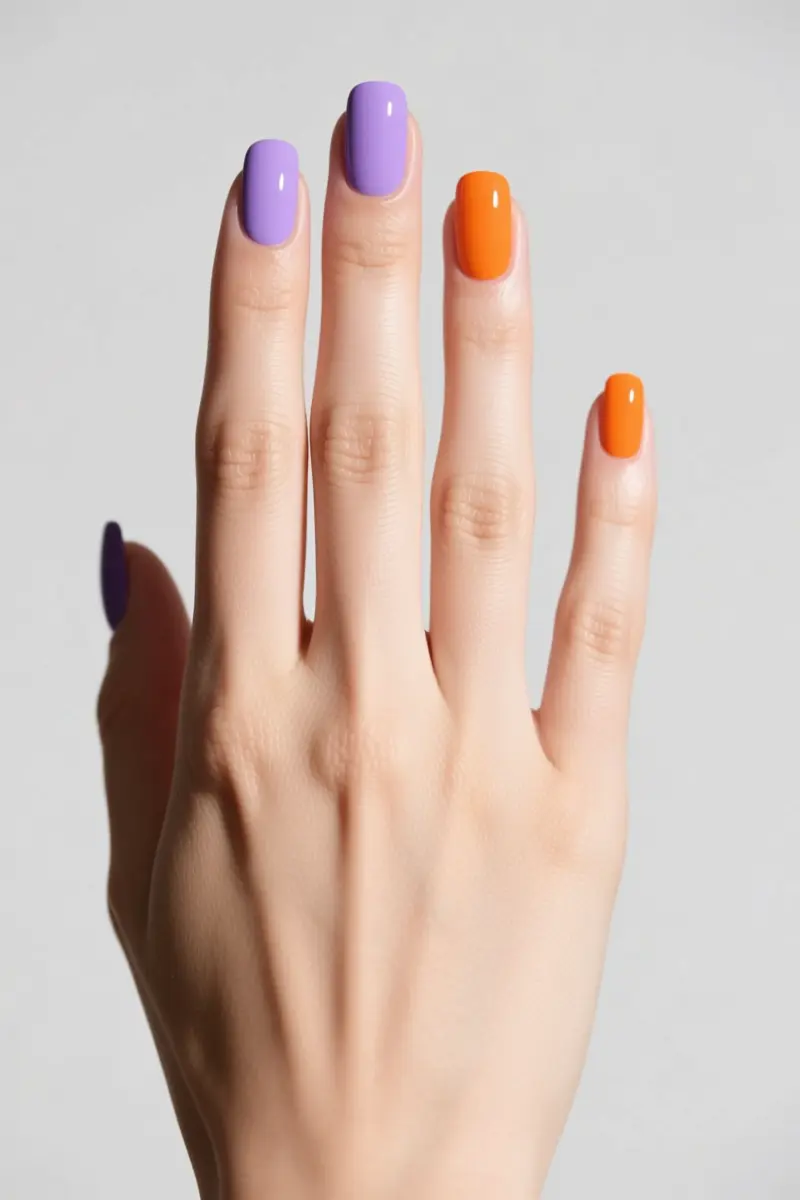
The half-and-half colorblocking splits each nail into two bold sections for immediate visual impact.
The Lindsay Half and Half Nails technique divides the nail vertically or horizontally and paints each half with a contrasting but complementary hue.
A base coat, low‑tack painter’s tape, and a top coat create a durable finish that survives typing and everyday tasks.
To get a crisp line, apply low‑tack tape before the first coat, press firmly, then paint the first color.
After it dries, remove the tape gently, re‑apply fresh tape on the opposite side, and fill the second shade. Gel curing works the same way, but avoid pulling tape off a still‑wet gel layer to prevent lift.
Pair unexpected colors such as lavender and tangerine for a sophisticated pop that feels playful yet wearable.
Many users report that the color-blocking design is easy to DIY at home without a salon visit.
A common downside is that aggressive tape removal from freshly cured gel can chip the polish, so peel slowly and support the nail with a cotton pad.
Keep nails clean; using them as prying tools can cause damage and lead to infection, which warrants professional care.
7. Aura Nails with a Soft Neon Gradient
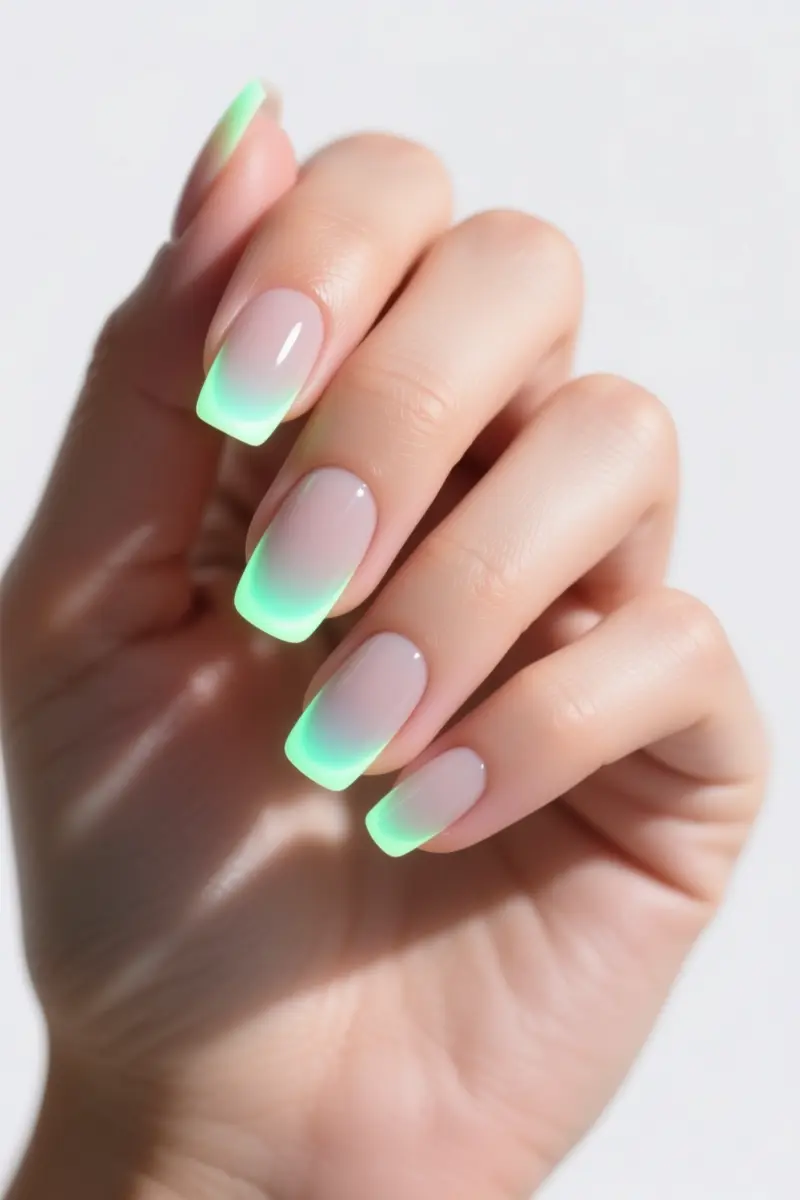
Aura nails with a soft neon gradient create a glowing halo that fades into a muted base.
The effect mimics an airbrush finish but is achieved with a cosmetic wedge sponge and highly pigmented polish or gel paint.
Start with a clean nail: clip, file, push cuticles, lightly buff for gel, then apply a thin base coat and cure fully.
Use a liquid latex barrier or barrier cream around the cuticle to keep cleanup easy.
Pick a bright neon polish for the aura and a neutral background color that will show around the edges.
Dab a small amount of neon polish onto the sponge, then press gently onto the nail bed, starting at the center and fading outward.
The sponge should hold just enough product; loading it too heavily creates air bubbles that ruin the gradient.
After the sponge work, seal with a top coat and cure each gel layer for the full recommended time to avoid lifting, dents, and a soft finish.
Many people find the soft gradient hides minor nail bed imperfections and ridges, giving a smooth look even on uneven surfaces.
A common mistake is rushing the cure, which can cause the same lifting issues noted for gel. Finish with cuticle oil for shine and a polished, wearable aura effect.
8. Tortoiseshell Remix with Bright Pops
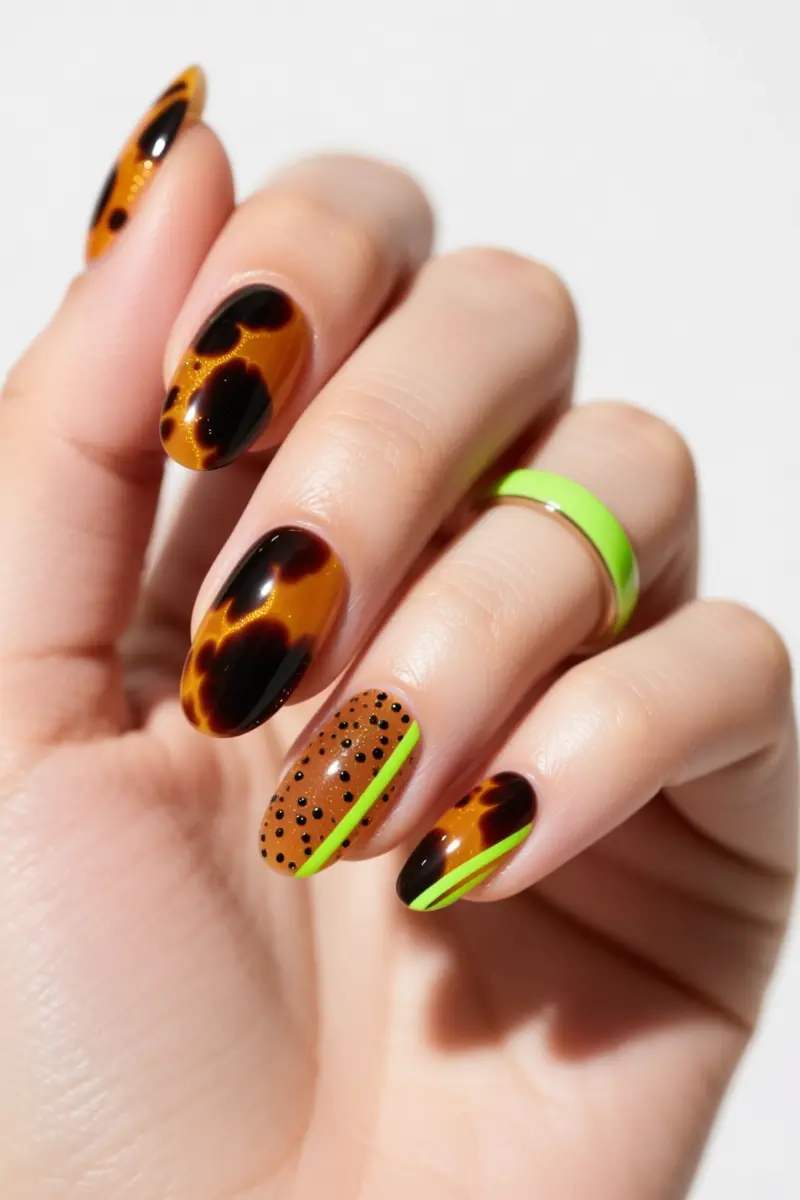
The tortoiseshell remix with bright pops pairs classic brown tortoiseshell design with neon pink or neon green blocks.
An amber gel jelly polish forms a warm base; black and brown speckles add shell‑like depth. Neon green is a trending nail color this season, giving the pop a fresh edge.
The look stays professional because most nails stay muted, while one or two accent nails deliver a playful edge. Choose a ring finger and a thumbnail for the neon block to keep the vibe polished.
Layering starts with an amber base, then dab tiny black or brown spots using a fine brush, and finally seal a neon stripe on the chosen nails.
Both a beginner‑friendly tutorial for easy tortoise shell nails and a darker gel tutorial show the same steps.
Salon nail art pricing for this multi‑layered design runs about $70‑$120, reflecting the extra time and skill. DIY kits cut costs but need a steady hand.
Pro tip: limit neon accents to one or two nails to maintain cohesion and avoid a cluttered appearance.
9. Metallic-Outlined Minimal Shapes
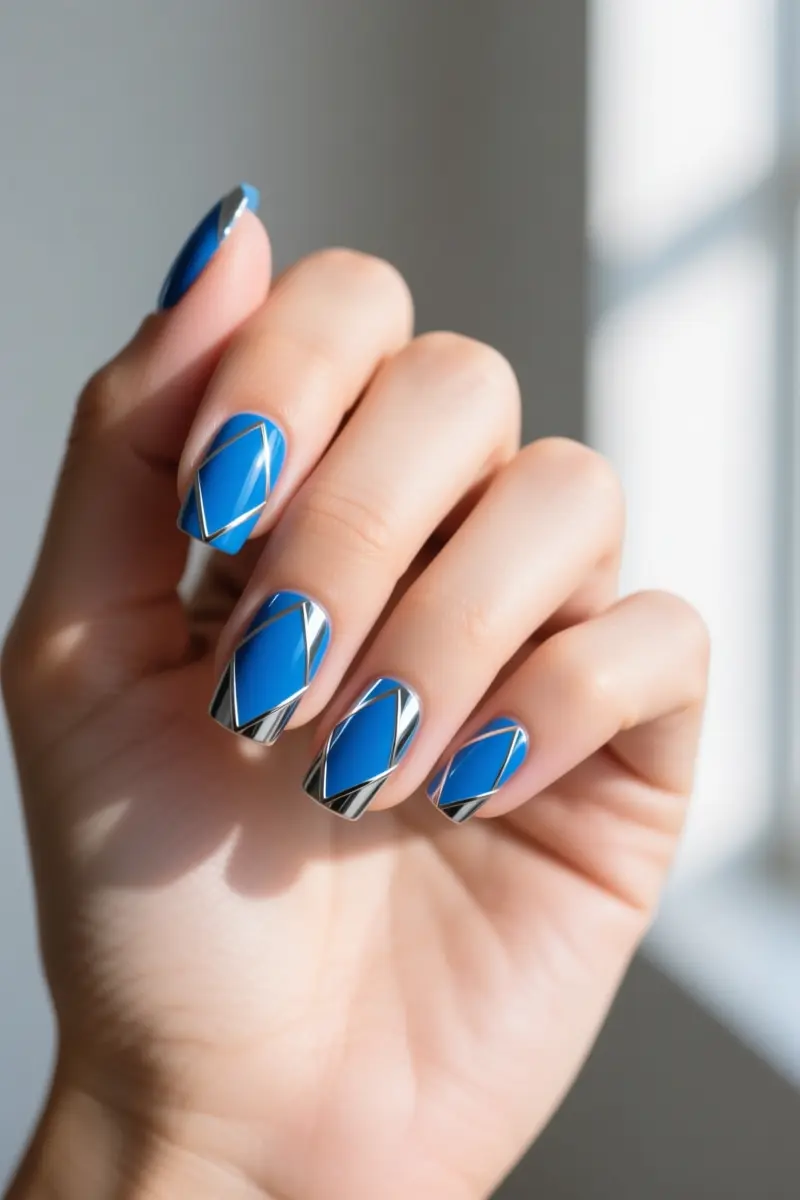
Metallic‑outlined minimal shapes frame bright color blocks with ultra‑thin chrome lines for a jewelry‑like manicure.
Choose a vivid base, neon pink, electric blue, or sunny yellow, and let it cure as a standard gel layer.
Apply no‑wipe chrome gel paint using a metallic detail brush; the brush spreads the paint evenly without streaks.
While the surface is still glossy and tack‑free, dust a light coat of chrome powder over the outline. The powder adheres only to the wet gel, creating a mirror‑finish edge.
Before the final topcoat, seal the design with a builder gel barrier. This extra layer locks the chrome particles in place and prevents early rubbing. Finish with a high‑gloss topcoat to lock in shine.
The whole process takes about 45 to 75 minutes, depending on nail condition and the number of accent nails.
A common limitation is that chrome outlines can chip after a few days if the barrier layer is omitted. Regular nail grooming and keeping the peely base inside the nail border extend wear.
This style suits short to medium lengths and works best for those who want a subtle futuristic pop without covering every nail in foil.
10. Speckled Egg Shell over Bright Solids
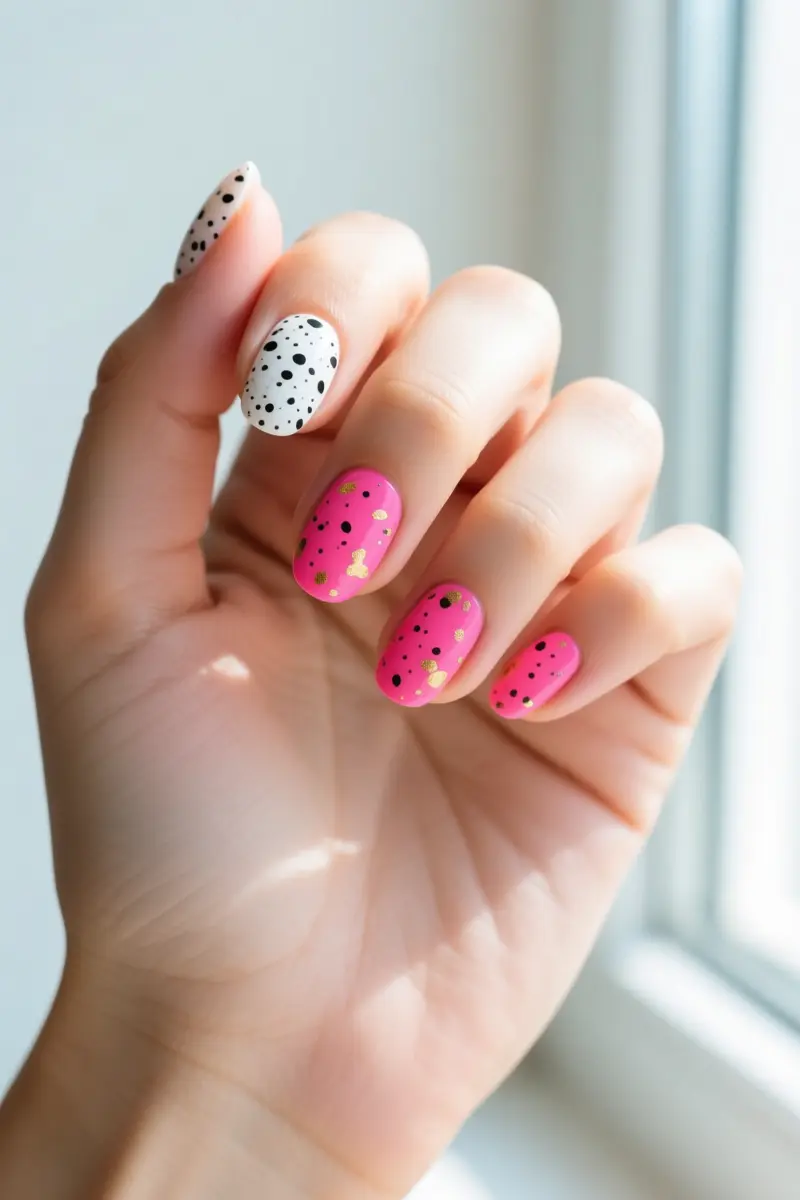
A speckled egg‑shell top coat turns bright solid nails into a textured, retro‑pottery look. The effect works best on short, active hands because the tiny speckles mask chips and scratches that often appear during daily tasks.
Start with any vivid base, neon pink, electric blue, or sunny yellow, and apply a thin layer of a speckled top coat, such as the black-and-white speckled topper popular in the crackle‑nail Easter trend, which many users pair with tiny dark speckles and a hint of gold.
A matte finish amplifies the stone‑like surface, making the egg‑shell texture feel more tactile, while a glossy layer adds shine but can flatten the speckles, reducing the retro feel.
Pro tip: choose a matte top coat to highlight the speckled texture and keep the colors popping.
Avoid over‑applying the speckled polish; a thick coat blends the bright bases into a muddy hue and defeats the playful contrast.
Because the speckles conceal wear, you can skip a touch‑up for a few days, but a fresh matte seal is recommended after any major chip.
Your Next Nail Moment Awaits
Tip one: when a design relies on crisp lines or tiny dots, reach for a gel formula; it hardens quickly and holds detail much longer than regular polish.
Tip two: keep a mini kit of micro‑liner brushes and dotting pens so you can touch up stray growth without a full redo.
Tip three: seal each finish with a high‑quality top coat every few days to lock in color and prevent chips.
Now pick a palette, grab your tools, and let those bright patterns live on your fingertips. Save this guide for your next salon visit or share it with a friend who loves a pop of color.
Wearable Funky Nails: Frequently Asked Questions
What is the best way to make bold, funky nail art look professional for the office?
Keep the base of the nails sheer or negative-space nude, and confine bright colors or complex patterns to small accents, asymmetrical tips, or single feature nails.
How do you prevent hand-painted nail designs from smudging when applying a top coat?
Allow regular nail polish designs to dry completely for at least ten minutes, then float a generous bead of top coat over the nail without letting the brush bristles directly touch the painted art.
Which nail shape is most practical and durable for detailed, bright nail art?
A short active oval or squoval shape provides the highest durability and resistance to chipping while still offering a balanced canvas for detailed line work.
Are press-on nails a reliable alternative for intricate, funky nail designs?
Yes, high-quality gel-X press-on nails offer salon-level art and durability at a fraction of the cost, lasting up to two weeks when prepped with thorough nail dehydration and strong glue.