
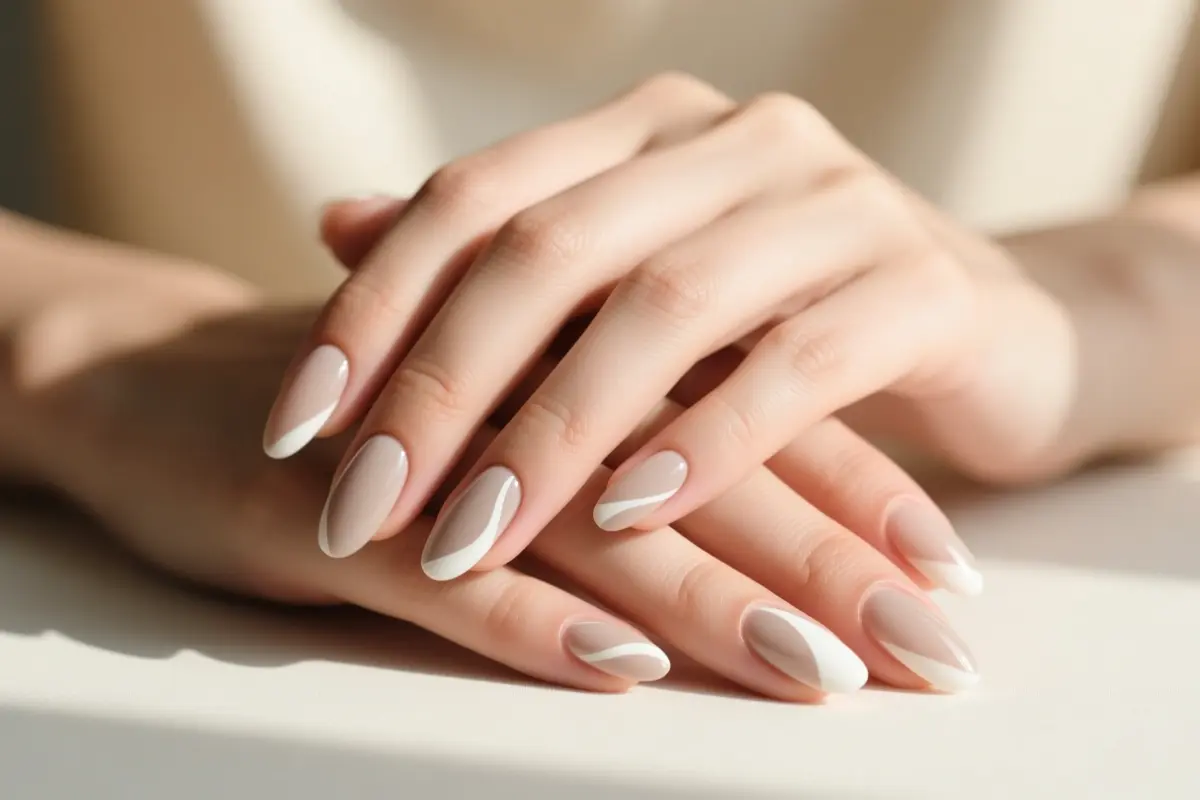
10 Wearable Fashion-Forward Gel Nail Ideas That Fit Real Life
Three‑inch, 3D charm‑laden salon extensions dominate the feed, yet the daily grind of typing, dish‑washing, and sprinting after the kids leaves no room for fragile art. You don’t have to choose between runway drama and a functional manicure.
This list skips the over‑embellished trends and leans on modern soft‑gel formulas that give structural durability without aggressive filing, while high‑pigment art gels pair with a 48‑watt LED to cure fully and avoid hidden wet pockets.
A realistic gel set can hold up 14 to 21 days, and if you use 100 % pure acetone for removal, follow with cuticle oil to restore stripped lipids.
1. Muted Aura Blends
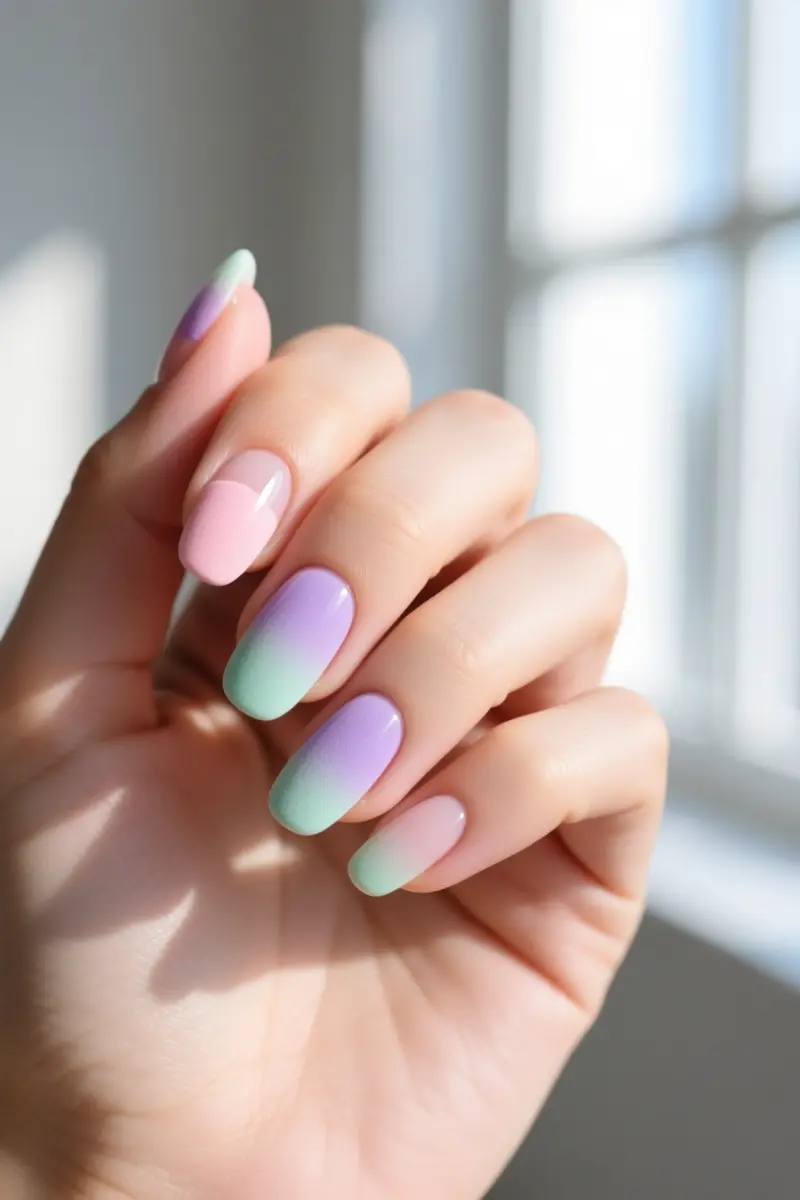
Muted Aura Blends use a soft gradient created with a dense cosmetic sponge for a subtle, pastel vibe.
The technique layers semi‑sheer builder base shades, stamping each hue gently to form pastel aura rings that melt into one another.
Because the sponge applies color slowly, the result looks airbrushed without an actual airbrush.
Start with a clean nail: shape, push back cuticles, light buff, then apply a thin builder base coat.
Press the sponge into a small amount of gel polish, lift, and dab onto the nail, repeating for each shade and flash‑curing between layers to keep the film thin.
Flash‑curing after each thin layer prevents bulk and locks in a chip‑resistant finish that can last three weeks.
Seal the gradient with a clear top coat and cure under a lamp; a non‑wipe top coat can hold chrome powder if a subtle shine is desired.
Many beginners find the sponge method reliable on the first try, especially when a base coat is used to soften the blend and protect against staining from rainbow pigments.
2. The Deep-Dimension Magnetic Cat-Eye
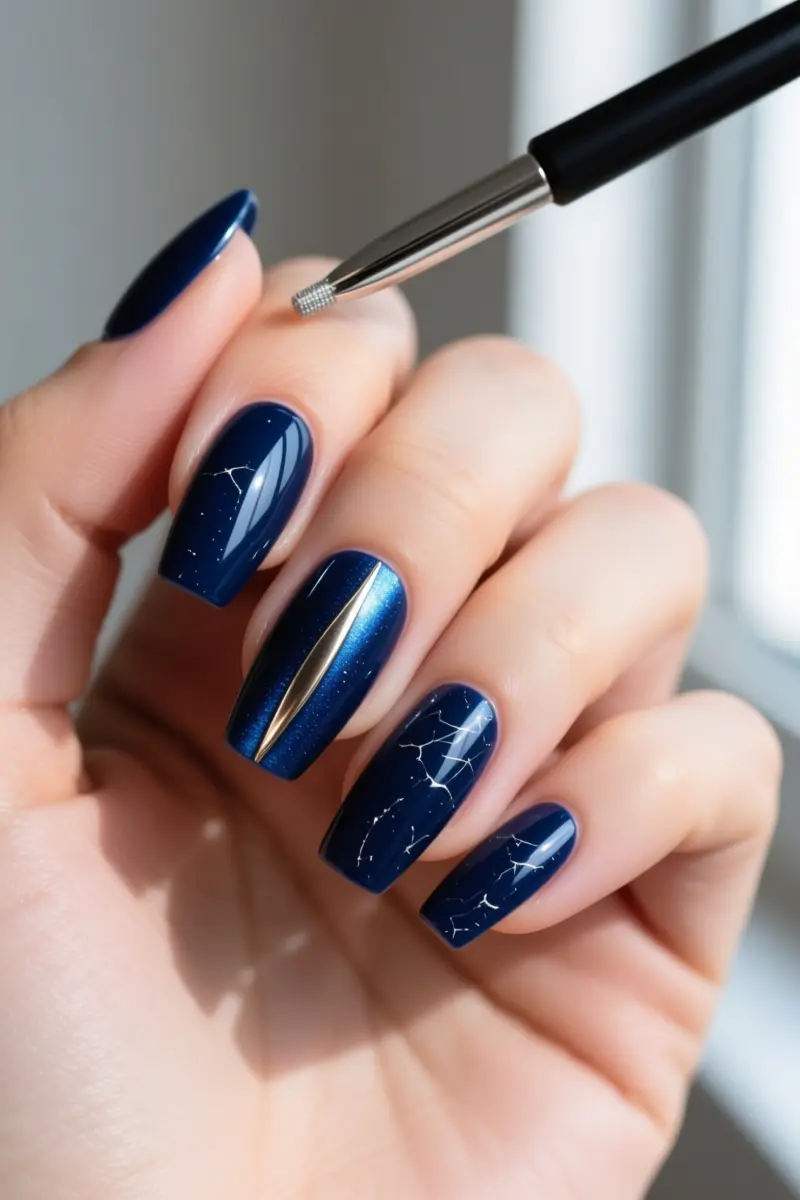
The Deep‑Dimension Magnetic Cat‑Eye creates a three‑dimensional shimmer by pulling iron particles toward the nail’s center with a dual‑ended magnet.
Start by applying a slightly thicker coat of cat‑eye gel than you would for a regular gel manicure; the extra thickness ensures enough metallic pigment for a visible line.
Hold a strong magnetic wand just above the uncured gel and move it slowly toward the tip.
Changing the wand’s distance and angle spreads the particles, so a closer, steady hold makes a bold central line while a sweeping motion creates a softer, radiating pattern.
Cure the nails the moment the desired effect appears; waiting even 30 seconds lets the particles settle and dulls the shine. Finish with a robust glossy top coat; dark magnetic pigments show micro‑scratches quickly if the seal isn’t strong.
Many technicians report that a thin gel layer or a weak magnet produces a faint, muddy shimmer, and delayed curing reduces the cat‑eye’s depth.
The result is a wearable, fashion‑forward look that holds up well with proper top‑coating and prompt curing.
3. Ultra-Thin Micro-French Tips
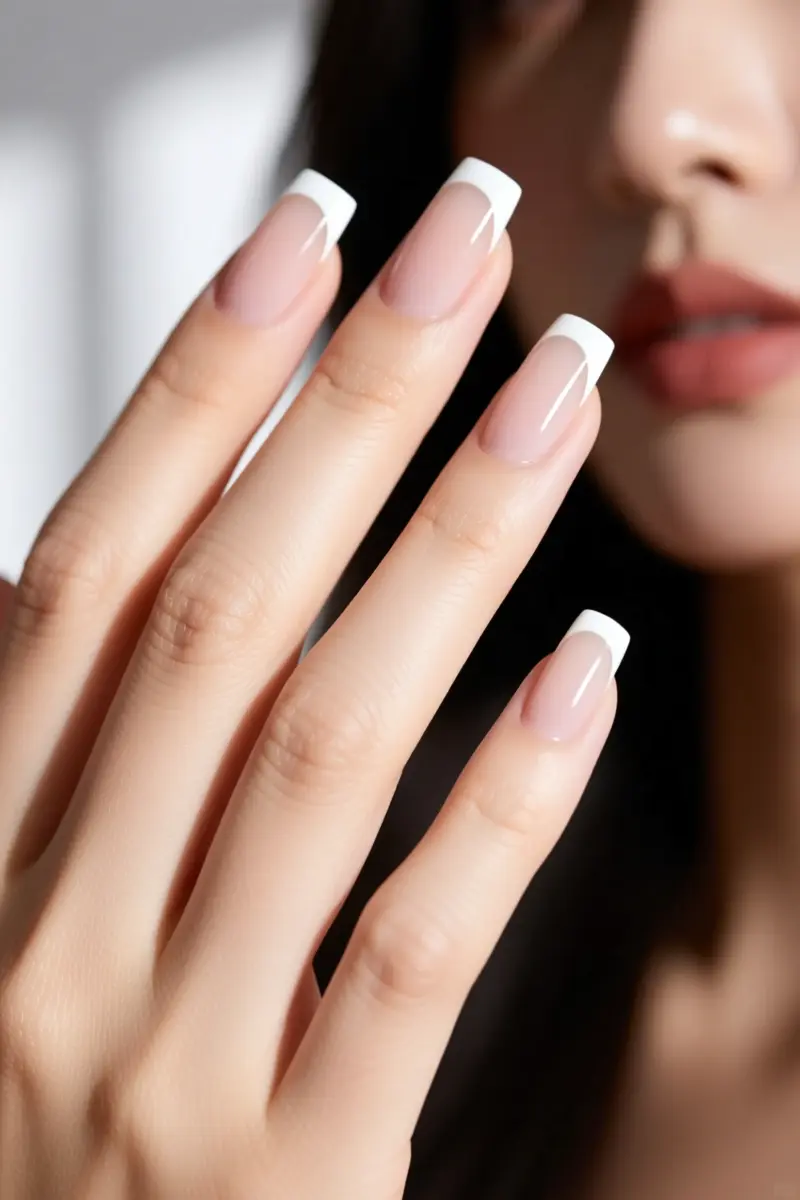
Ultra‑Thin Micro‑French Tips elongate short nail shapes and hide regrowth at the base. The invisible French manicure, also called a micro‑French or latte French, uses sheer, milky or nude‑toned polishes to create a barely‑visible tip.
This ultra‑thin micro‑French tip design mimics the natural look of a healthy nail bed, offering a clean, polished appearance.
Celebrity nail artist Jin Soon Choi popularized the trend on Zoë Kravitz at the YSL Fall/Winter 2026 runway, and InStyle and Cosmopolitan have highlighted it as a leading 2026 trend.
Compared with classic French tips, the ultra‑thin version provides a softer, more organic look that elongates the fingers and works with any nail shape or length, especially short nail shapes.
Apply the design with an ultra‑fine detail brush instead of a thick stencil.
After shaping, lay down a flexible rubber base coat to add shock absorption; the rubber layer helps prevent the fine painted tip from chipping on hard surfaces.
A user shared that they prep the nails, shape them into neat squares, apply a clear gel base coat, and cure under an LED lamp before painting the micro‑French tip.
The look demands steady brush control, so those with shaky hands may find it tricky, and without the rubber base coat, the delicate tip can chip more easily.
4. Abstract Negative Space Swirls
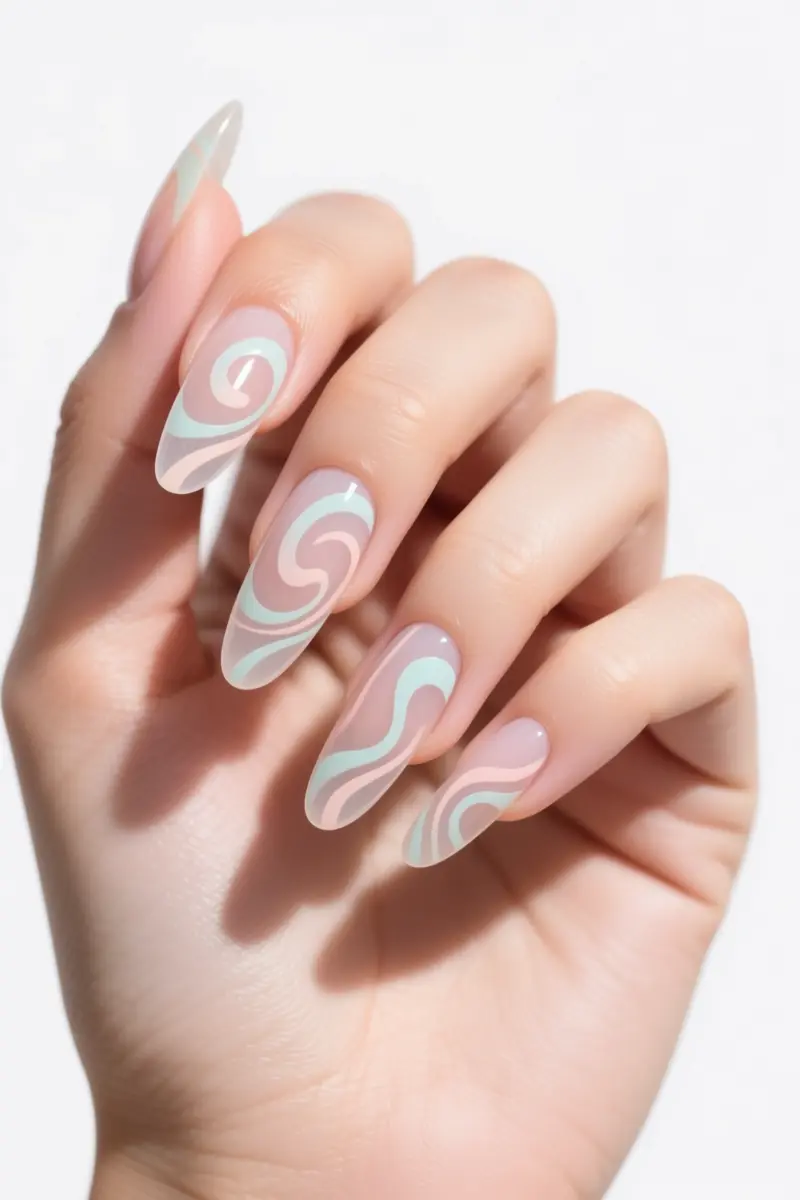
Abstract negative space swirls combine a sheer tinted gel base with free‑form linework for a modern, wearable look.
Start by applying a thin layer of tinted gel to achieve a translucent hue; cure it fully. Lightly cleanse the nail with a nail dehydrator, then immediately seal with a high‑quality pH‑bonding primer.
Skipping the primer after dehydration often leads to premature lifting at the free edge, especially on the thinner tip.
Using a fine‑point gel brush, draw organic, asymmetric swirls across the nail.
Keep the lines thin and uneven to echo natural movement; this works on both short and long nails, making short nails appear longer while giving long nails room for detail.
Allow the design to dry between strokes to prevent smudging.
Finish with a top coat that adds a glass‑like sheen, then cure.
Negative space nails rely on intentional bare sections, so the unpainted gaps blend seamlessly with natural regrowth and can hold up for over three weeks.
Simple tape‑based negative space designs are doable at home, but intricate cut‑out acrylic work is best left to a professional.
A common downside is the difficulty of achieving precise cut‑outs without specialist tools.
5. Pearlescent Chrome Glaze
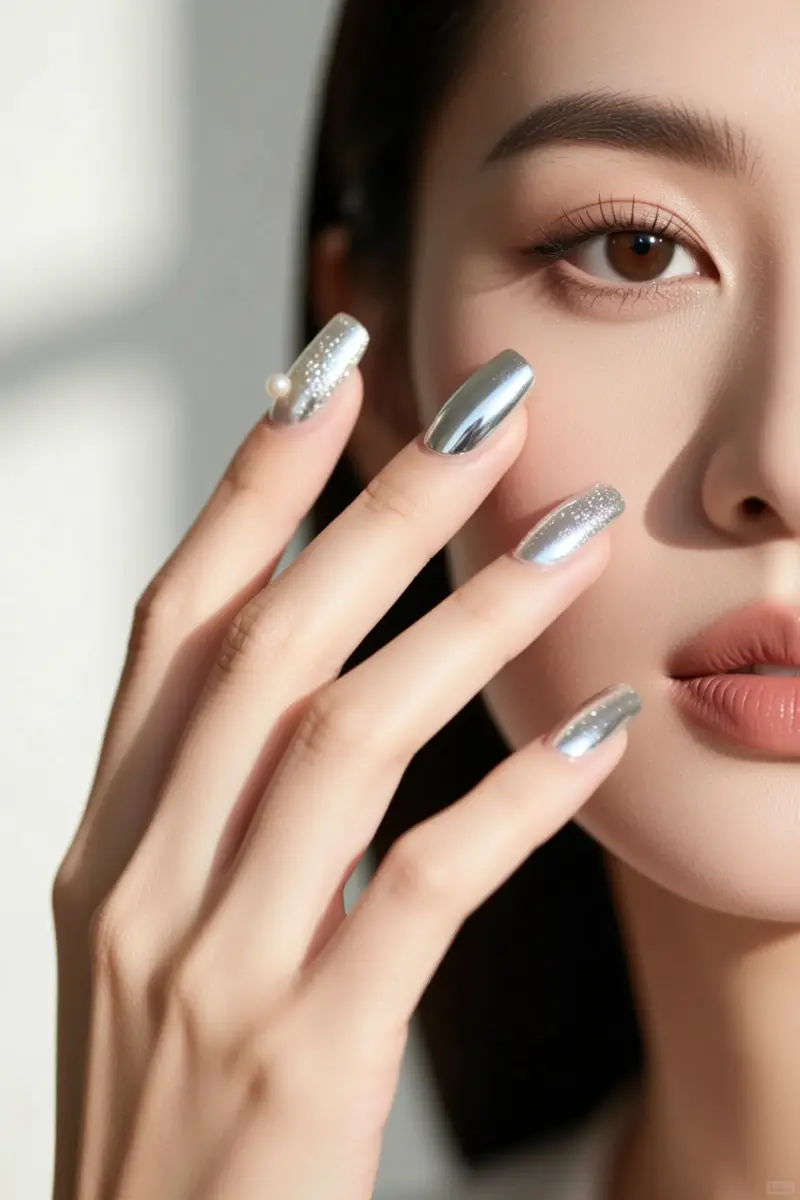
Pearlescent Chrome Glaze is achieved by dusting fine pearl powder onto a cured non‑wipe gel top coat and then burnishing the surface.
Start with a smooth, even gel base and apply a sheer nude or pink color that matches the desired glaze intensity.
After the color cures, spread a thin layer of non‑wipe top coat and flash‑cure it for exactly 15 seconds; this timing creates just enough tack for the powder to grip without becoming overly slick.
While the coat is still warm, sprinkle a light dusting of white chrome or pearl powder, tap off excess, and immediately burnish with a soft polishing buffer.
The burnishing step locks the pigment into place and yields the signature mirror‑like sheen.
A frequent error is over‑curing the non‑wipe layer, which makes the surface too glossy for the chrome powder to adhere, resulting in flaking.
Even application of the builder and color layers is crucial; any streaks will show through the reflective finish.
With proper technique, the glaze lasts two to three weeks and stays chip‑resistant, making it suitable for everyday wear while still delivering an editorial, futuristic look.
6. Contrasting Half-Moon Accents
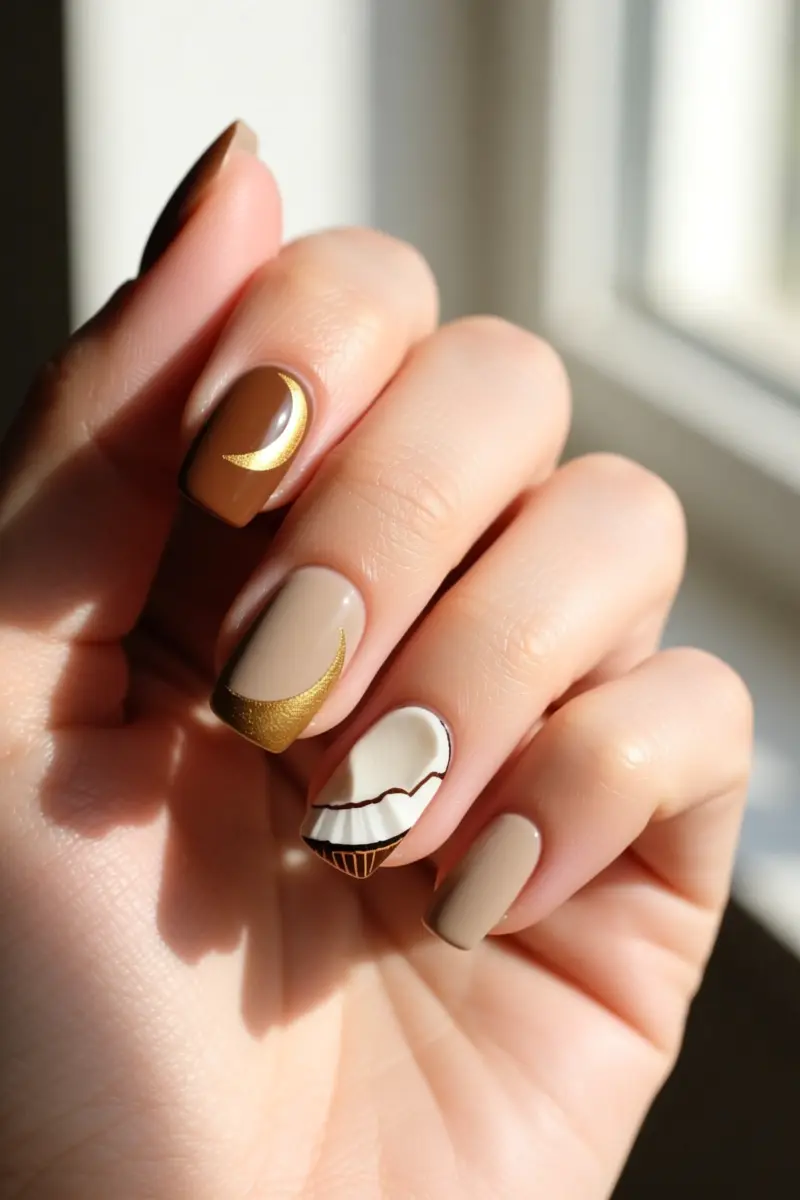
Contrasting half‑moon accents create a retro geometric cuticle accent that stays fresh for weeks.
The “mid summer moon” design uses a neutral Vivia Antigua base, two coats, then a bold half‑moon in Loot the Booty and arched details in Coconut Cove. Because the base stays muted, most wearers see minimal growth lines for up to four weeks.
Color blocking works differently on warm versus cool skin undertones.
Warm undertones pair best with a golden‑brown half‑moon, while cool undertones look sharper with a teal or icy blue contrast.
The stark line at the cuticle draws attention to the nail’s shape, making the manicure feel tailored rather than generic.
Community members note that the half‑moon can be swapped for a creamy white tip against a deep blood‑red base, proving the style adapts to any palette.
This flexibility lets you match the accent to a seasonal outfit or a favorite accessory without a full nail change.
A practical downside appears when the base color is too bright; the growth line becomes noticeable as the contrast sharpens.
The look also suits medium to long nails better, because short nails may not give enough space for the arched detail to shine. Choose a subtle base if you need extra durability during busy weeks.
7. Milky Matcha and Pistachio Swirls
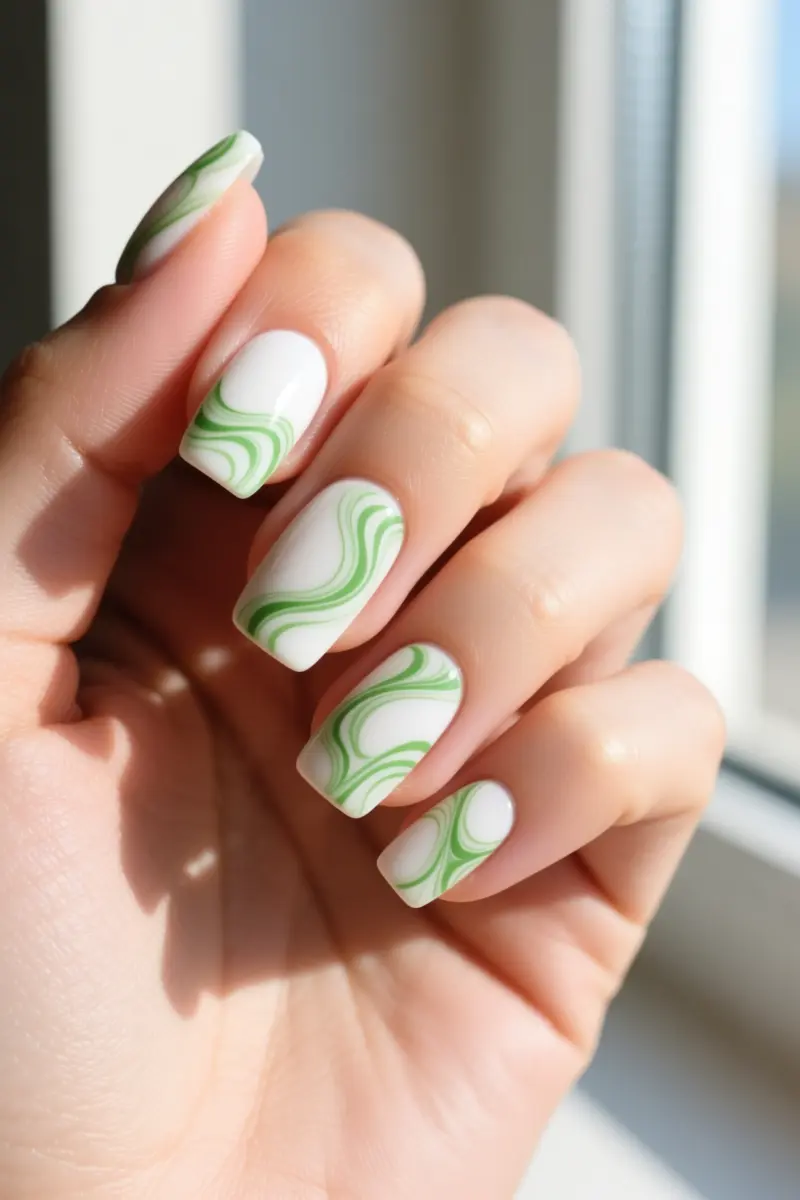
Milky matcha and pistachio swirls blend earthy green tones with sheer white gel for a marbleized, creamy texture that reads like matcha nails with a latte finish.
The look starts with a thin coat of milky gel polish as a base, then drips pistachio green gel in random lines. Using a fine brush or a toothpick, swirl the colors together while the gel is still wet.
The result mimics a latte‑style marble and showcases the marbling technique that catches light on every movement.
Highly pigmented green gels like pistachio demand paper‑thin layers. Thick spots block UV light, causing incomplete curing and surface wrinkling.
Apply each green line no thicker than a fingernail’s edge, then cure under a 36‑watt LED for the recommended 30 seconds.
This precise pigmented gel curing ensures a smooth finish and prevents lift later in the week.
Pistachio green is a summer‑2026 trend, and community members frequently reference shades called “Pistachio Whispers” and “Pistachio Macaron” in tutorials.
The swirl works best on medium to light skin tones; deeper complexions may need a richer white base to keep the contrast visible. Expect a maintenance routine of gentle filing every three to four days to keep the marble crisp.
8. Heavy-Duty Concrete Matte
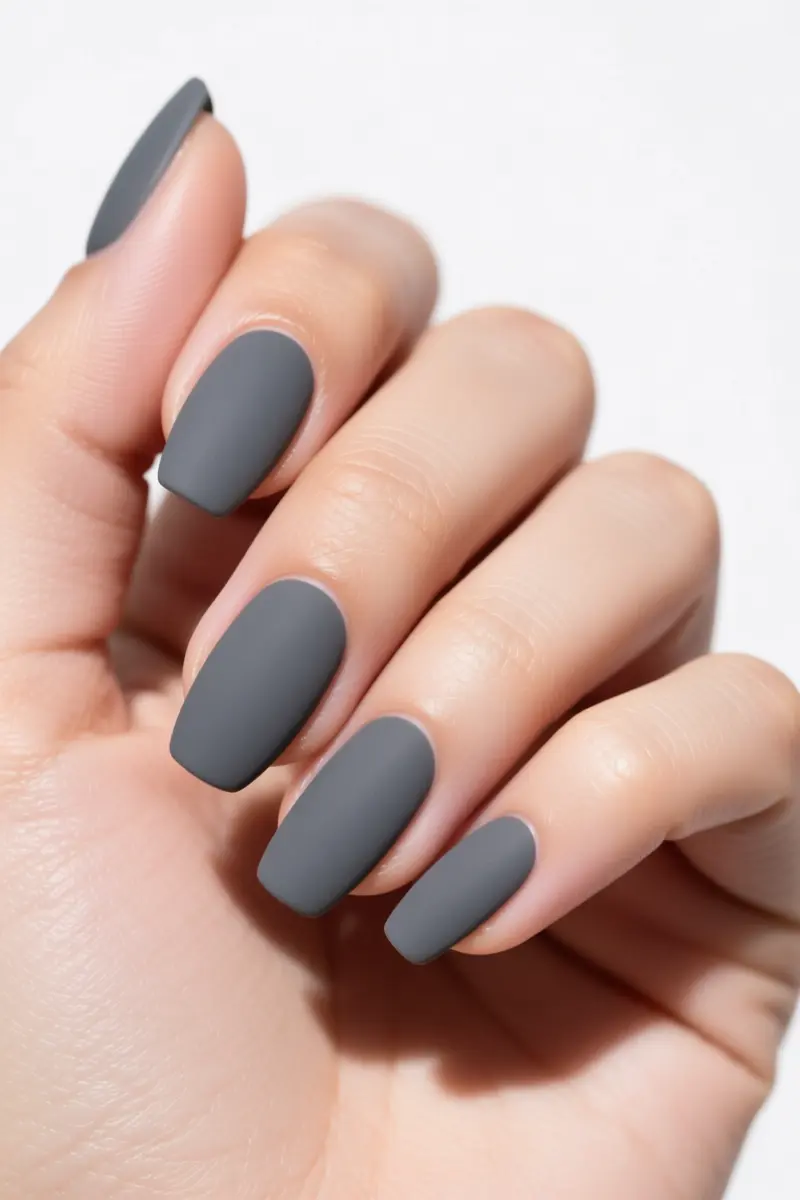
Heavy‑duty concrete matte nails deliver a deep, moody look that feels industrial chic. Start with a saturated base such as charcoal, deep navy, or oxblood, then seal it with a professional matte gel polish top coat.
The matte gel creates a flat, concrete manicure that catches light subtly and pairs well with dark denim or metallic accessories.
A porous finish is the honest drawback: matte top coats absorb pigments from hair dyes, dark fabrics, and even food stains more readily than glossy gels.
Users report that matte gel nails become dirty quickly, and the surface can pick up dye from a pair of black jeans or a bold lipstick.
Keep the look fresh with a quick isopropyl alcohol wipe between outings. For deeper cleaning, soak the nails in warm, soapy water for five to ten minutes, gently scrub with a soft brush, rinse, pat dry, and finish with a fresh matte top coat.
This routine removes built‑up grime without sacrificing the matte texture, ensuring the concrete vibe stays crisp throughout the week.
9. Korean Syrup (Jelly) Nails
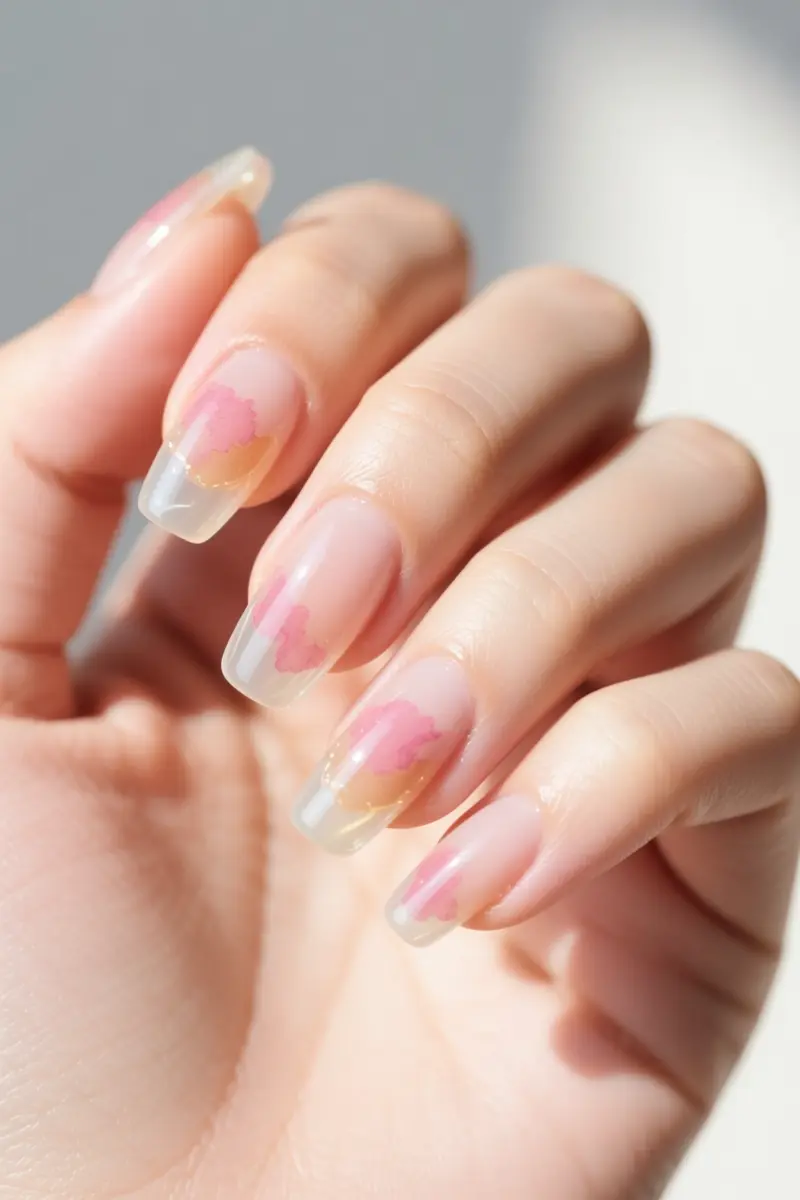
Korean Syrup (Jelly) Nails give a glass‑like, translucent finish that stays clean as they grow out. The syrup gel formula builds in thin, layered coats, each letting light pass through and bounce back for an inner glow.
Under bright daylight, the nails look lit from within, while soft indoor lighting reveals a subtle sheen that doesn’t fade into a dull matte.
These nails thrive on short lengths because the sheer depth reads as polished rather than understated.
The neutral palette, often a blush or water‑colour tint, blends with the skin tone, echoing the understated vibe popularised by K‑pop idols.
The style falls under the broader Korean jelly nail umbrella, which also includes glass, cat‑eye, and gradient variations.
A crucial step is applying a hard‑gel overlay before the jelly polish. Thin, peeling natural nails tend to lift the edges of the jelly layer if the base isn’t reinforced.
Many technicians recommend a thin, cured hard‑gel coat to lock in the translucent finish and prevent premature chipping.
Maintenance is low‑key; a gentle soak‑off every two weeks keeps the surface smooth. Expect to spend roughly $30‑$45 for a full set at a reputable salon that offers Korean jelly nail services.
10. Speckled Terrazzo Shells
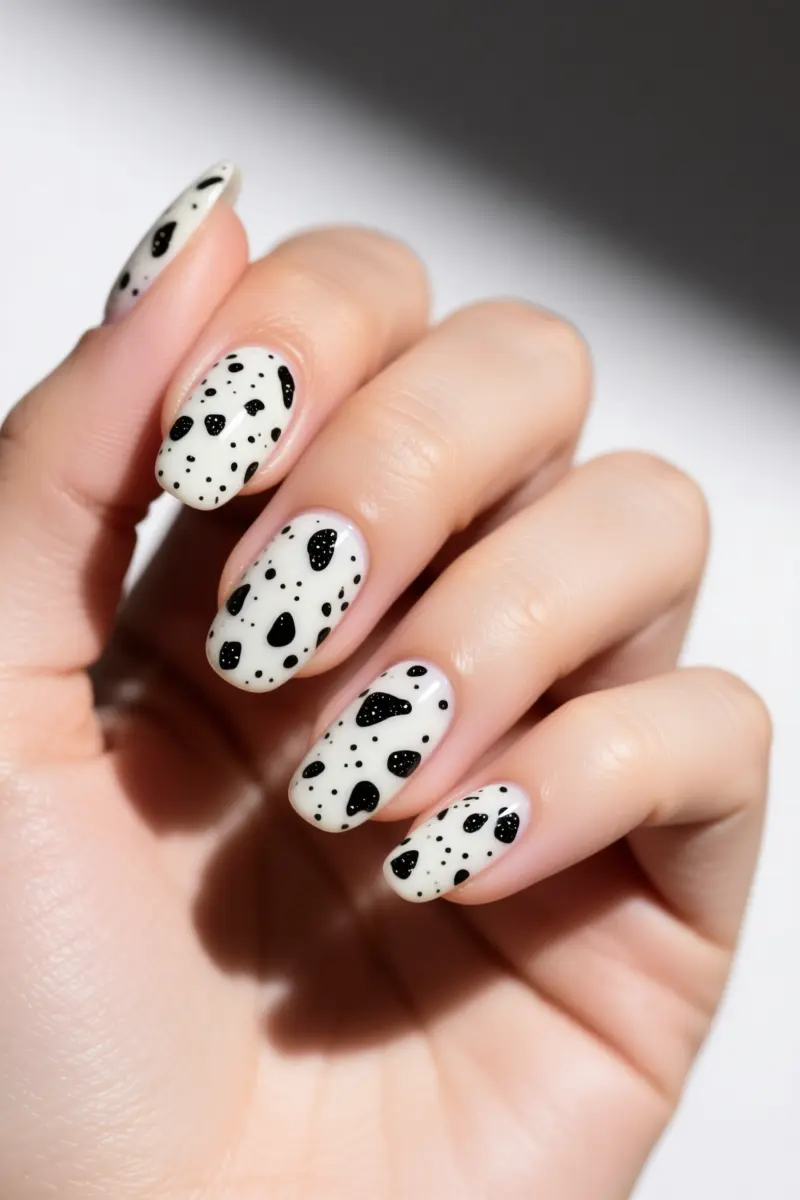
Speckled terrazzo shells combine matte black flecks in a milky builder gel for an organic stone look. The design uses encapsulated glitter that floats within the gel, so no precision brushwork is required.
This makes it a perfect entry point for DIY gel enthusiasts who want a fashion‑forward manicure without a steady hand.
Because the flecks are sealed inside the gel, the finish stays smooth and resists catching on knitwear, unlike raised 3D textures that can snag.
The result is a durable speckled nail that endures daily wear and still reads like a high‑end terrazzo manicure.
Application involves a single layer of milky builder gel, a quick sprinkle of matte black glitter, and a top coat cure, no sculpting or layering of separate pieces.
A practical tip: work in natural light to see the flecks evenly distributed, then give the gel a brief extra cure to lock the particles in place.
The look pairs well with minimalist outfits and works on all nail shapes, from almond to squoval. The only limitation is that the muted palette leans toward neutral wardrobes, so it may feel less striking with bold color schemes.
Your Next Nail Moment Awaits
Start with a soak‑off soft‑gel base to give your natural nail a sturdy foundation without the harsh filing of acrylics. Cure each layer under a 48‑watt LED lamp; the extra power pushes pigment to the core and eliminates the wet pockets that trigger dermatitis.
After you pop the gel with 100 % acetone, massage cuticle oil into the nail beds to replenish lost lipids and keep the surface flexible.
Pick the style that matches your vibe, protect it with the right aftercare, and watch the compliments roll in. Pin this guide for your next salon visit or share it with a friend who craves a runway‑ready yet work‑friendly manicure.
Wearable Gel Nail Design FAQ
What is the newest trend in gel nail designs?
The newest trend focuses on high-dimension, textural finishes like magnetic cat-eye effects and soft, diffused aura gradients that mimic natural gemstone patterns rather than flat colors.
Which nail colors are currently dominating fashion-forward looks?
Earthy, muted tones like milky matcha green, rich espresso brown, and soft pearl chrome finishes are dominating modern fashion-forward manicures.
What are some creative gel nail pattern ideas for short nails?
Micro-French tips, delicate negative-space abstract swirls, and contrast half-moons at the cuticle bed are excellent patterns that elongate short nails without overwhelming the nail plate.
How do you prevent gel polish from peeling at the free edge?
To prevent peeling, always dehydrate the nail plate, apply a primer, and cap the free edge of the nail with base coat, color, and top coat during application before curing.
Is it safe to peel off lifting gel polish at home?
No, peeling off lifting gel pulls away the delicate keratin layers of your natural nail, leading to thinning, peeling, and long-term damage; always soak off gel with acetone instead.