
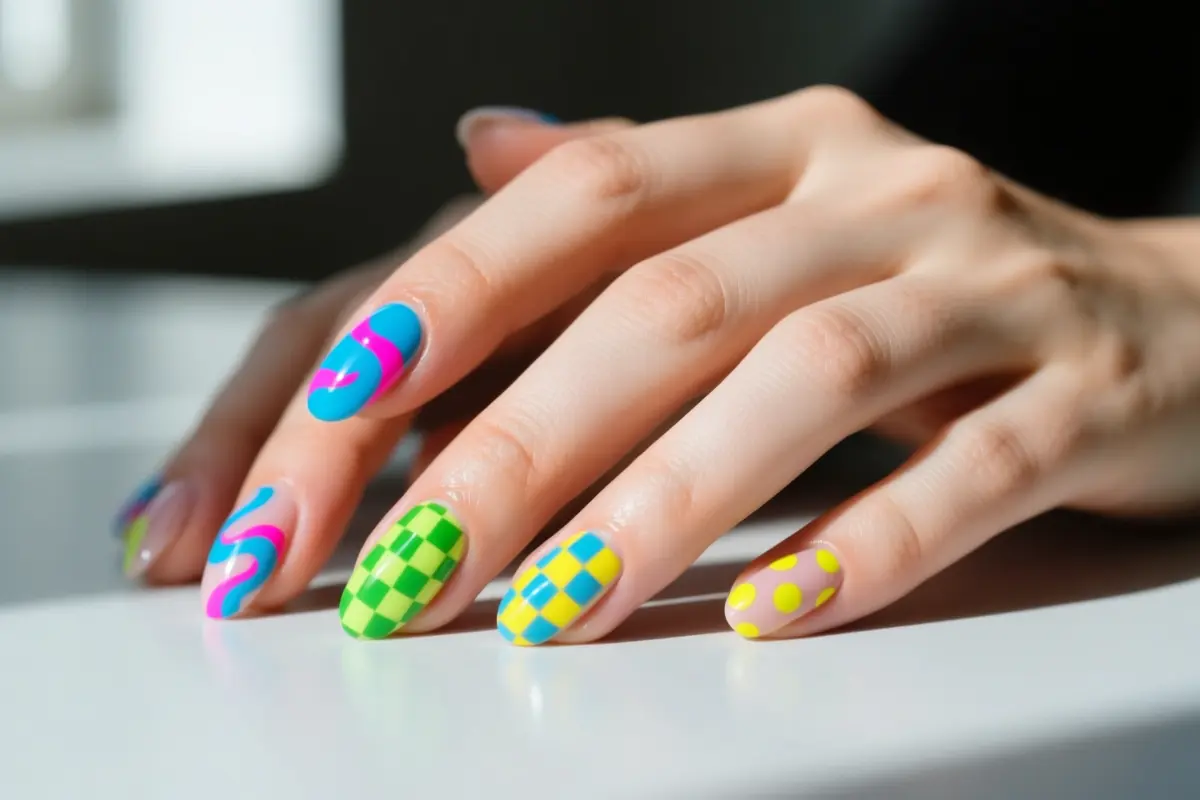
10 Funky Nails Ideas That Refuse to Blend In
Tired of the same boring salon designs that blend into every other manicure? Funky nails flip the script, turning each fingertip into a bold, unapologetic statement piece. Forget predictable nudes and classic French tips; think 3D gel sculptures, hand-painted bursts of color, and glitter-filled charms that demand attention.
In this list, we break down ten high-impact looks, rating each on wearability, cost, and upkeep. You’ll learn why 3D gel art needs a structured gel or acrylic base to stop lifting, how hand-painted free-edge designs chip 40 % faster without a dual-layer top coat, and why encapsulated glitter and chunky charms require professional e-filing for safe removal. Expect honesty, not hype.
1. 3D Jelly Blobs and Water Droplet Art
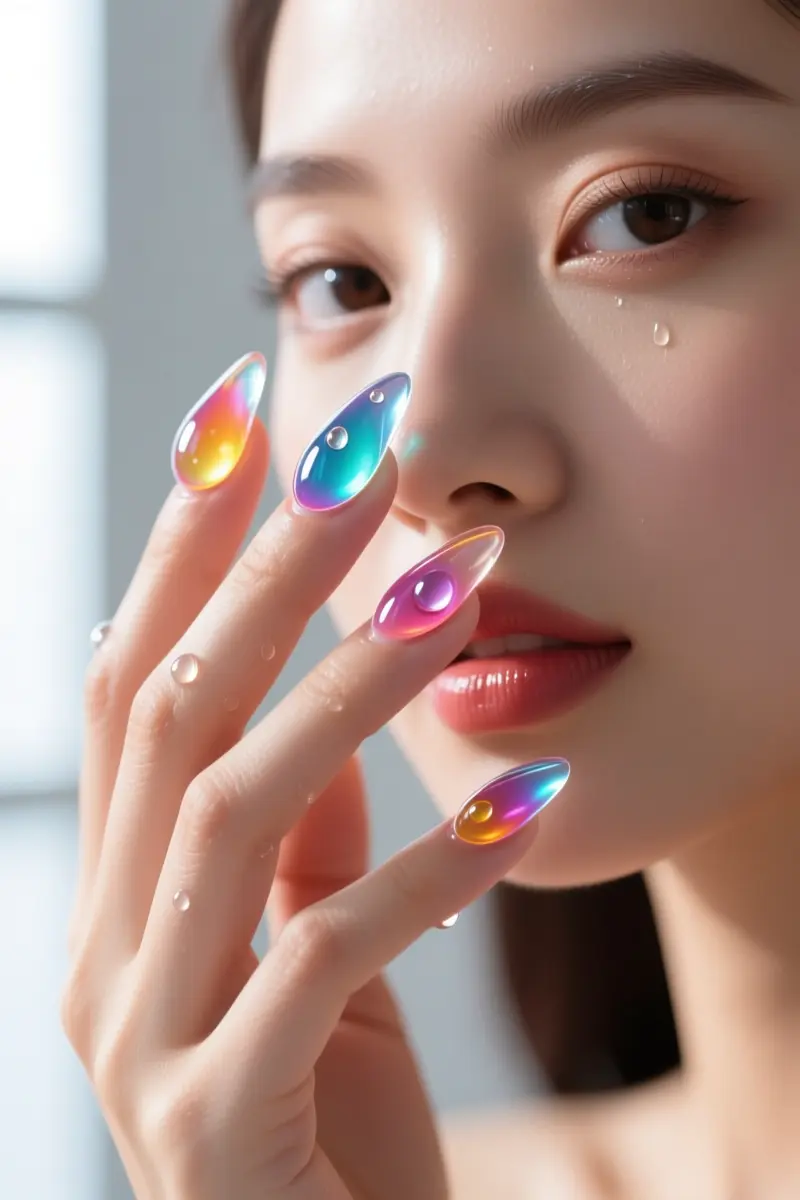
3D jelly blobs and water‑droplet art use clear, high‑viscosity builder gel to create raised, tactile droplets over vibrant base polishes.
Start with a glossy base coat that doubles as a smooth foundation, then dispense the self‑forming liquid gel from the Top Water Drops Kit.
After 30-60 seconds, the gel naturally gathers into bead‑like droplets.
Because the layer is thick, cure it for the full 90-120 seconds under a UV lamp or 60 seconds under LED; shorter cycles leave uncured pockets that can cause lifting.
Use a micro‑detail brush to push each droplet into place and to shape the edges for a crisp wet‑look.
Many users report that the raised blobs catch on knit sweaters or loose hair, so keep nail length at a comfortable bite‑size and avoid overly bulky fabrics.
A common mistake is sealing the design with a regular top coat; the extra layer softens the sharp edges and defeats the 3D effect.
The kit is HEMA‑free, safe for sensitive nails, and can last 21 + days before a soak‑off removal.
While the look is eye‑catching, it suits those who don’t mind occasional snagging and who can dedicate the extra curing time.
2. Retro Melted Checkerboard Patterns
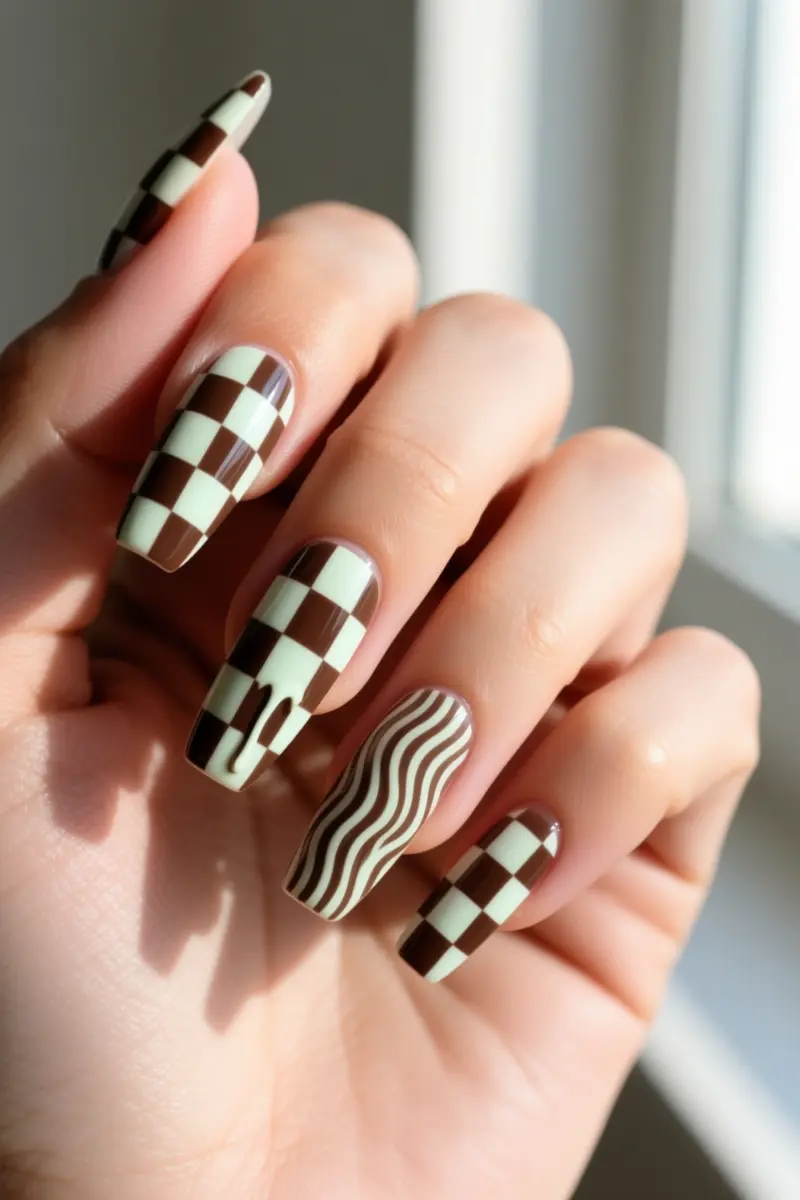
Retro melted checkerboard patterns add wavy, distorted vibes to the classic 1970s design. The vertical stripes create nail bed elongation, making short nails look longer.
On very narrow nail beds, the same lines can feel cramped and cluttered, so consider a slightly wider nail width before committing.
A long striper brush is the tool of choice for this freehand nail art. Its extended tip lets you glide smooth curves without breaking the line, something a standard polish brush often can’t achieve. Keep the brush angled at about 45 degrees for even pressure and tighter control.
Because each curve is painted by hand, the design typically doubles the service time of a simple solid manicure.
Salons usually charge $45‑$70 for the extra labor, depending on location and artist skill. If budget matters, try a DIY version with a fine‑tip brush and steady hand, but expect a learning curve.
The look shines on medium‑to‑wide nail shapes and pairs well with matte top coats that mute the busy pattern.
Avoid this style if you favor low‑maintenance nails or have very short, narrow digits, as the visual effect may not translate as intended.
3. Contrasting Chrome Starbursts on Aura Bases
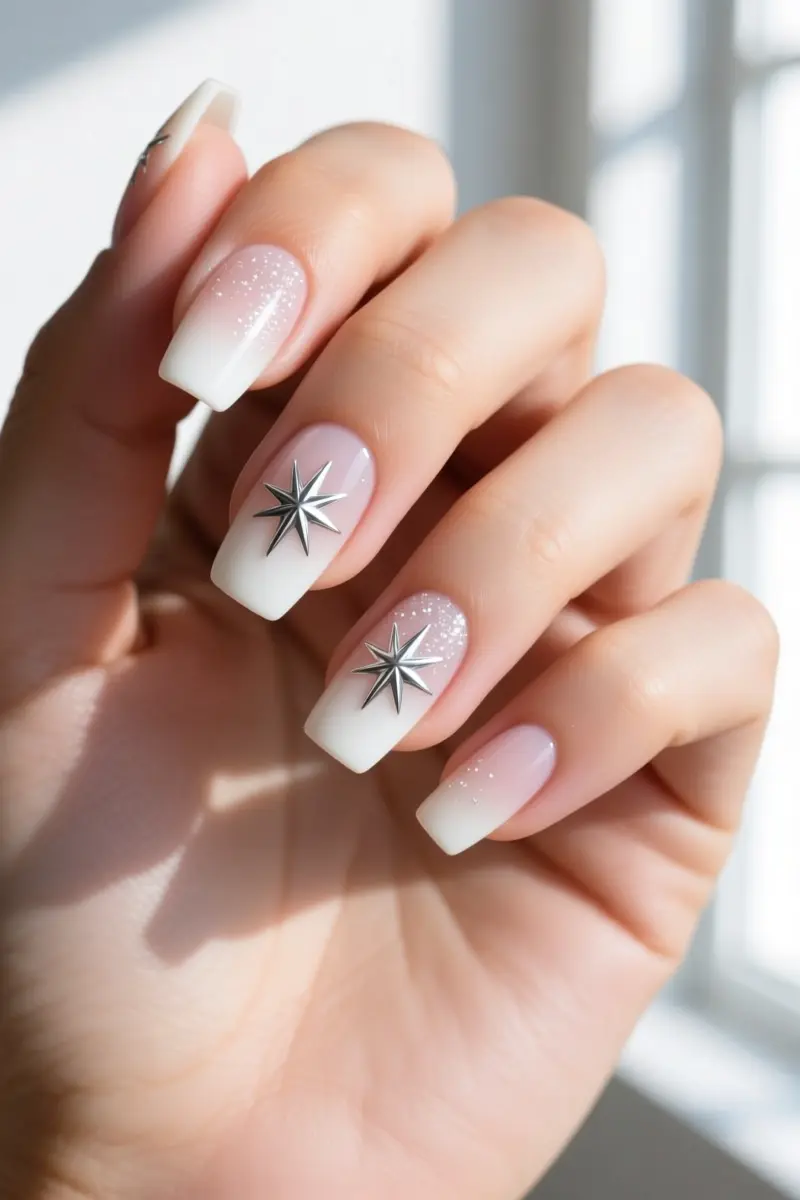
Contrasting chrome starbursts on aura bases fuse a soft, airbrushed background with sharp metallic stars.
Aura nails use airbrush ink, which gives a sheer, gradient finish that stays flexible under pigment powder.
For the stars, choose chrome pigment powder instead of liquid inks because the powder adheres only to tacky surfaces.
After the aura dries, draw each star with a fine brush and seal it with a no‑wipe top coat; the tackiness captures the silver or gold chrome powder while the surrounding aura repels it.
A milky white aura paired with white‑pearl chrome creates a creamy, interior shine that looks icy in any light.
Almond‑shaped nails soften the metallic flash, while square tips amplify the futuristic edge.
Adding a dusting of micro sparkle beneath the chrome adds depth without turning the design into a glitter nail.
Because chrome can chip quickly at the nail tips, finish with a double‑cap top coat: two layers of no‑wipe top coat cured separately to lock in the pigment.
This extra seal extends wear time by several days, especially on square nails that experience more friction.
4. Fully Mismatched ‘Chaos’ Nails
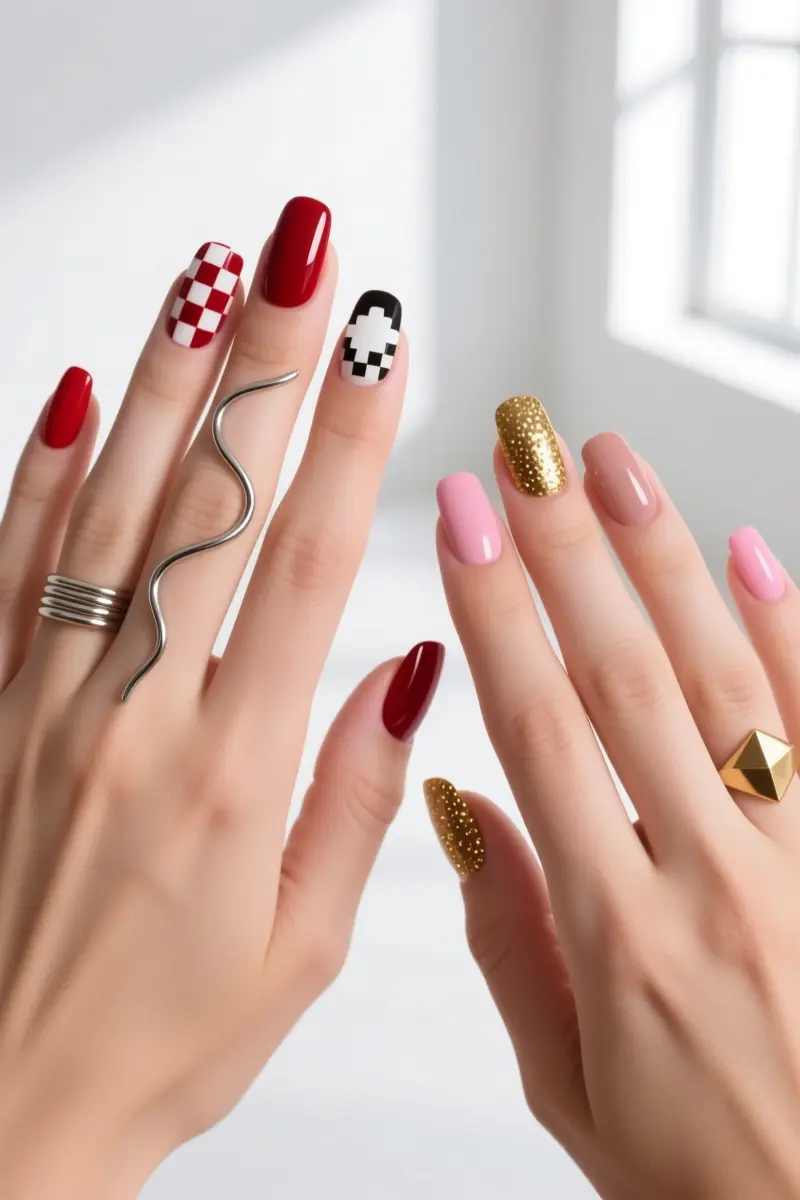
Fully mismatched “Chaos” nails let each finger showcase a unique design while still feeling intentional.
The 2026 “Chaos Manicure” is a new status symbol, spotted daily in Gurgaon and Bandra office cafeterias where coworkers pause to admire the anti‑perfectionist vibe.
A typical set might pair a sleek cherry‑red nail on the left hand with a checkerboard thumb, a squiggly chrome line on the index finger, and a pixelated cloud on the ring finger of the right hand.
To keep the look from feeling sloppy, start with a cohesive color palette, choose tones that sit next to each other on the color wheel, then repeat a tiny element like a gold speck or matte finish across the fingers.
Balance busy designs with simpler ones and keep the overall finish (glossy or matte) consistent.
This mix-and-match manicure strategy lets each nail express its own “moment” without sacrificing overall harmony, a point many users cite as “funky nail inspo swipe” energy.
A practical shortcut is to use high‑quality press‑on nails. They cost far less than a salon session, can be swapped in minutes, and let you experiment with bold textures without committing to a permanent paint job.
Pro tip: buy a starter kit with assorted shapes and finishes, then curate the set at home by arranging the pieces before gluing, ensuring the final spread looks deliberately curated rather than random.
5. Neon Animal Print on Sheer Negative Space
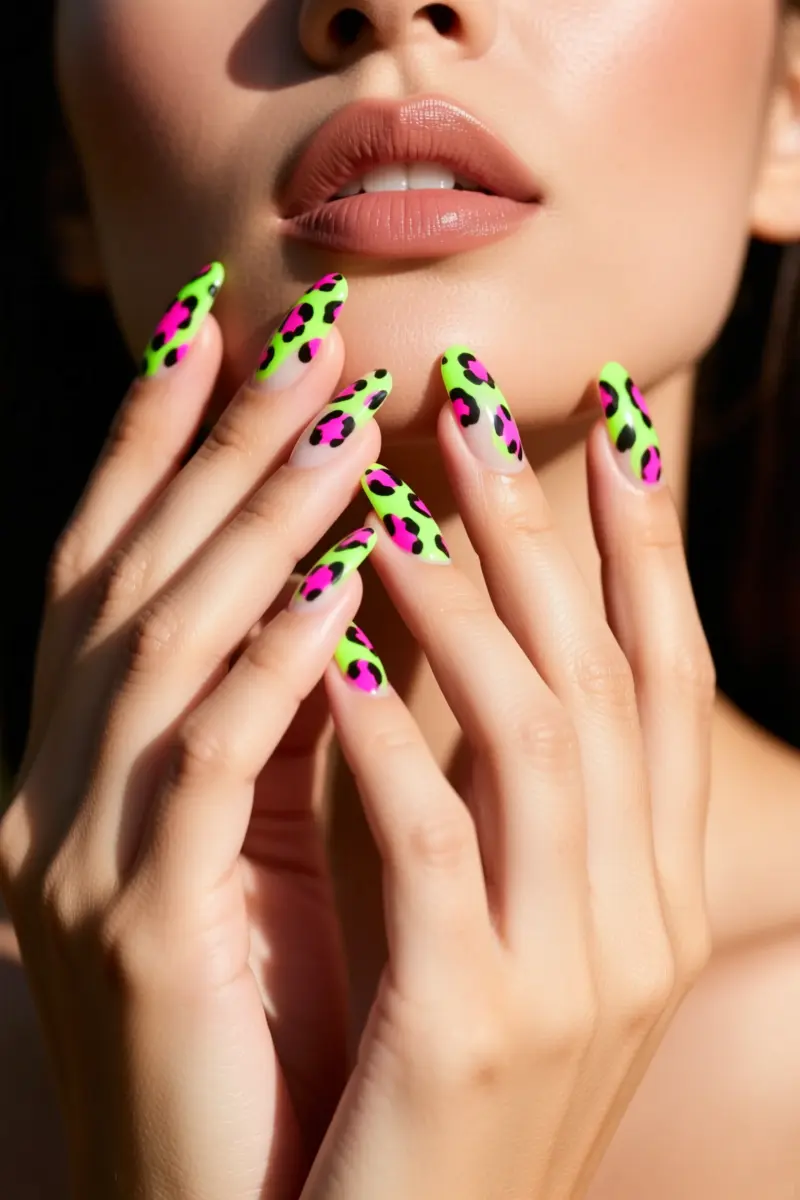
Neon animal print on sheer negative space gives a bold, playful vibe while keeping the manicure airy.
Start with a milky base coat that lets skin show through; the translucency balances neon pigments and prevents the colors from overwhelming the eye.
Apply leopard spots or zebra stripes in electric pink, lime, or electric blue, letting the negative‑space gaps remain clear for breathing room.
Warm‑toned skin makes the neon hues pop, while cool undertones can mute the brightness slightly.
The pigments react to sunlight, so colors fade faster after prolonged exposure, making this style less reliable for all‑day outdoor events.
Many readers report feeling a cool‑girl energy and a confidence boost without trying too hard. The look works well for rooftop weekends, music festivals, and casual coffee runs, where a flash of color feels appropriate.
A common mistake is using a thick, chalky white base before the neon pattern; it blocks the sheer effect and makes the design look heavy.
Stick to a thin milky coat and seal with a quick‑dry top coat to extend wear.
6. Pop Art Cartoon Outlines
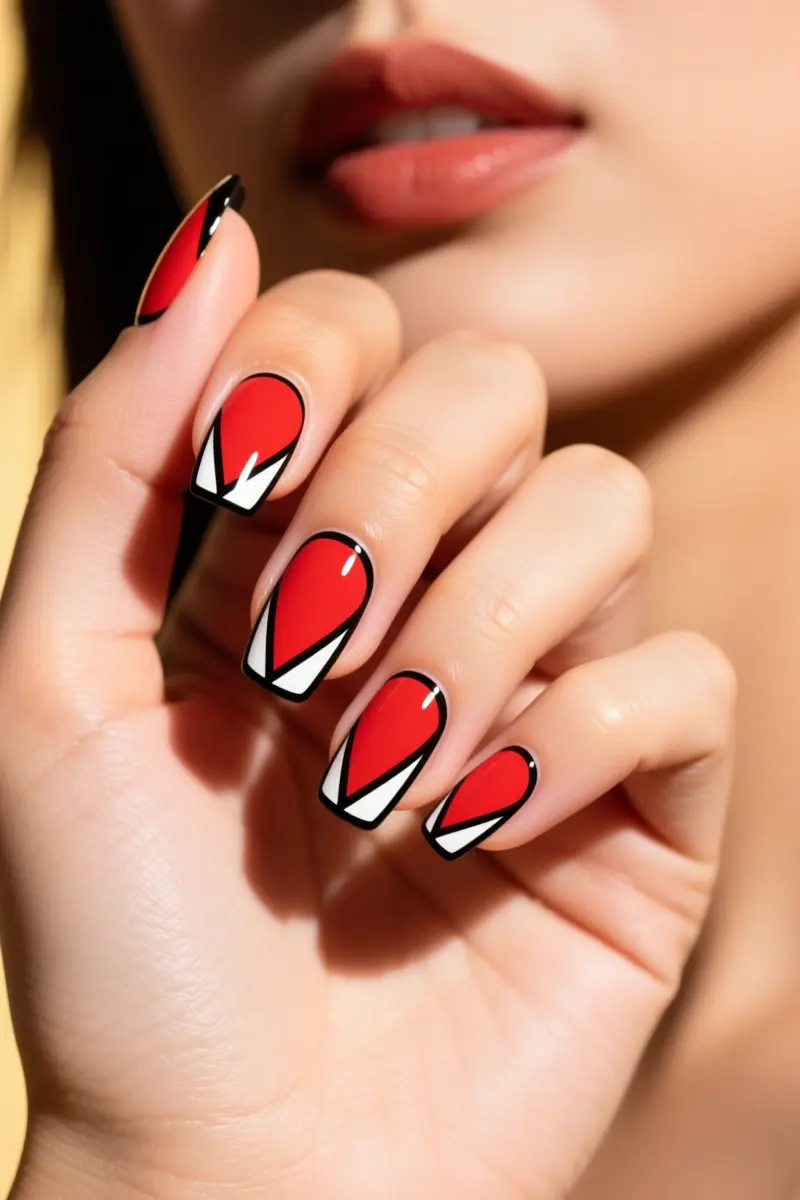
Pop Art cartoon outlines turn each nail into a bold 2D comic panel.
The style pulls bright reds, yellows, or blues for the base, then adds razor‑sharp black outlines and thin white highlight lines that mimic comic‑book shading.
The result feels like a miniature pop‑art print that refuses to blend in. These 2D comic nails work best on short to medium lengths where the outlines stay visible.
For crisp, non‑bleeding lines, a highly pigmented non‑wipe black gel paint is essential; regular polish tends to feather and lose definition after a few hours.
A matte finish seals the design, but it also shows dirt and stains faster than glossy coats, so a quick swipe with rubbing alcohol every two days keeps the artwork sharp.
Many users pair pastel or neon backgrounds with the black or white outlines to maximize contrast, and a daily dab of cuticle oil prevents the colors from drying out.
The look traces its roots to the 1950s‑60s pop art movement, so you can echo iconic artists by swapping primary colors for a monochrome scheme or adding speech‑bubble text for extra personality.
7. Encapsulated Chunky Glitter and Jelly Polish
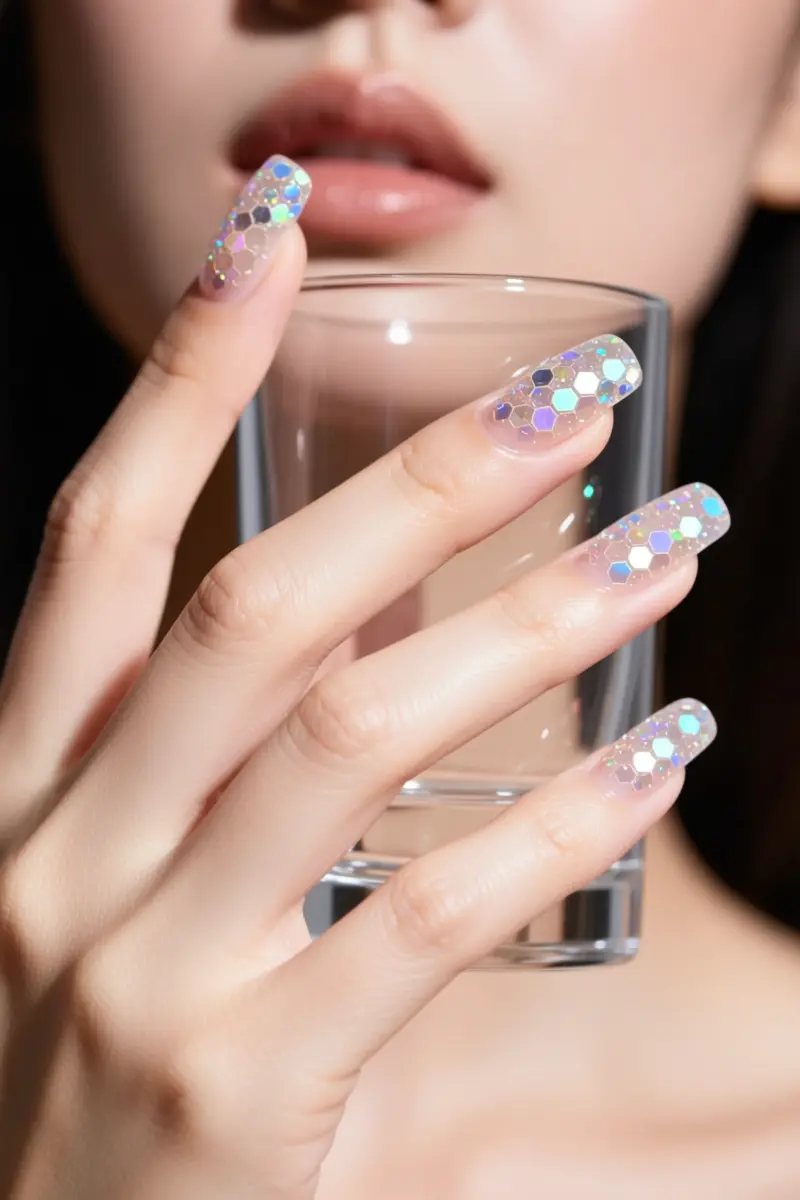
Encapsulated chunky glitter beneath translucent jelly polish delivers a bold, layered look that pops on any hand.
The glitter is trapped in a hard gel or acrylic base, creating a smooth, glass‑like surface that won’t chip as the jelly topcoat wears.
Professional‑grade hard gel extensions hold the suspended hexagonal particles securely, so the design stays flawless for up to four weeks.
A typical Soft Glitter Nail set, which uses 100% hard gel builder, color, and top coat, costs roughly $238 and is handcrafted to each nail bed.
If you prefer a DIY route, Polish Pops gel nail kits start around $12 and give about 14 days of wear, though they lack the full encapsulation strength of salon‑grade hard gel.
Both options offer finish choices from super shiny to velvety matte, and the set can be renewed twice.
Removal must be done with a soak‑off removal process; trying to peel or scrape the encapsulated glitter will gouge the natural plate.
A licensed technician can dissolve the gel safely, preserving nail health.
Because the design requires hard gel, expect salon fees of $50‑$120 per session, a worthwhile trade for a nail that truly refuses to blend in.
8. Psychedelic Clashing Swirls
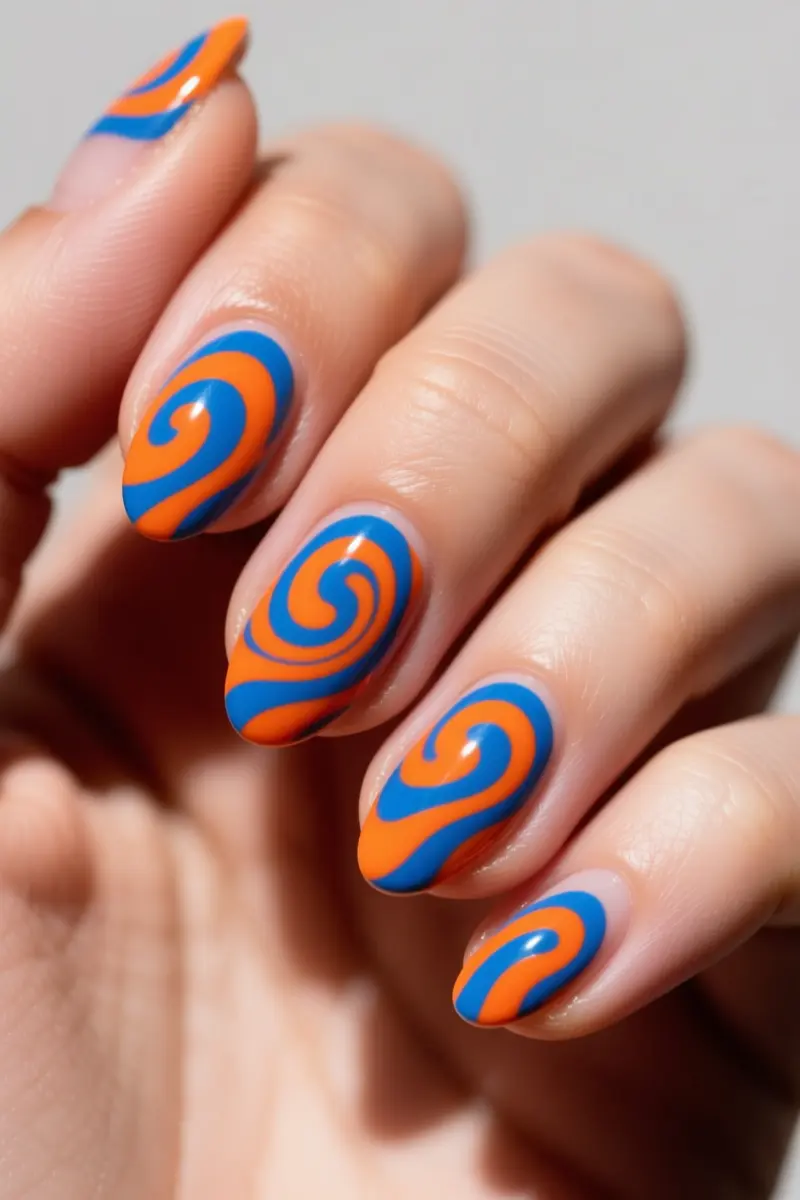
Psychedelic clashing swirls create wavy, multi‑colored lines that wrap around the nail edge.
The design uses highly contrasting colors, think orange meeting cobalt blue, to form an optical illusion that elongates almond and coffin nail shapes.
Because abstract art nail designs express mood rather than depict objects, the freeform swirls feel like a miniature canvas on each fingertip.
A thin brush and two polish shades are enough; no professional training is required. Apply the first color in a smooth curve, then flash cure for five seconds before adding the next hue.
Repeating the flash cure for each line prevents the contrasting color wheel from bleeding, keeping the edges crisp.
The right abstract nail color can make hands look longer, younger, and more polished, which is why this look shines on almond nail shape.
Many people find the vivid swirls perfect for a full‑on psychedelic retro vibe, especially when neon shades echo 70s psychedelia.
A practical downside is the extra curing time; each line adds five seconds, so a full set can take fifteen to twenty minutes.
The effect also works best on longer nails; short, round tips may lose some of the illusion’s impact.
9. Velvet Cat-Eye with 3D Chrome Framing
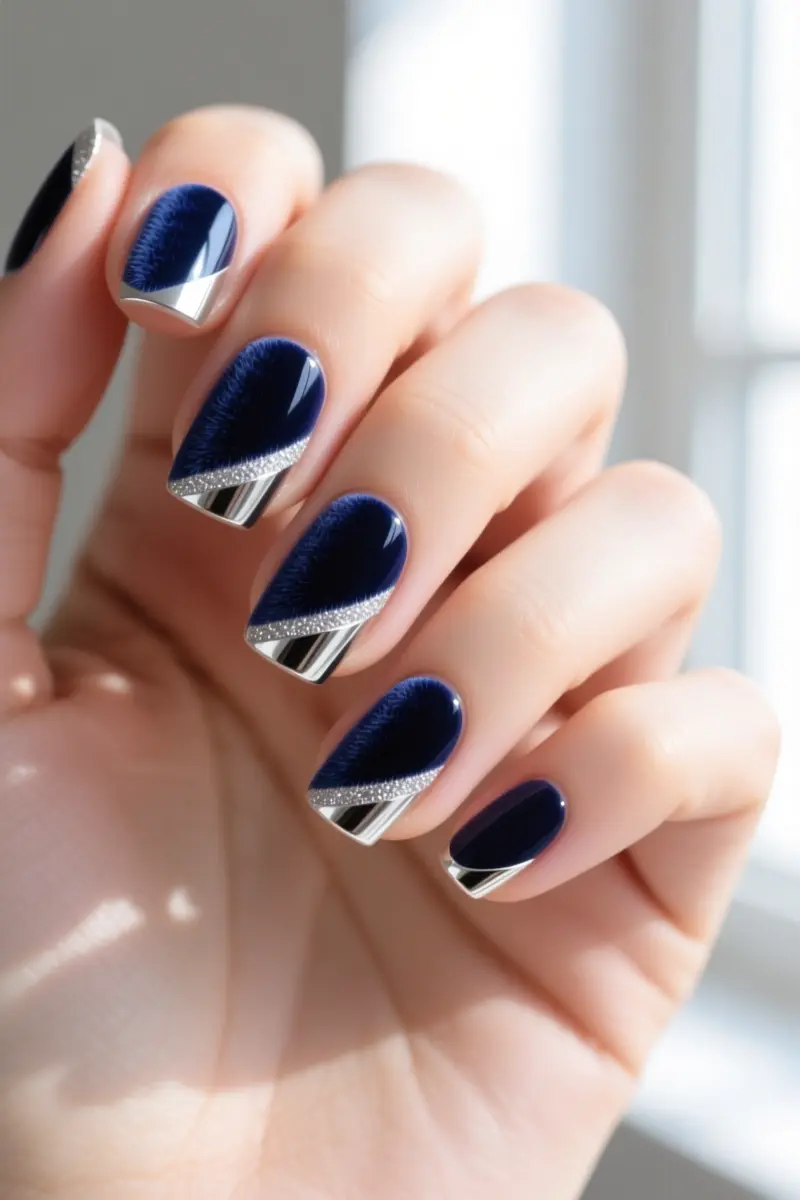
Velvet cat‑eye nails framed with 3D chrome create a bold, playful look that refuses to blend in.
The base uses magnetic polish, which contains fine magnetic particles that give a fuzzy velvet effect when a magnet is swept across the wet coat.
For the cat‑eye line, the magnet is held at a slight angle so the particles align in a straight, diagonal stripe that mimics a cat’s eye.
A thin rim of metallic chrome powder is then applied while the polish is still tacky, and a second pass of the magnet softens the edge into a diffuse, dimensional glow instead of a harsh line.
This manipulation of the magnet tool is the key expertise that separates a polished finish from a jagged outline.
Because the technique combines two premium steps, velvet cat‑eye and raised chrome detailing, salon prices reflect the luxury.
One report lists a gel‑X manicure with chrome and cat‑eye at roughly $90, while detailed nail art can add about $14 per nail on top of a $150 basic gel set.
Many nail artists describe the light play on velvet nails as “magical,” and the effect appears quickly, which suits clients who dislike long appointments.
The main limitation is cost; the dual‑technique approach is best reserved for special occasions or those willing to invest in high‑end nail art.
10. Pierced Tips and Hanging Nail Charms
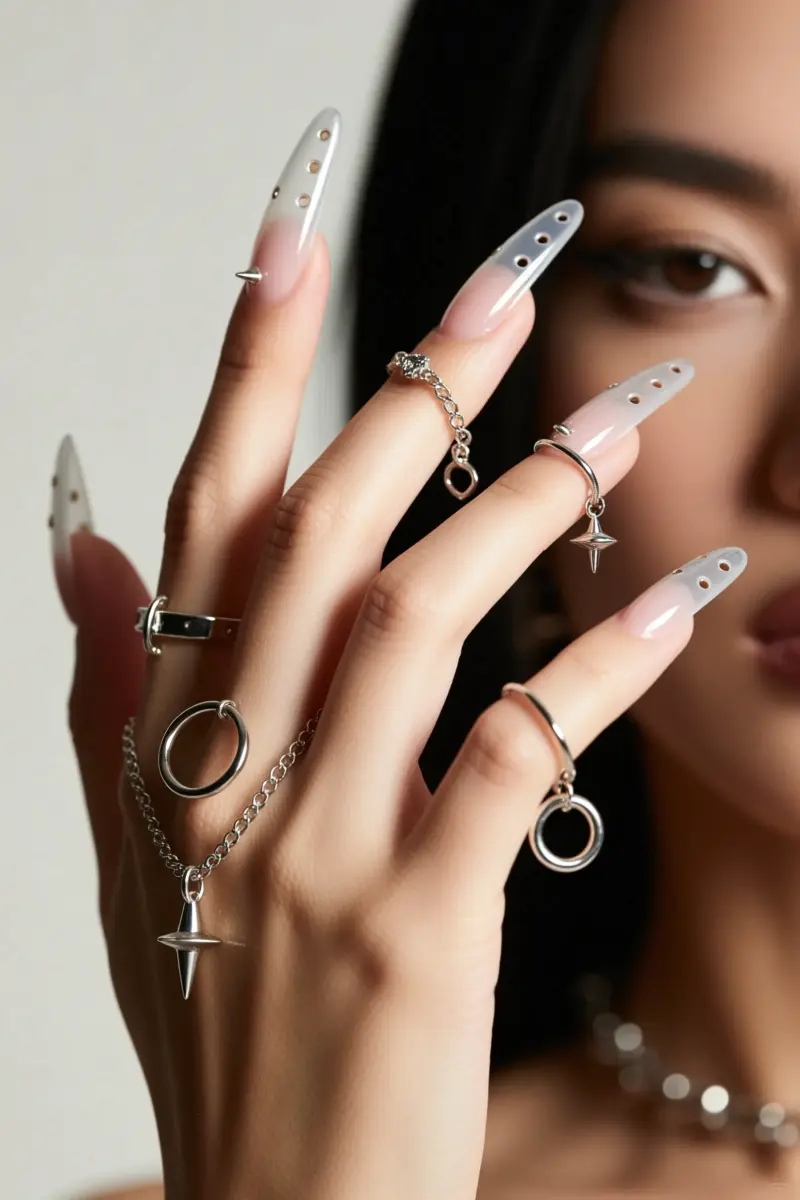
Pierced tips and hanging nail charms give an edgy Y2K vibe by drilling tiny holes in acrylic extensions to suspend metal charms.
Nail piercing involves creating a small hole through the tip of an acrylic or gel nail extension, then threading rings, chains, dangle charms, spikes, barbells, or mini hoops.
The look is hot on fashion runways and social‑media feeds, borrowing from 90s hip‑hop and the Y2K revival.
Because the process uses no needles, no blood, and no healing time, it feels low‑risk, but the risk lies in the hardware.
Many people find the dangling charms snag on keyboards, pockets and zippers, turning a bold statement into a daily annoyance.
A strong warning: never attempt this on natural nails, as the drilled tip causes immediate splitting and painful tearing.
Maintenance is straightforward but essential. Remove the charms before swimming, showering, or exercising, and keep them away from perfumes, lotions, and harsh chemicals.
Store the metal pieces in a dry jewelry box or pouch when not in use.
Commercial kits, such as a 12‑case of gold‑and‑black spike charms, make the trend accessible, yet it works best for those comfortable with acrylic or hard‑gel extensions and willing to trade convenience for visual impact.
Your Next Nail Moment Awaits
Pick the style that matches your vibe, then prep with a strong base coat to lock in color. Keep a top coat handy for touch-ups, and avoid harsh detergents that can lift glitter or 3D elements.
A thin layer of nail strengthener before the base can also help prevent premature chipping.
Schedule a professional removal if you’ve layered encapsulated charms or thick acrylic structures.
With the right prep and maintenance, these funky designs stay fresh far longer than a quick swipe of polish.
Pin this guide for your next salon visit, share it with a friend craving a nail rebellion, and let your fingertips do the talking.
Frequently Asked Questions
What are some funky nail art ideas?
Popular options include 3D jelly drops, hand-painted retro checkerboards, mismatched designs on each finger, neon animal prints over negative space, and textured chrome starbursts.
How long do 3D nail art elements typically last?
When cured with professional-grade builder gel or dedicated nail charm adhesive, 3D elements will stay securely attached for two to three weeks.
Are funky nail designs expensive to get at a salon?
Yes, because they require advanced techniques and significant time, custom hand-painted or 3D art can add $30 to $100 or more to the cost of a basic manicure.
Can I do complex funky nail designs on short natural nails?
Yes, graphic prints, mismatched colors, and minimal 3D drops work exceptionally well on short natural nails without needing long extensions.
How do you clean matte cartoon or pop art nails?
Wipe the surface of matte nails with a lint-free wipe saturated with 90% isopropyl alcohol to quickly remove dirt, oils, and makeup stains.