

9 Practical Short Back-to-School Nail Trends That Actually Last
Long, dramatic nails look amazing online, but they quickly become a nightmare when you’re typing essays, opening lockers, or sprinting between classes.
Heavy typing, science labs, and a packed schedule make extensions impractical for any student.
Short nails offer the perfect blend of style and practicality, staying strong through typing and sports while keeping maintenance low.
We’ve gathered nine short‑nail trends that actually last all semester.
From gel polish that holds for two to three weeks to budget‑friendly lacquer you can change every few days, each look works with busy hands.
Sheer and negative‑space designs hide regrowth better than dark solids, so you stay cute without constant touch‑ups.
1. The Clean Girl Micro-French
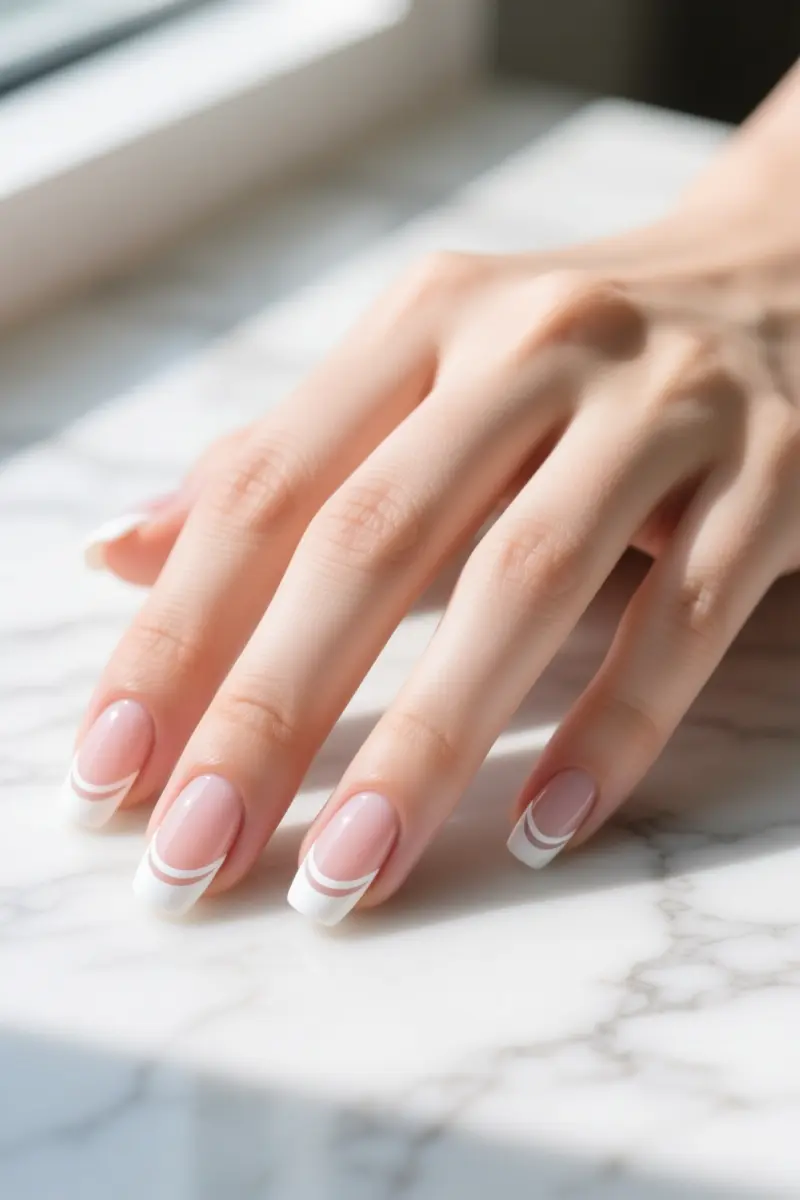
The Clean Girl Micro‑French is an ultra‑thin smile line applied to short nail beds for a lengthening effect.
A traditional thick smile line often makes a short nail look stubby, while the micro‑line hugs the free edge and creates the illusion of extra length.
It works best on nail beds under 2 cm, where even a subtle tip can change the whole silhouette.
A DIY regular polish version costs about $5 for a bottle and typically lasts 4-5 days on short nails, which equals roughly $1.00 per week.
A professional gel manicure runs $40-$45 and can survive 2 weeks, bringing the weekly cost to $2.00-$2.25.
The gel option offers stronger wear but requires UV light and removal chemicals, adding time and potential dryness to the nail bed.
The Micro French Reusable Pop‑On Manicures provide a non‑damaging, salon‑quality alternative to gels, dips, acrylics, and press‑ons.
Priced around $18, each set claims up to 30 days of wear and can be reapplied up to six times, delivering a cost‑per‑week of roughly $0.30.
The tips are bend‑and‑crack resistant like acrylic yet appear natural, earning a 4.5‑star rating from four reviewers.
Availability is limited; the product was sold out at the time of capture, so planning is advisable.
2. Sheer Jelly Blush Nails
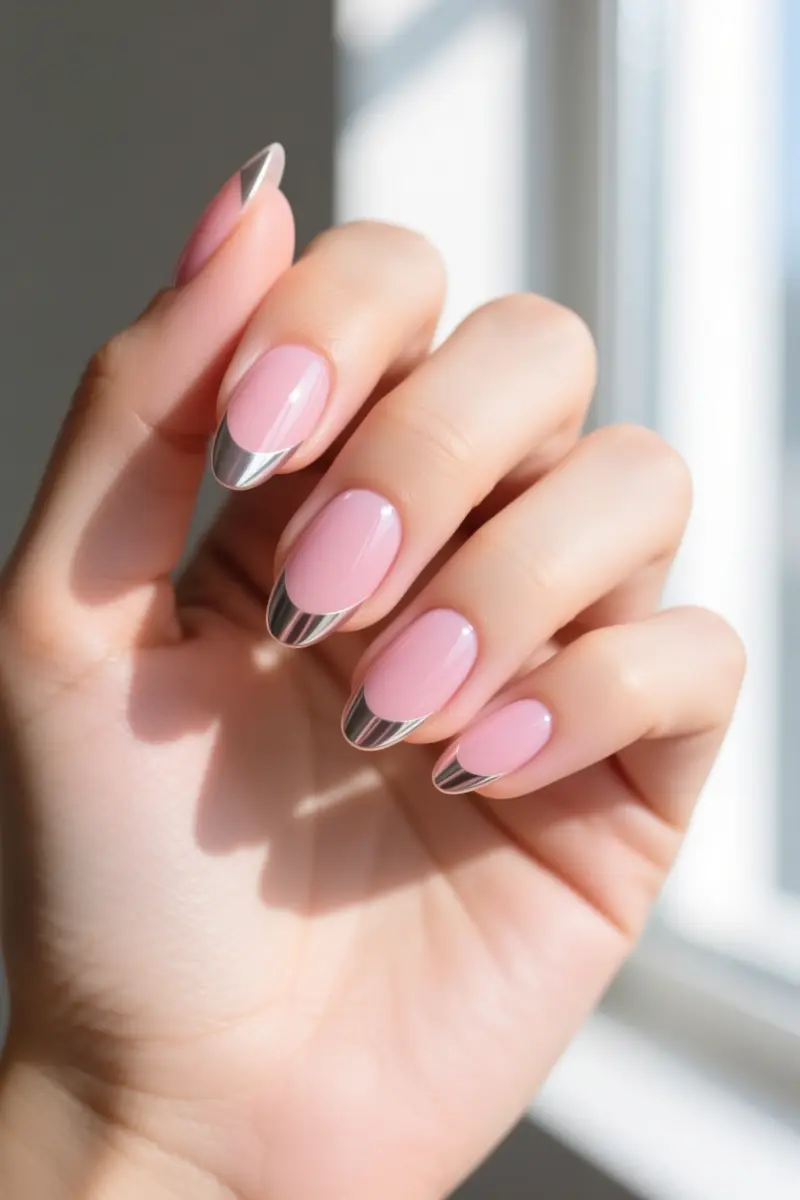
Sheer Jelly Blush Nails give a semi‑translucent flush that mimics a natural skin tone while keeping the nail’s own texture visible.
The jelly polish finish is high‑gloss and lets the nail show through, creating a sheer wash that looks like a soft syrup coating.
Because the color sits on a clear base, cuticle regrowth is virtually invisible even after three weeks, making the style last through a full school term.
The 2026 palette leans toward softer hues, sheer coral, butter peach, sea‑glass blue, and translucent cherry, paired with short almond or short square shapes that dominate the trend.
Adding a glazed chrome top over the jelly base adds a subtle sparkle without sacrificing durability.
This look differs from lip‑gloss nails, which stay neutral; jelly nails incorporate a hint of color for a more polished vibe.
Expert tip: dilute a regular cream polish with a clear topcoat in a 1:2 ratio, then apply two thin layers and finish with Hardwear Shine UV Top Coat (about $18).
The mixture creates the same sheer, jelly‑like effect without buying a specialty formula, and the top coat locks in the shine for weeks.
3. Matte Pastel Skittles
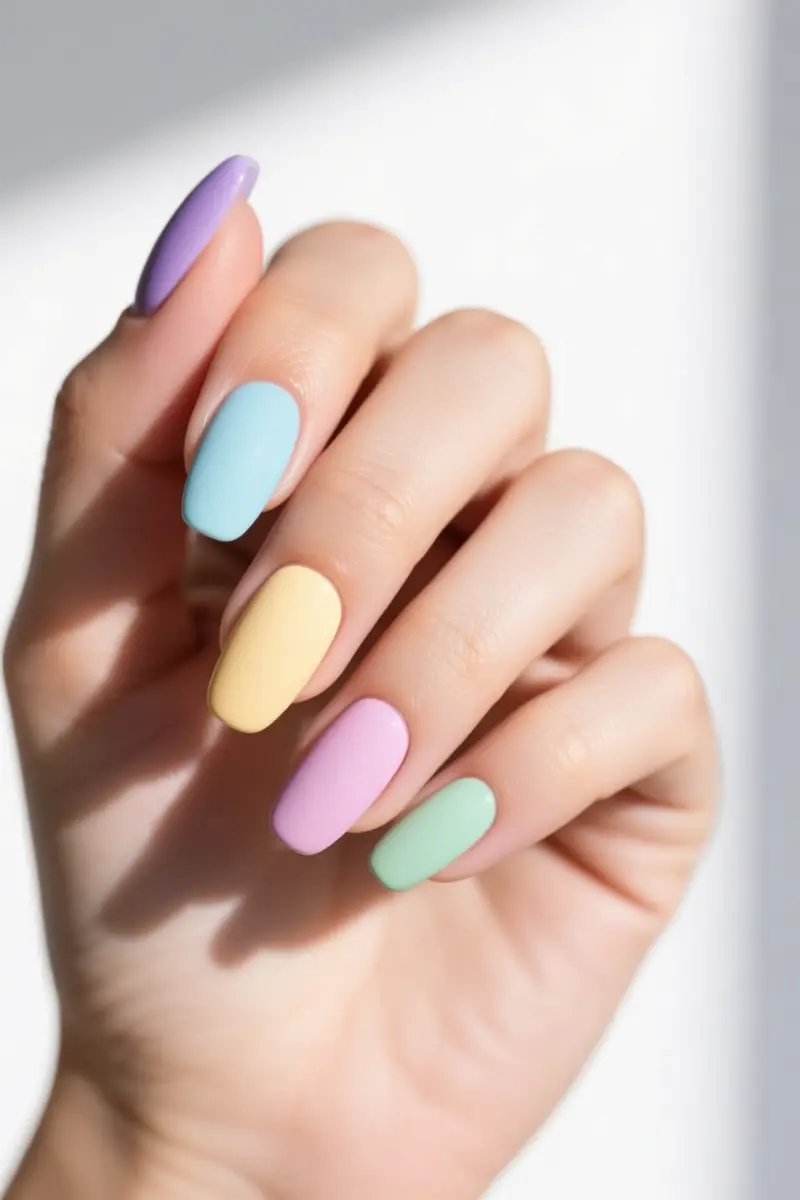
Matte Pastel Skittles delivers a multi‑colored pastel palette where each finger showcases a different muted shade, sealed with a matte topcoat.
The matte finish turns the polish into a soft, velvet‑like surface that diffuses light, making each pastel hue appear deeper and more vibrant.
Because silica creates a gritty texture, the look feels modern without the glare of glossy polish.
A practical downside is that matte topcoats reveal dirt and oils faster than glossy finishes, and they typically soften to a semi‑gloss within four days.
Many people notice the finish losing its flat look and becoming uneven, which shortens the overall longevity of the manicure.
If you prefer a longer‑lasting look, choose a no‑wipe matte topcoat, which leaves less sticky residue and can help prevent early chipping.
Pro tip: keep a cotton pad soaked in rubbing alcohol handy. A quick swipe removes surface oils and restores the matte texture without stripping the color.
This simple step extends the fresh appearance of the skittle manicure and keeps the pastel palette looking crisp through the school week.
4. Minimalist Abstract Lines
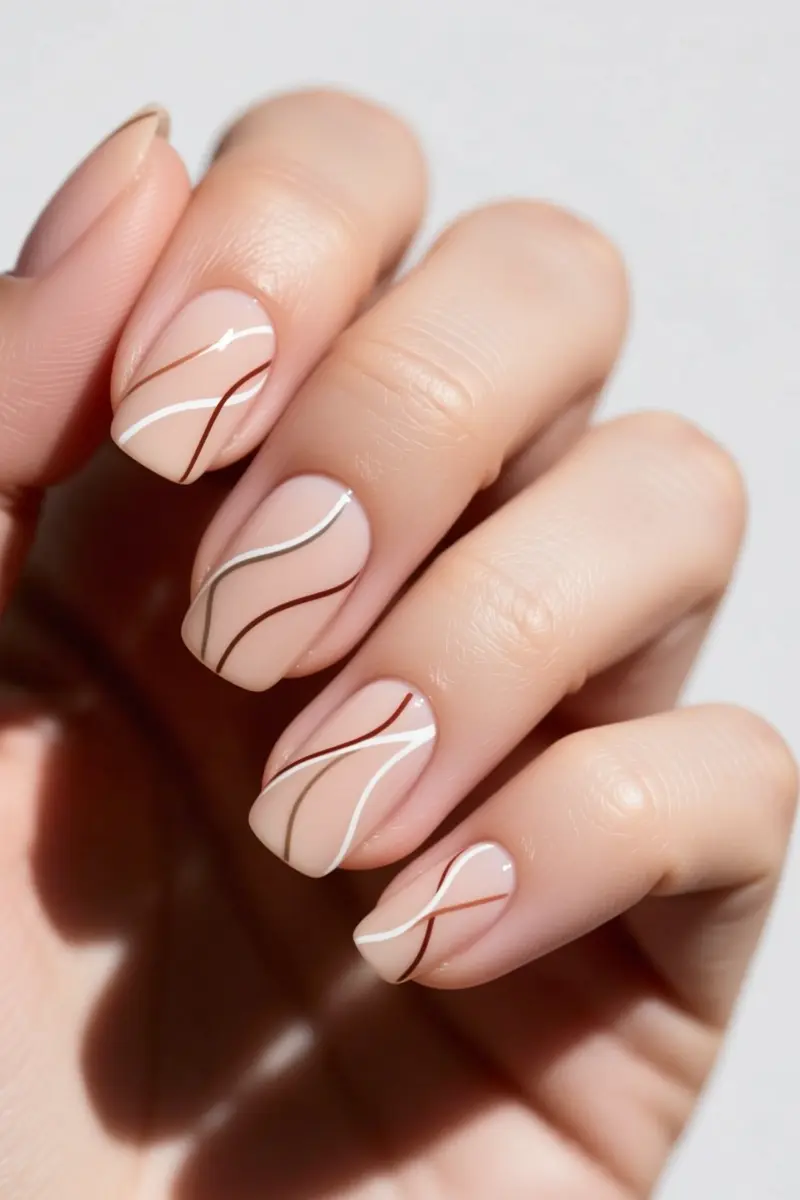
Minimalist abstract lines look chic on short nails by using fine organic strokes over a nude base.
A nude or bare base lets the line work breathe, so the design stays visible even as the free edge chips.
A 7 mm liner brush is the sweet spot for short nail surfaces; it offers enough width to lay down a steady line without overwhelming the limited space.
Many artists also keep 5 mm and 10 mm brushes handy for thinner accents or thicker accents, but the 7 mm size handles most freehand work reliably.
When you draw with a detailer brush, aim for fluid, slightly imperfect lines. The lack of perfect symmetry adds an artistic vibe and reduces pressure to draw perfect geometry.
Negative space designs are forgiving; if a chip lands near the tip, the open area already frames the nail, so the flaw blends into the concept rather than standing out.
For a quick setup, apply a clear base coat, let it cure, then paint a sheer nude polish.
Once dry, use the 7 mm brush dipped in a contrasting gel or liquid liner to sketch one or two abstract strokes across each nail. Finish with a top coat to lock the lines in place.
This approach delivers a polished school‑ready look without demanding intricate skill or constant touch‑ups.
5. Tortoiseshell Accent Nails
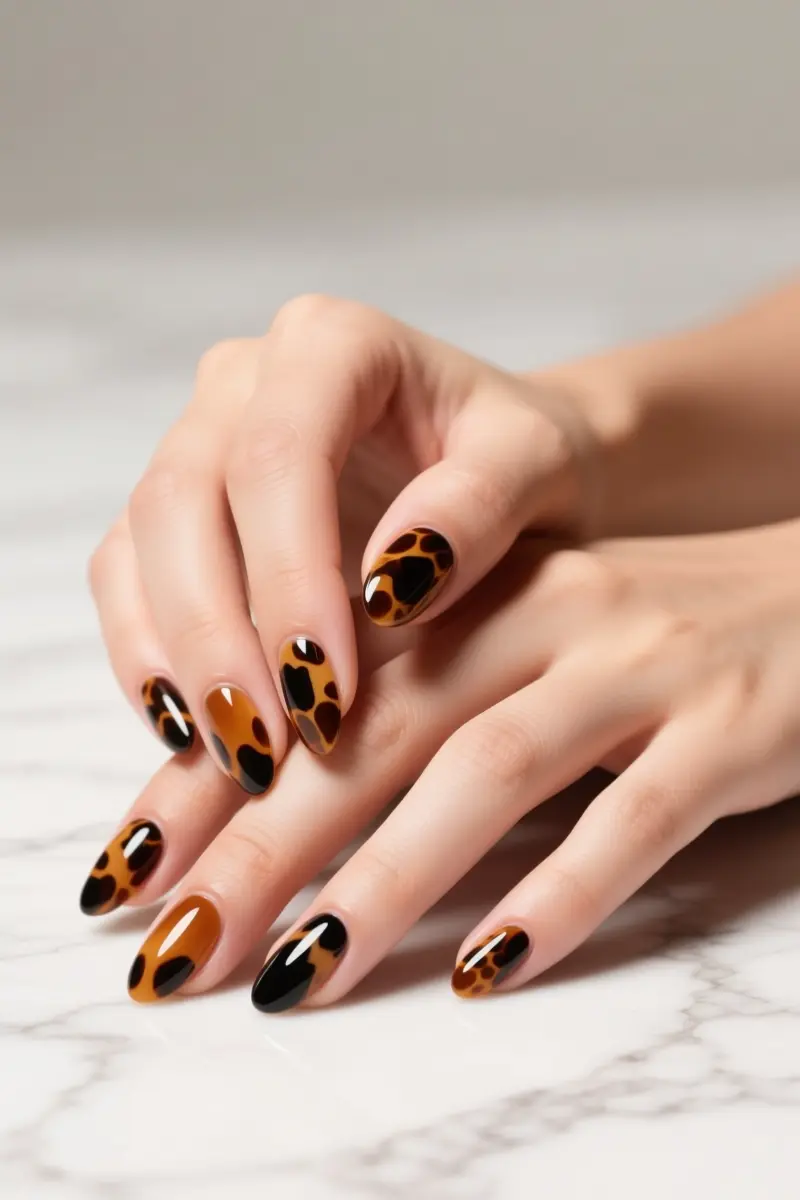
Tortoiseshell accent nails add a sophisticated touch to short back‑to‑school manicures.
A classic warm‑toned tortoiseshell pattern on one or two accent fingers creates dimension without overwhelming a busy school schedule.
The look is built by layering sheer amber jelly, caramel, and black polish in translucent coats, so the marbled effect mimics real tortoiseshell rather than a flat animal print.
Many people find the multi‑layered brown spots surprisingly effective at hiding minor chips, because each translucent layer masks imperfections underneath.
Salon appointments for this detailed nail art typically range from $45 to $70 per hand, reflecting the time needed to blend the three shades smoothly.
DIY versions are cheaper, about $15 for the three polishes, but require steady hands and a precise layering order; a slip can ruin the dimension and force a redo.
The technique works on short nails and can be done with regular polish, not just gel, as long as the translucent layers are applied correctly.
If you prefer a quick fix, limit the tortoiseshell to a single accent nail on each hand. This keeps the look refined while reducing the time and skill needed for a flawless marbled finish.
6. Magnetic Velvet Shimmer
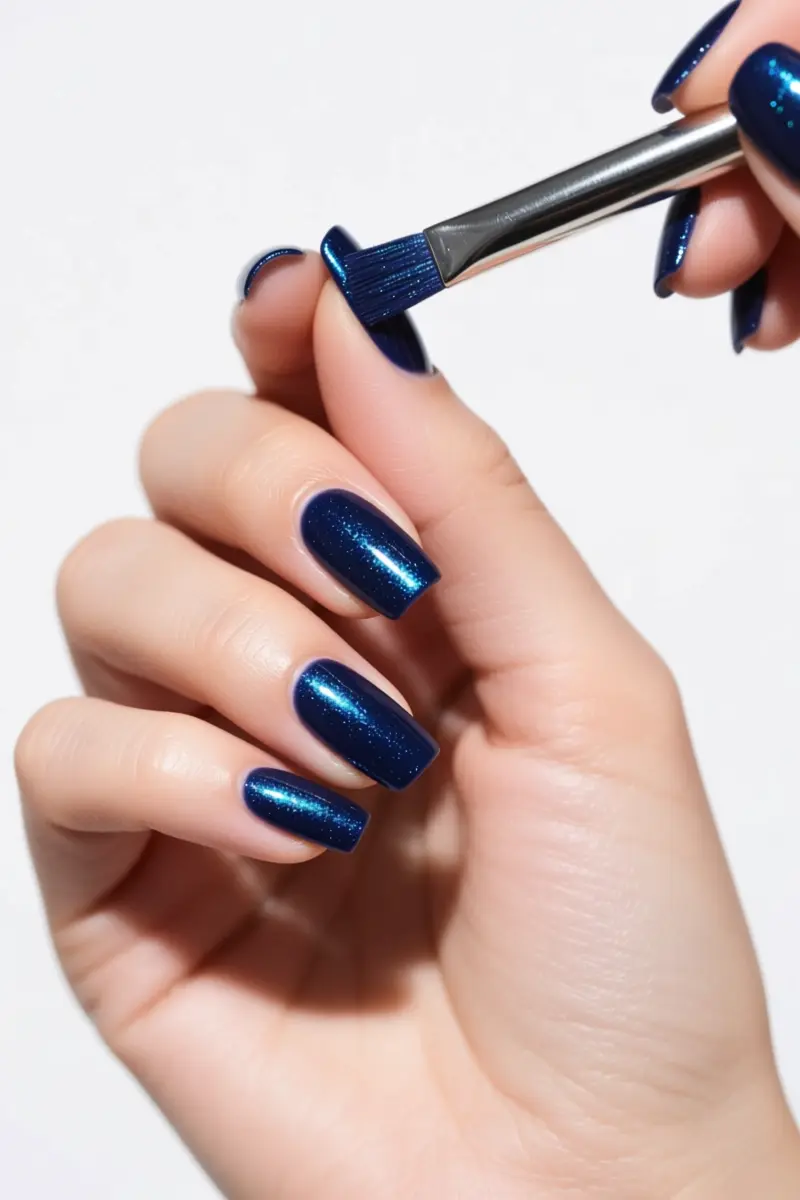
Magnetic velvet shimmer gives short nails a plush, light‑reflective finish that feels like crushed velvet.
The effect comes from a magnetic gel polish loaded with tiny iron filings that shift when a strong magnetic wand is swept over wet polish.
Place the wand parallel to one side of the nail for five seconds, then to the opposite side, and finally near the cuticle and free edge; the particles gather toward the center and create a hazy, multidimensional glow.
A ten‑second flash cure in a UV/LED lamp locks the pattern in place, preventing the shimmer from fading.
Because the magnetic formula is thicker than regular lacquer, it must be cured fully; under‑curing can leave residual iron particles on the skin and trigger contact dermatitis.
Use a 2.0‑tech UV lamp and follow the recommended flash time to stay safe.
Gel is essential here; regular nail polish dries too slowly, allowing the filings to settle unevenly and produce a blurry, grey look.
Current color trends include deep midnight blue, champagne gold, sage green, and burnt orange.
The look works best on short nails, where the velvet texture stays visible without overwhelming the surface.
Expect a learning curve: precise timing and a strong magnet are required, so beginners may want to practice on a single nail before committing to a full set.
7. Aura Sponge Art
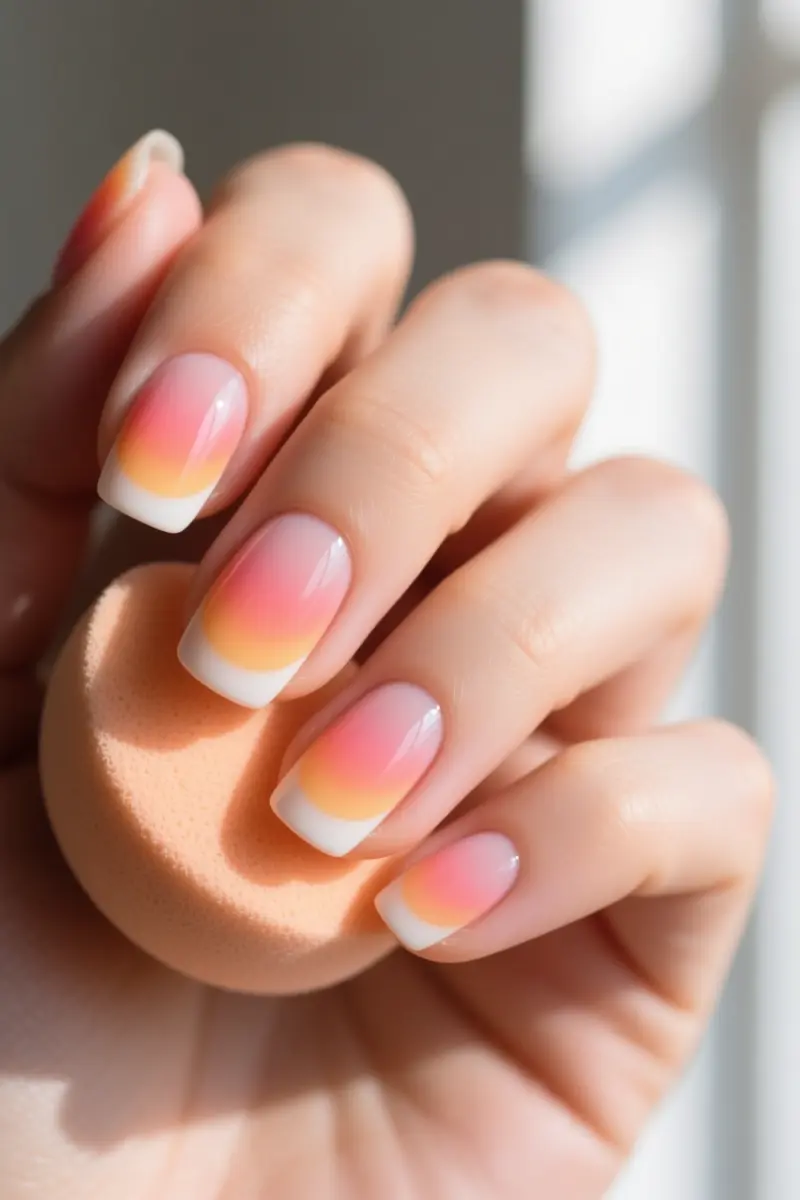
Aura Sponge Art creates a soft‑focus gradient burst in the center of each short nail.
The aura effect looks like a gentle glow radiating outward, a hallmark of aura nails that differ from traditional ombré by placing the brightest shade in the middle.
To DIY the look, dab a clean makeup sponge onto a base coat, then press three polish shades- light, medium, dark- onto the nail in a circular motion.
Blend quickly before the polish dries, keeping the center the most saturated.
Salons use an airbrush to spray the same gradient blend, which yields a smoother transition but requires professional equipment and higher cost.
Choose colors that complement the wearer’s skin undertone. Warm undertones pair well with peach, coral, or gold hues, while cool undertones shine with lavender, mint, or silver shades.
The right palette enhances the ethereal glow and prevents the design from looking washed out.
DIY enthusiasts love aura nails because the technique offers an artistic result without complex skills, and the trend has exploded on TikTok, with celebrities like Dua Lipa and Megan Fox showcasing the style.
A common mistake is overloading the sponge, which creates blotchy edges and ruins the gradient blend; using a light hand and wiping excess polish off the sponge keeps the center crisp and the fade seamless.
8. Academic Plaid Accents
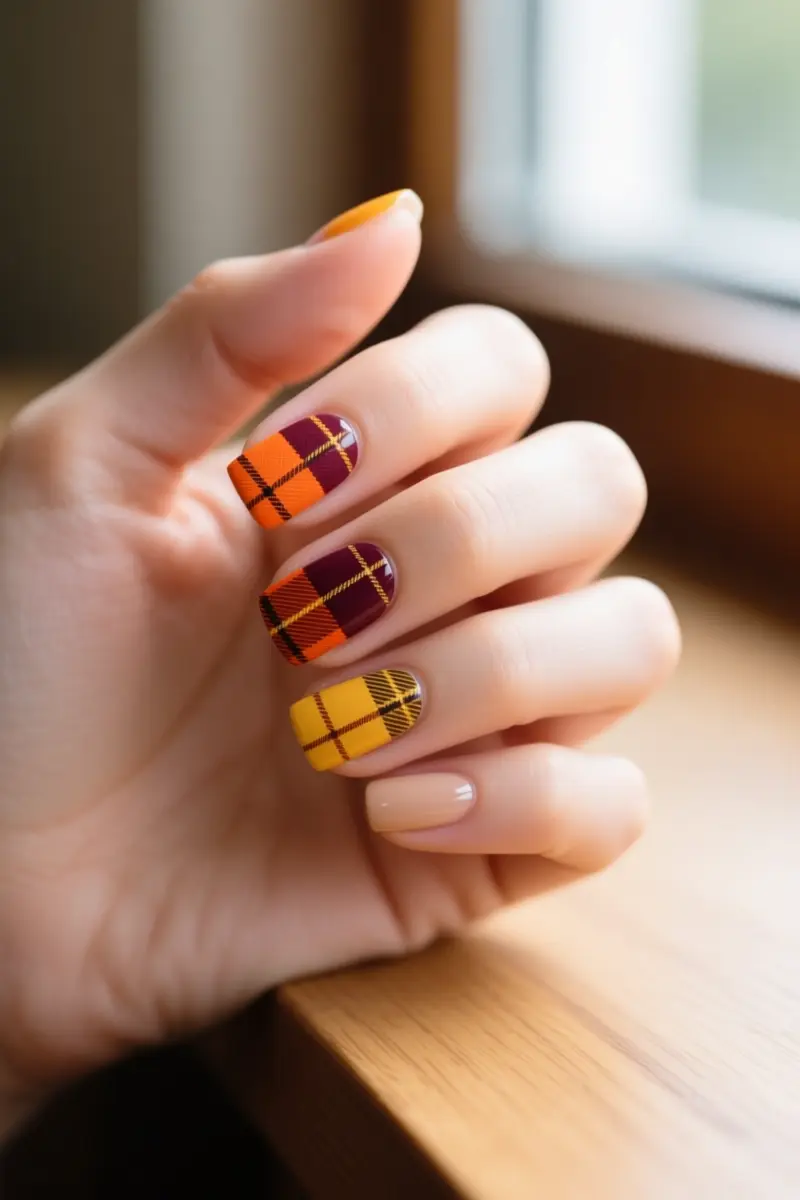
Academic plaid accents give short nails a scholarly vibe by featuring a crisp plaid pattern on a neutral base.
The design taps into fall’s cozy, classic feel, pairing warm autumn tones with a timeless check that looks effortless on a nude manicure.
Because short nails have limited space, most artists place the plaid on a single accent finger. This prevents clutter and lets the pattern pop.
Using striping tape speeds the process for the plaid design to about ten minutes per hand, while freehand painting with a precision brush can take fifteen to twenty minutes and demands a very steady hand.
The tape method reduces the risk of uneven lines, but mastering the brush gives more control over tiny intersecting stripes.
A common downside is the difficulty of achieving clean intersections on short nails; many people find the design tricky unless they restrict it to one accent nail.
The result looks polished, yet the extra detail may chip faster than a solid color, so a top coat is essential for durability.
This style suits short, square or oval nails with a nude or light‑colored base. It is less flattering on very short, rounded nails where the pattern can appear cramped.
9. Muted Sage Monochrome
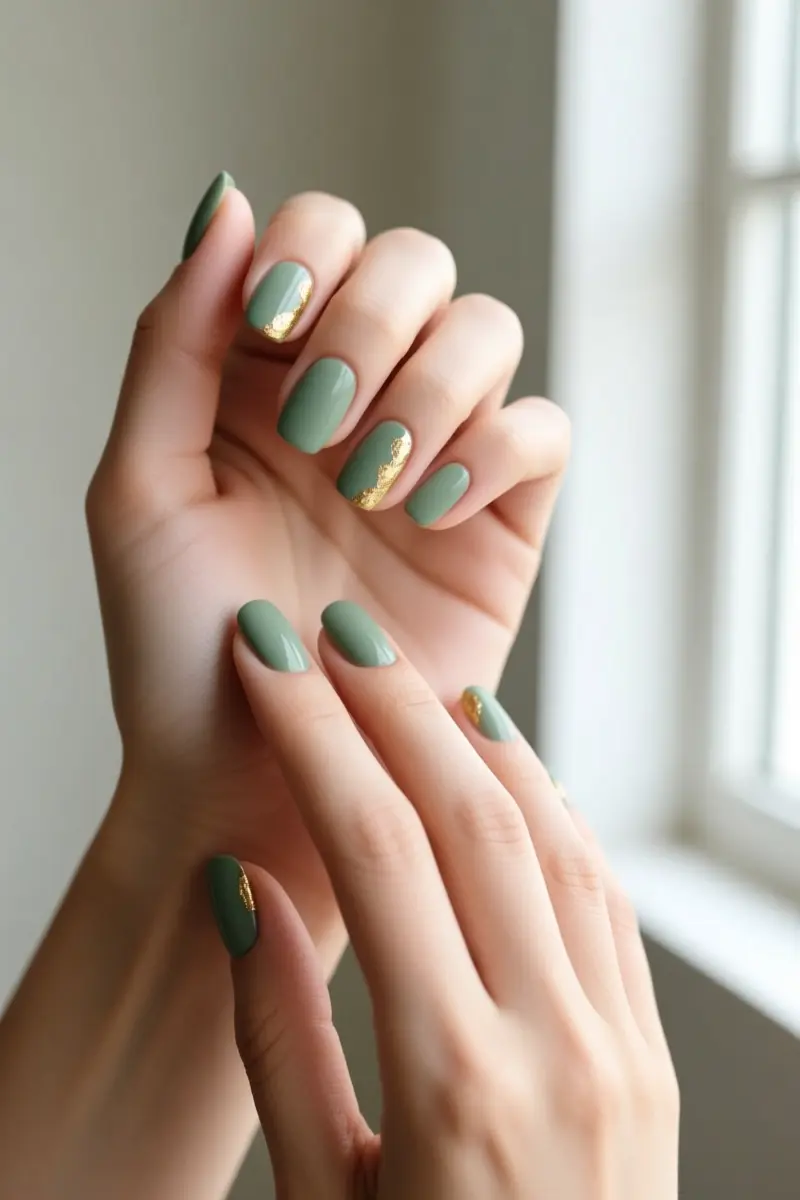
Muted sage monochrome delivers a calming, modern transition for autumn school days. The shade is a solid cream finish of sage green that reads as sophisticated without shouting.
OPI’s Nature Strong Vegan Nail Lacquer “Sage It for Later” provides this hue in a cruelty‑free formula, making it a reliable choice for students who prefer ethical products.
Because pastel greens tend to streak on the first swipe, apply a self‑leveling base coat before the cream lacquer.
Many users notice the initial coat looks uneven, but the base smooths the surface and prevents edge wear.
After two thin layers, the color settles into an even matte‑to‑gloss surface depending on the finish you select.
Expect about five to six days of wear before the tips begin to show light fading; a top coat can extend this by another day or two.
Sage green works across every skin tone, cool undertones shine in grey‑sage, warm tones glow in pistachio‑sage, and neutral undertones handle the full spectrum.
A common hesitation is uncertainty about personal suitability; testing a small swatch can confirm the grounded look before committing to the full manicure.
This trend stays fresh from fall through winter, pairing well with subtle gold‑foil accents for added depth.
Your Next Nail Moment Awaits
First, pick a finish that matches your schedule. Gel polish gives two‑week wear, but remember to cure safely and remove it without over‑filing to protect thin nails.
If you’re on a budget, a fresh coat of regular lacquer every few days keeps color bright and chips manageable.
Keep a small file and cuticle oil in your backpack to smooth edges and maintain moisture between classes.
With these tricks, you can rock a polished look all semester without constant salon trips. Pin this guide for your first week back or share it with a classmate who needs a nail fix.
Frequently Asked Questions
What are some short nail ideas for back to school?
The most practical short nail ideas for school include clean-girl micro-French tips, sheer jelly blush nails, and minimalist abstract lines, as these styles look polished, fit school dress codes, and hide regrowth exceptionally well.
How do you make short school nails last longer without chipping?
To prevent chipping, thoroughly dehydrate the nail plate with isopropyl alcohol before painting, apply a high-quality base coat, seal the free edge of the nail with your topcoat, and wear gloves when doing heavy cleaning or chores.
Is gel or regular polish better for busy students?
Gel polish is better for busy students who want zero maintenance for two to three weeks, while regular polish is preferred for those on a tight budget who want to change their nail color frequently without salon removal costs.
Can I wear press-on nails if I have short natural nails?
Yes, you can wear short-length press-on nails, but you must prep your natural nail beds by lightly buffing them and using a high-quality nail glue to prevent the artificial nails from popping off during school activities.