
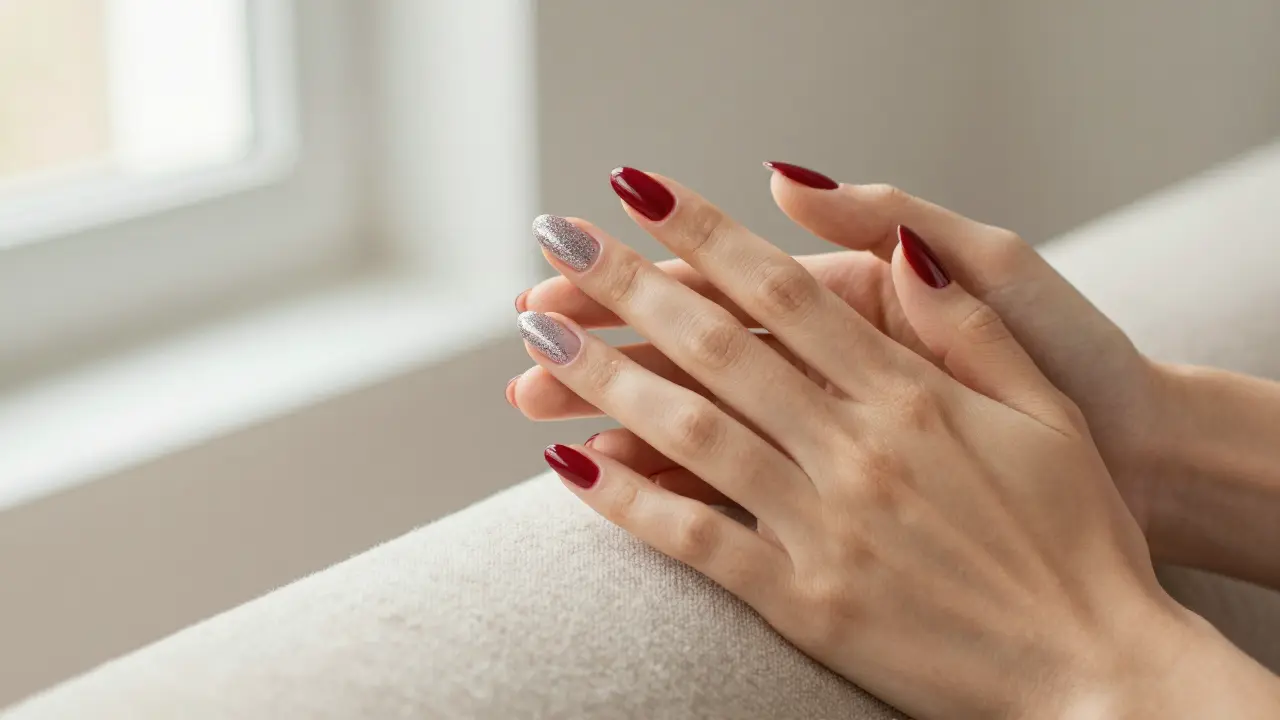
12 Wearable Christmas Nail Designs: Festive Polish Ideas That Stand Up to Real Life
Skip the impractical 3D winter wonderlands that snag on every cozy sweater; here is a realistic breakdown of durable holiday manicures that work for actual day‑to‑day life. You can still sparkle while wrapping gifts, stirring batter, or typing holiday cards, and you won’t need to trade a manicure for a mitten.
From a velvet emerald cat‑eye that moves without the snag risk of rhinestones to negative‑space holly accents that grow out gracefully, the twelve looks cover every mood.
Matte burgundy with gold leaf, micro‑glitter candy‑cane lines, sage green snowflakes, and even cable‑knit textured tips sit on the list. Whether your nails are short, wide, or you love a glossy finish, there’s a wearable option that fits a busy holiday schedule.
1. Velvet Emerald Cat-Eye
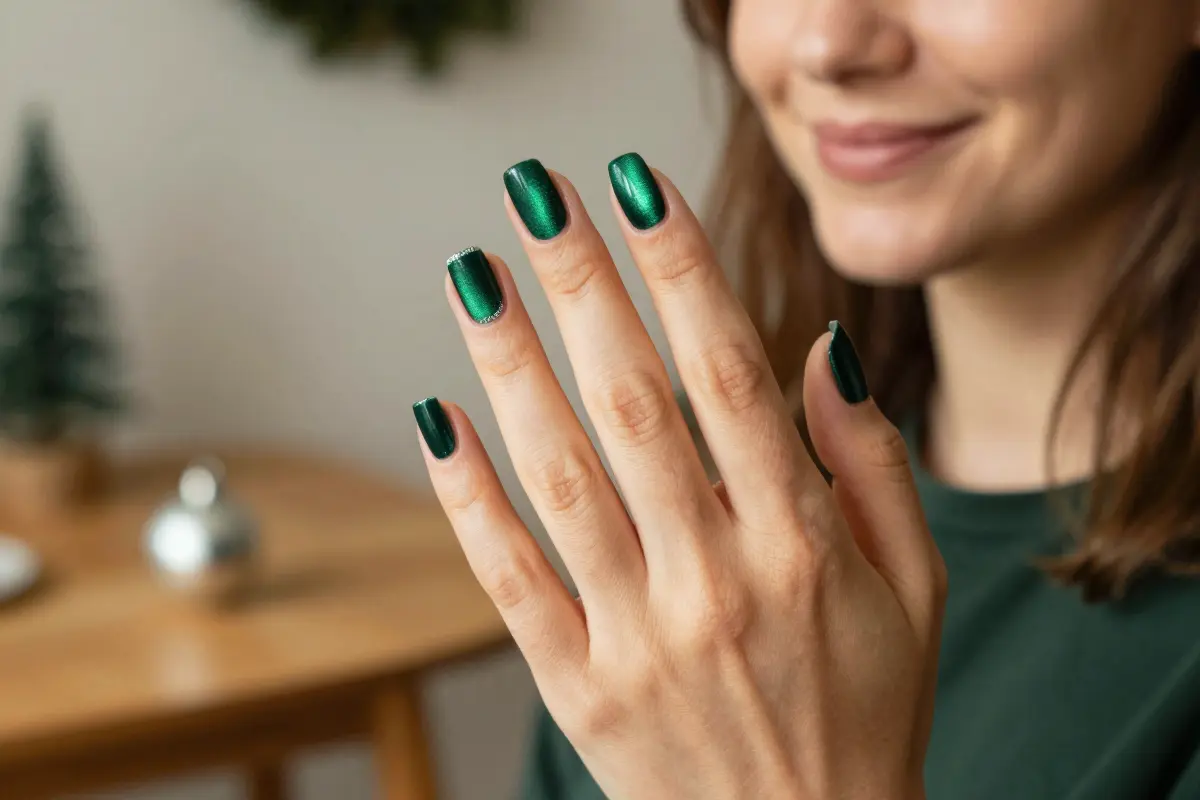
Velvet Emerald Cat‑Eye is a magnetic gel manicure that creates a deep green velvet effect with a subtle cat‑eye shimmer.
The magnetic gel polish contains iron particles that align under a magnet, producing the velvet illusion and a thin line of light‑catching sparkle.
When holiday lights bounce off the nails, the emerald hue deepens, giving a luxe look that photos often exaggerate.
A professional UV LED lamp is needed to cure the gel fully; air‑dry formulas cannot hold the particles in place, so a salon visit is recommended. The shade complements cool skin undertones best, while warm tones may find the green too stark.
- high‑impact look
- long‑lasting finish
- requires lamp
- salon cost
Typical pricing runs about $45 to $70 for a full set at a reputable studio, with touch‑up appointments costing $20 to $35.
- Full set: $45, $70
- Touch‑up: $20, $35
Refresh the magnetic line every two weeks with a quick polish wipe to keep the cat‑eye sharp and avoid flaking.
Apply a top coat with a glossy finish to enhance the light‑reflective cat‑eye line and extend wear by up to a week.
2. Negative Space Holly Accents
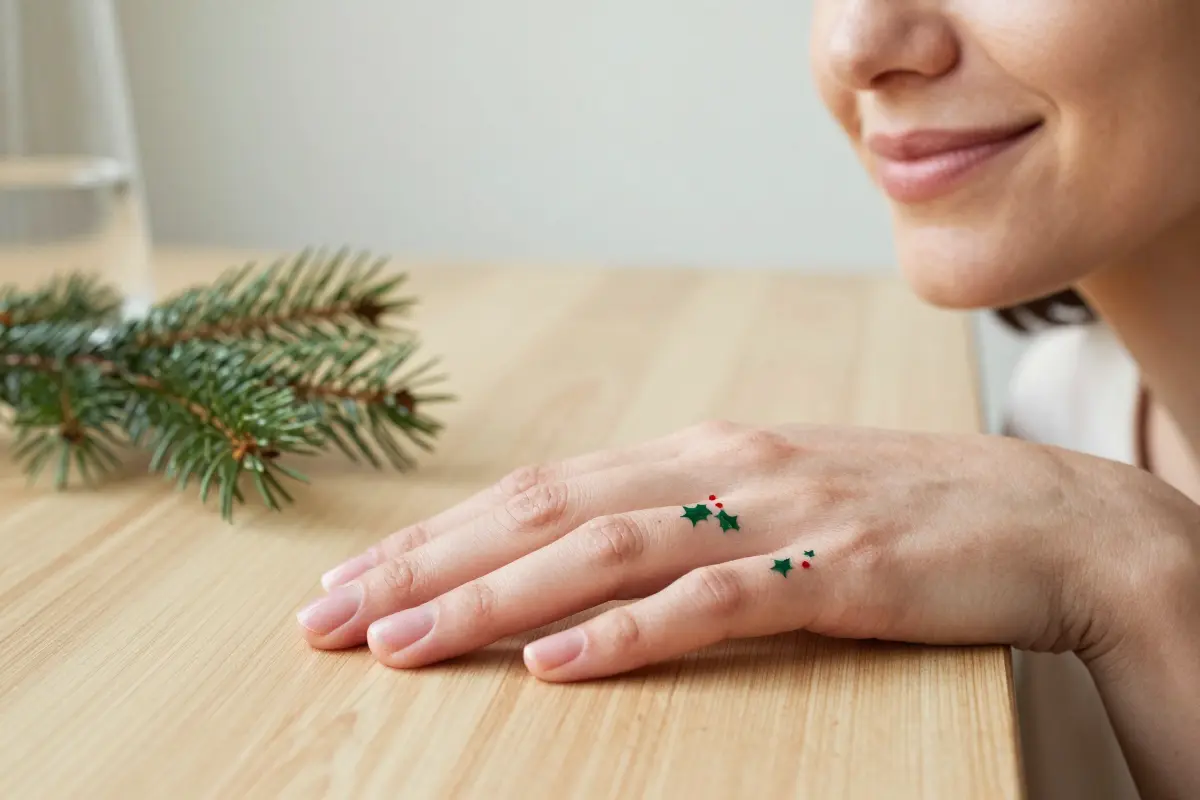
Negative space holly accents give a sleek, festive nail look that stays clear for weeks. Start with a sheer base coat to let the natural nail peek through.
Using a fine‑tip detailing brush, draw thin, slightly curved holly leaves with a dark green gel, leaving the center of each leaf unpainted so the natural nail shows through.
Add two or three tiny red berry dots at the base of the leaves with a dotting tool. Cure each element for 30 seconds under an LED lamp before moving on, since uncured berries smear into the leaves.
The design sits in the middle of the nail or hugs one corner, which keeps it away from the cuticle and the free edge.
That placement is why it grows out gracefully: there is no solid color line at the base to expose regrowth, so the manicure still looks intentional at week three.
It also avoids raised embellishments, so nothing snags on sweaters or wrapping paper.
- grows out cleanly
- no raised pieces to snag
- needs a steady hand
- sheer base shows mistakes
Warm the gel on a palette for a few seconds before painting so thin leaf lines flow smoothly instead of dragging
<div class=”rwt-box rwt-tip”><span class=”rwt-label”>Quick Tip</span></p> <p>Warm the gel on a palette for a few seconds before painting so thin leaf lines flow smoothly instead of dragging</p> </div>
3. Glazed Gingerbread French Tips
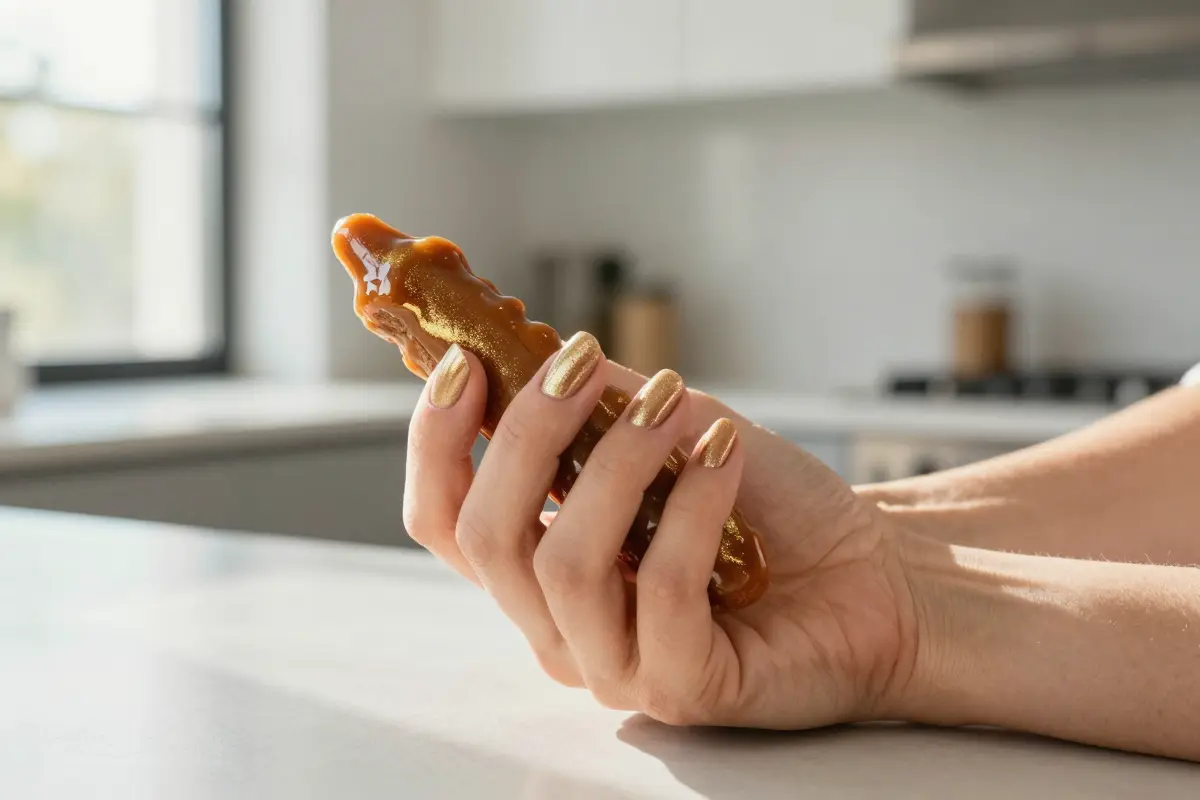
Glazed gingerbread French tips combine a caramel‑brown base with a fine chrome powder glaze for a festive nail. The look starts with a clear gel base, then a gingerbread‑colored gel coat that mimics warm caramel. While the gel is still tacky, a light dust of chrome powder is brushed over the top coat.
Cure the no‑wipe top coat just long enough for the chrome to burnish smoothly without slipping. This short cure locks the shine but leaves the surface flexible enough to avoid flaking.
The free edge, where the French tip ends, tends to show the most wear; expect a few microns of chipping after a day of normal use.
A quick tip: keep the free edge trimmed short to reduce chipping on the tip. The design shines best on nails at least ten millimeters long; short nails may not hold the chrome glaze evenly.
- Apply clear gel base
- Cure
- Paint caramel gingerbread shade
- Cure
- Dust chrome powder over wet top coat
- Cure just enough for powder to set
- Seal with no‑wipe top coat
- Warm holiday vibe
- Shiny modern finish
- Requires precise timing on top coat
- Can chip faster on free edge
4. Matte Burgundy with Gold Leaf Flakes
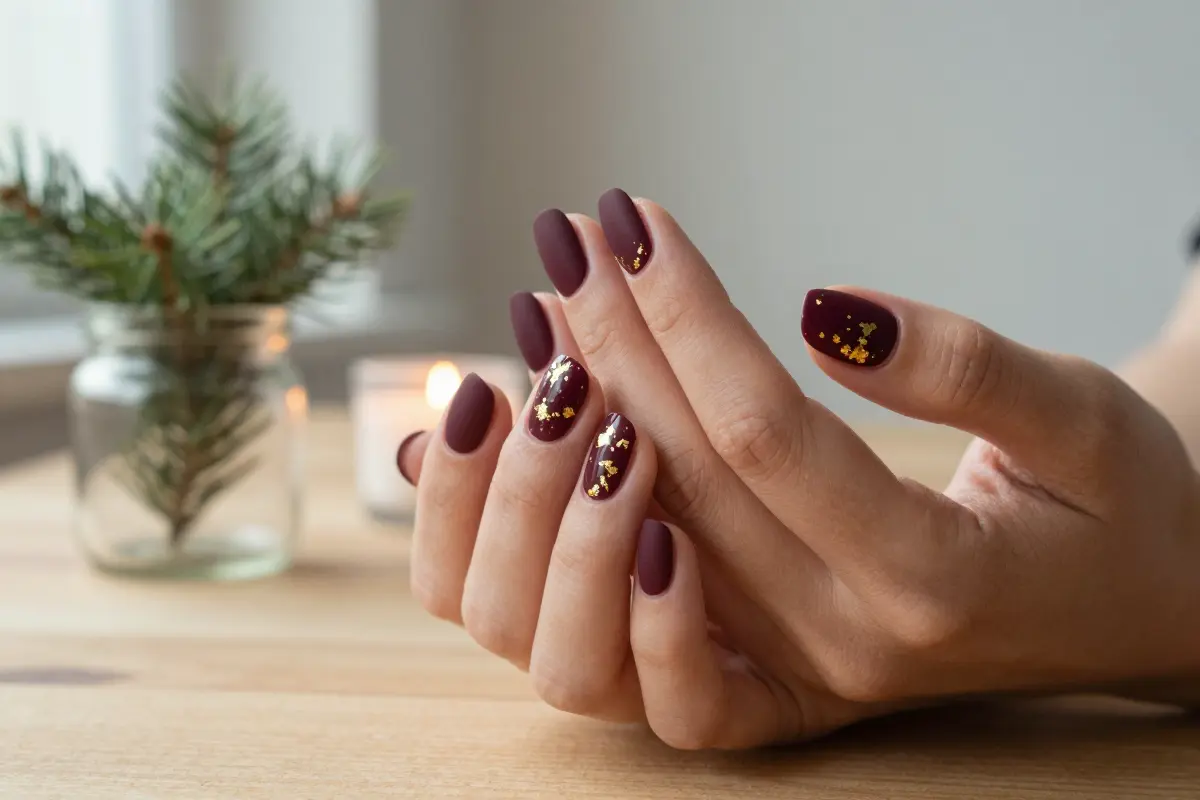
Matte Burgundy with Gold Leaf Flakes delivers a deep, holiday‑ready shade that feels luxe without shouting.
The rich burgundy base absorbs winter light, while tiny gold leaf flakes catch sparkle on party lights. A matte top coat deepens the color, making the gold appear as subtle foil rather than glossy glitter.
This look favors cool‑toned skin and pairs well with dark denim or velvet dresses.
OPI Matte Top Coat seals the polish, stays smudge‑proof for up to seven days, and dries quickly, though it sits at a higher price point.
A common complaint is that matte surfaces attract dust and can look dull after a few days. The finish shows chips more clearly on long nails, so shorter lengths tend to stay polished longer.
Matte finishes can pick up pigment from dark denim or winter coats, leading to quick discoloration.
Refresh the matte surface every two days with a thin layer of OPI Matte Top Coat to lock in color and repel denim stains.
- does not bubble up
- smudge‑proof
- easy to apply
- quick drying
- expensive
- can become dirty
- chips faster than glossy
5. Micro-Glitter Candy Cane Lines
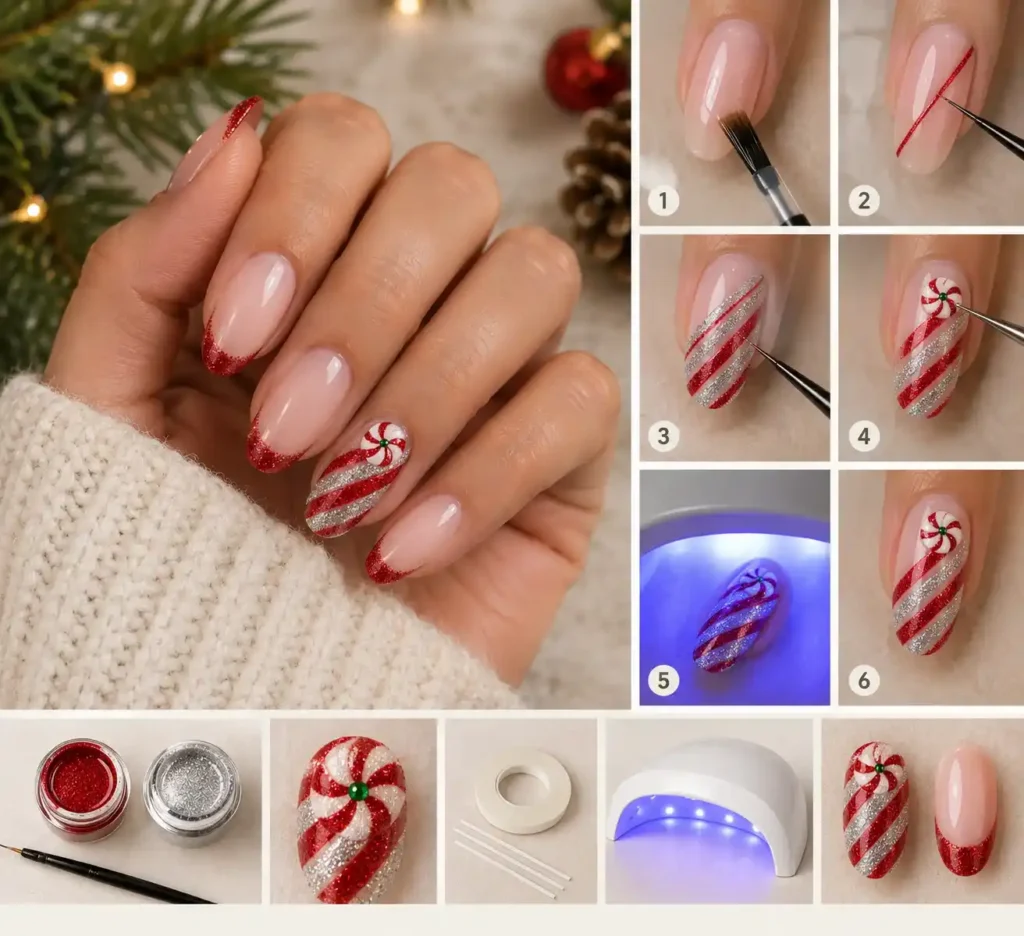
Micro‑Glitter Candy Cane Lines are thin red and silver glitter stripes placed on a single accent nail. The look mimics a classic candy‑cane with a sparkle that catches holiday lights.
Start with a cured base coat, then use a nail art liner brush with high‑viscosity gel to draw a 2 mm red line. Stabilize the hand by resting the pinky on the table edge; this reduces tremor while the gel stays thick.
Without cleaning, load the brush with micro‑glitter silver gel and trace a parallel line. A peppermint swirl of sparkling glitter with a tiny festive green dot adds extra holiday flair.
Cure each line under an LED lamp for 30 seconds to lock the pigment and stop bleeding. Regular polish or low‑viscosity gel will spread, merging the colors before curing.
A professional gel manicure with this design runs about £36, while a 1 oz glitter acrylic powder costs roughly $10 for home use.
Use painter’s tape as a guide for even stripes; it helps beginners and saves time.
- Apply and cure a base coat
- Load a liner brush with thick red gel and draw a 2 mm line
- Cure for 30 seconds
- Trace a parallel line with micro‑glitter silver gel
- Cure again, then seal with a no‑wipe top coat
- festive without bulk
- works on one accent nail
- thin gel lines need a steady hand
- regular polish bleeds
6. Rich Plum with Flat Pearl Accents
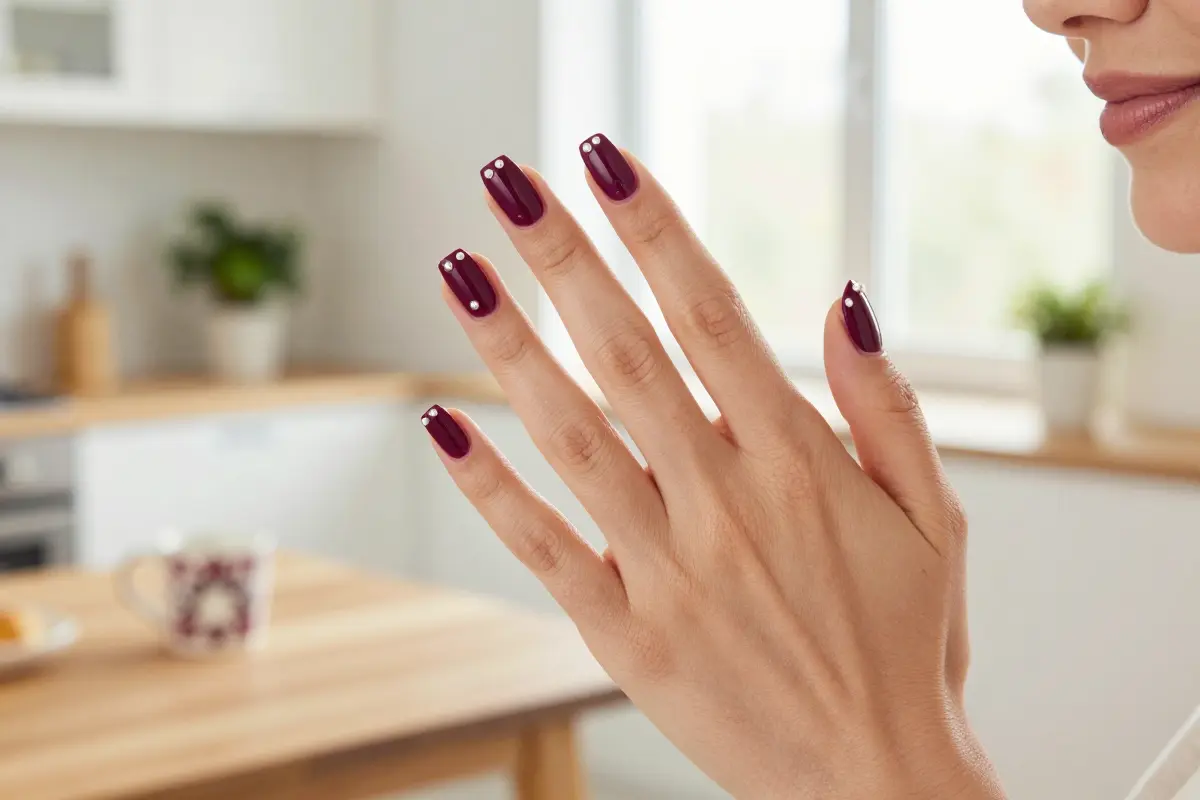
A rich plum base with flat‑backed pearl accents gives a festive, sophisticated holiday nail. The deep, wine‑like shade mimics winter twilight, while tiny pearls catch light without overwhelming the manicure. Flat‑backed micro‑pearls embed into a thick builder gel, so the embellishments stay put during gift‑wrapping, cooking, or dancing.
3D pearls often lift off during busy festivities
Using a gel layer of at least 1 mm ensures the pearls are sealed and less prone to chipping.
The look suits medium to long nails; shorter tips may hide the subtle sparkle.
- elegant sparkle
- easy to pair with outfits
- soft pearls scratch easily
- chemicals can dull luster
Keep the nails away from harsh chemicals and remove perfume before applying the pearls to protect the nacre. A quick wipe with lukewarm water, mild dish soap, and a soft cloth removes surface residue without harming the gems.
Because pearls rank only 2.5‑4.5 on the Mohs scale, they are vulnerable to metal zippers or abrasive tools, so avoid heavy hand‑tools while the manicure lasts.
If you prefer a matte finish, swap the glossy top coat for a soft satin gel; the pearls still shine, but the overall vibe stays understated, which many office‑goers appreciate. For very short nails, place a single pearl at the cuticle edge instead of a full scatter, so the design remains visible.
7. Sage Green and Watercolor Snowflakes
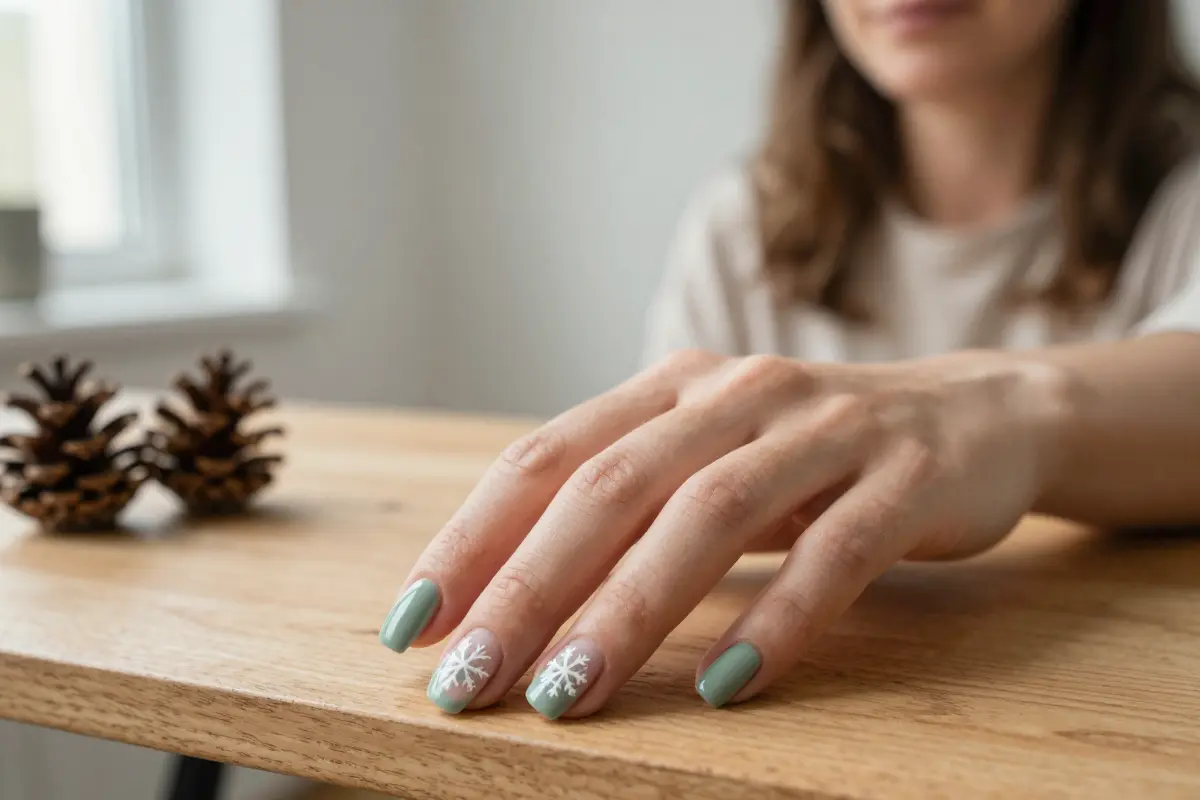
Sage green and watercolor snowflakes create a subtle, holiday‑ready manicure that feels both polished and playful. The muted sage tip keeps the look soft, while a tiny snowflake decal adds a wintry sparkle. Water‑slide decals work best for this design.
They sit flat on the nail plate and stay glued at the corners when you seal with a top coat, unlike vinyl stickers that can lift. To apply, start with a clean, smooth base.
Paint a sage green French tip, let it cure, then position the water‑slide snowflake and seal with a quick‑dry top coat.
A tip: use a matte top coat if you want the snowflake to stay matte rather than glossy.
The design shows best on light to medium skin tones; on very dark nails the sage may appear muted. Finish with a nourishing cuticle oil to keep the nails from drying out during holiday celebrations.
If you prefer a bolder look, swap the sage tip for a deep forest green for extra contrast.
- flat finish
- easy sealing
- needs smooth nail surface
- muted on dark tones
- paint sage French tip
- cure base coat
- place water‑slide decal
- seal with top coat
8. Glossy Cherry Red with Tortoiseshell Accent
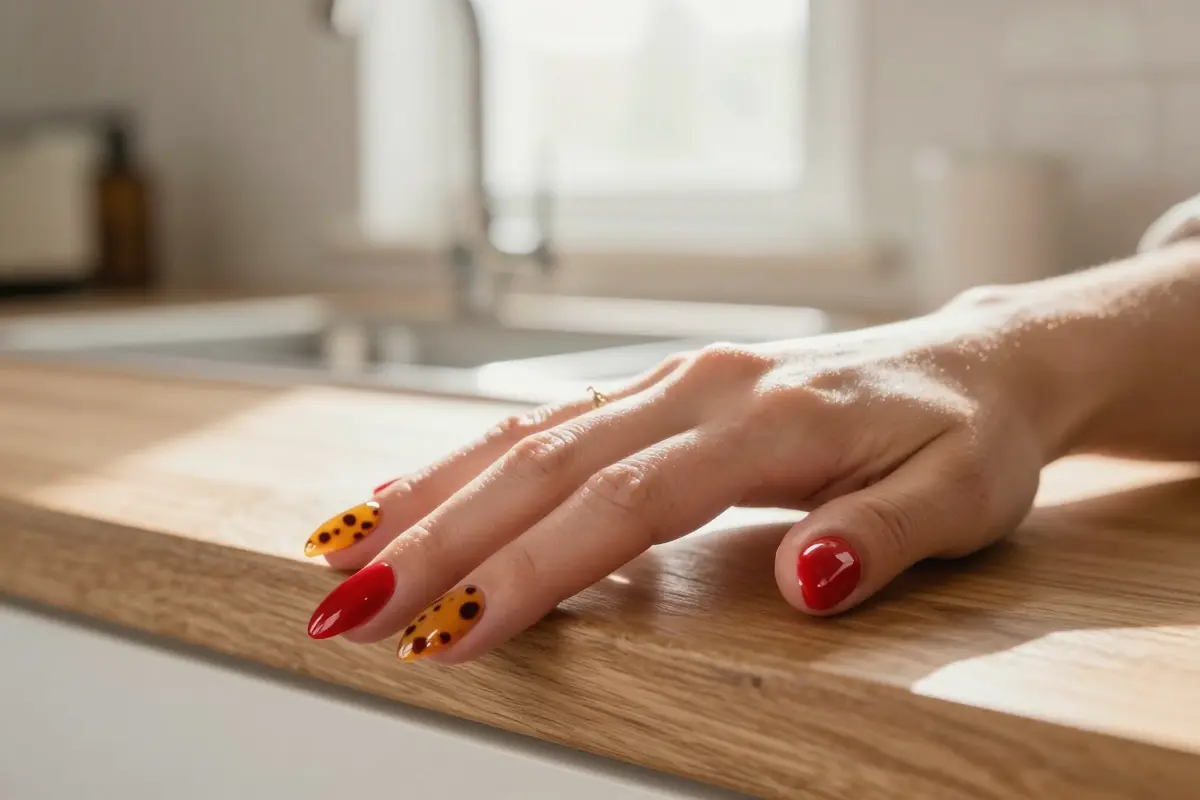
Glossy cherry red nails paired with a tortoiseshell accent create a festive yet wearable holiday look. The deep cherry red polish covers most nails while one or two accent nails receive a layered tortoiseshell effect. Start with a clear base, then apply cherry red polish on all fingers.
For the accent, lay a translucent yellow jelly over the red, follow with an amber glaze, and dot dark brown spots to mimic natural tortoiseshell. Finish with a glossy gel top coat for shine. Almond nail shapes highlight the curve of the accent and keep the look elegant.
The warm tortoiseshell tones blend well with autumn palettes, so the design works nicely for holiday parties that lean toward earthy décor. A tip: use a fine‑point brush for the brown spots to keep the pattern crisp. The look shines best on medium to long nails; very short nails may lose detail.
Some users note that the multi‑layer process can be time‑consuming, so plan extra drying time.
- eye‑catching contrast
- versatile for autumn
- time‑consuming process
- detail loss on short nails
- apply base coat
- paint cherry red
- add yellow jelly
- apply amber glaze
- dot brown spots
- seal with glossy top coat
9. Champagne Shimmer and Frosted Tips
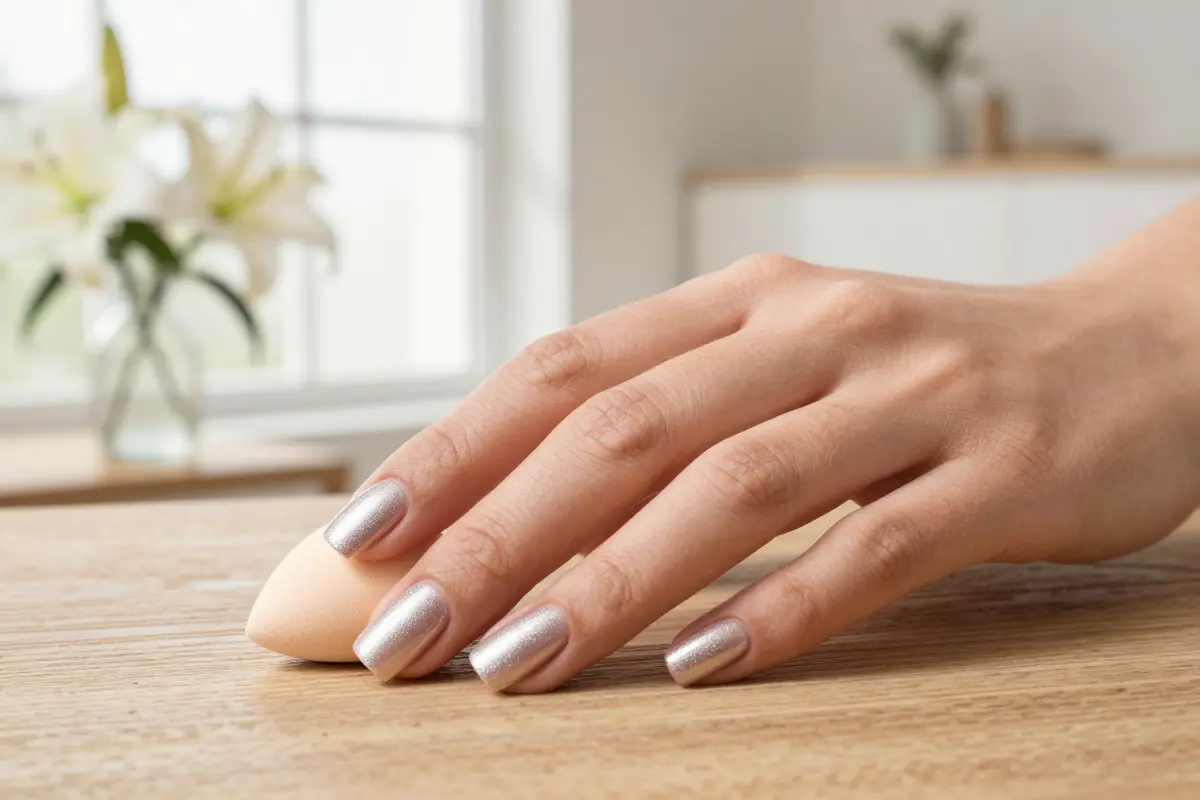
Champagne shimmer with frosted tips gives a festive, yet wearable look. The metallic polish can show brush strokes if you use a brush, so a makeup sponge works better for a smooth gradient. Start with a thin base coat.
Apply two coats of a nude shade that matches the champagne tone, letting each dry. Add a clear top coat to lock in shine. Using a small makeup sponge, dab silver chrome powder onto the nail surface; the sponge spreads the powder without streaks.
While the powder is still tacky, press a damp sponge over the tip area to create a frosted silver gradient that fades into the champagne base. Finish with another clear top coat to seal the design.
Use a lightly damp sponge for the gradient to avoid harsh lines; works well for a seamless frosted tip
- base coat
- two nude coats
- clear top coat
- dab chrome powder with sponge
- press damp sponge for gradient
- seal with top coat
The result is a soft, striking shade that flatters any skin tone and pairs with party outfits. You can swap the chrome powder for shimmer polish or magnetic cat‑eye polish for a different sparkle, as suggested by nail artists Trenna Ann and Brittney Boyce.
Reapply the top coat every two days to keep the frosted tip glossy.
10. Midnight Blue and Silver Starbursts
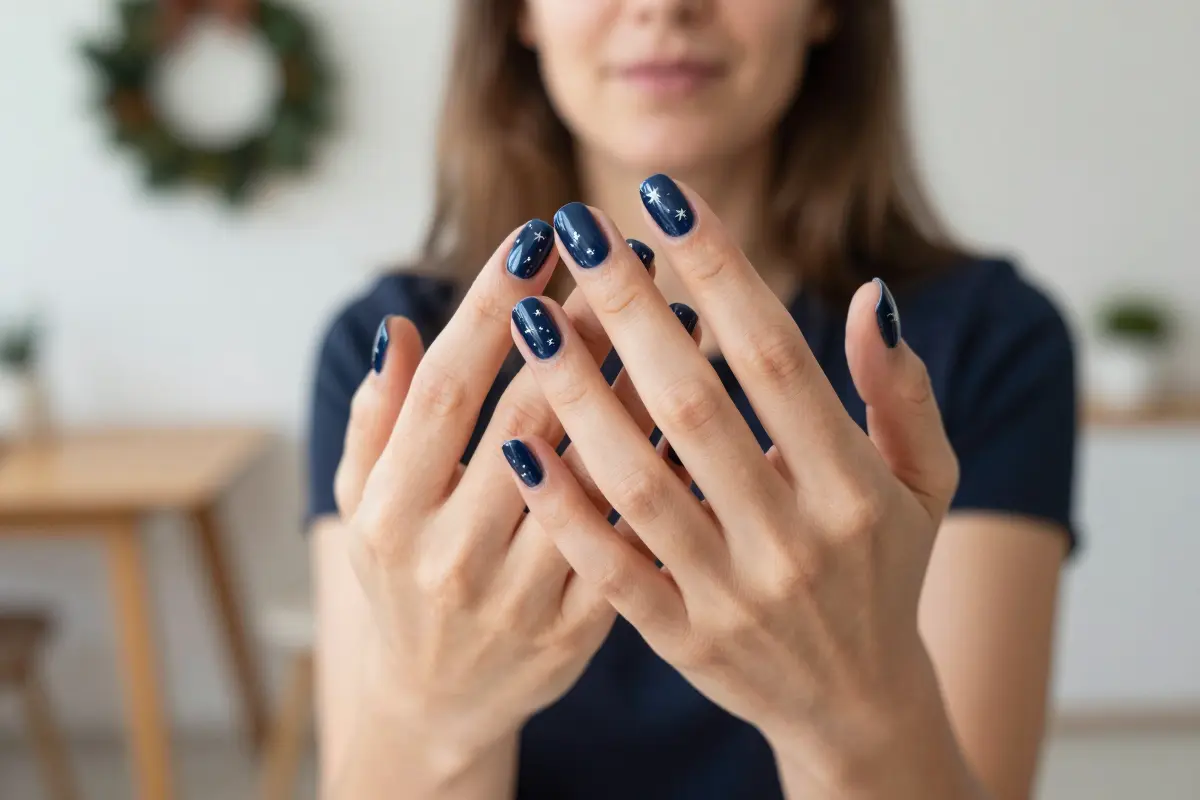
Midnight blue and silver starburst nails create a celestial holiday vibe.
Start with a true midnight blue gel polish. The deep hue holds up under lights and hides minor growth.
Paint tiny silver starbursts with a high‑pigment silver gel paint. The gel cures in 30‑45 seconds under a UV/LED lamp, while regular metallic lacquer needs 5‑7 minutes to dry and can smear.
Apply the silver in thin, controlled strokes. Two light coats prevent the common wrinkle that appears when a thick layer cures unevenly.
Seal the design with a clear top gel. The finish stays glossy for two to three weeks, far longer than standard polish that chips in a few days.
A practical tip: use a fine‑point brush and work from the cuticle outward. This suits people with steady hands; those who struggle may prefer pre‑made silver foil stickers.
Because the gel can shrink slightly, the design looks best on nails at least 10 mm long. Short nails may lose detail.
- long‑lasting shine
- deep color
- curing wrinkles
- thick texture
silver gel paint can shrink, blurring tiny stars on very short nails
11. Cable Knit Sweater Textured Accents
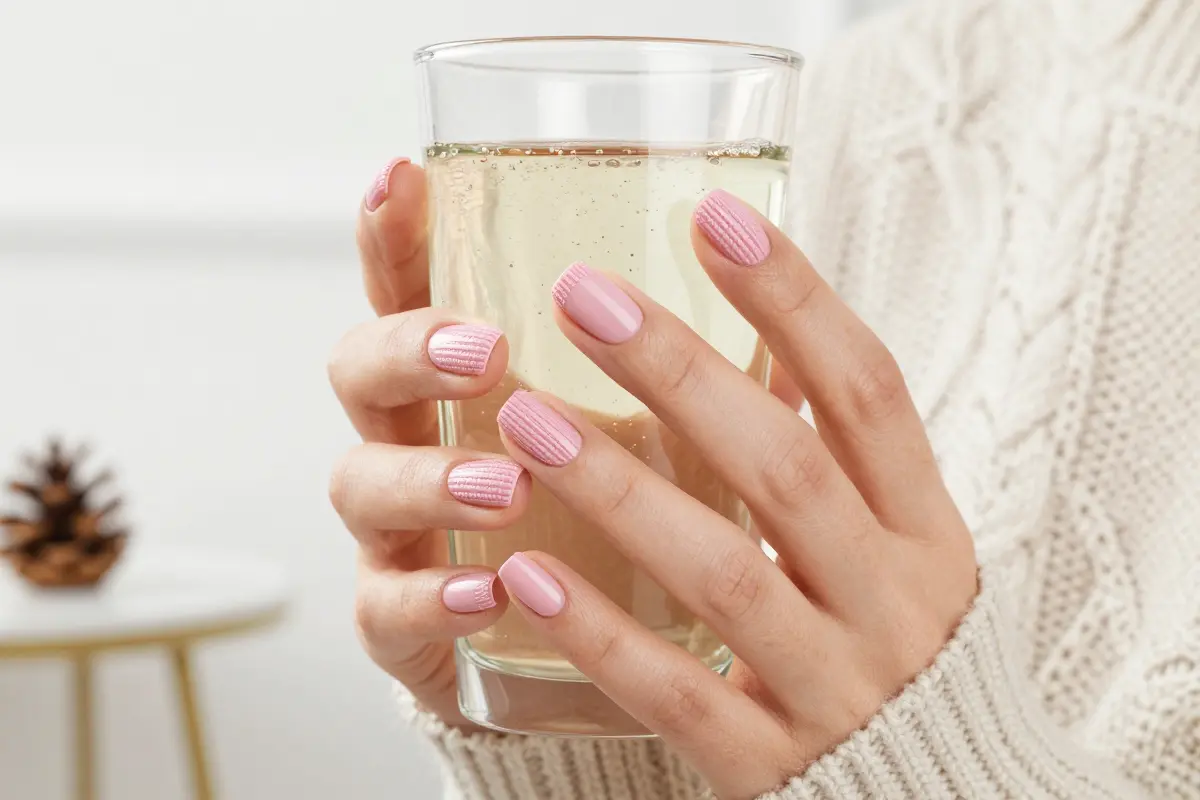
Cable knit sweater nails create a raised, sweater‑like texture using matte gel and acrylic powder. The matte gel forms a smooth base, then a small amount of acrylic dipping powder is brushed into the wet gel to build tiny ridges that mimic knit stitches.
A soft pink or nude polish under the texture adds a cozy winter vibe, and a clear matte topcoat locks everything in place.
The effect feels like a miniature sweater on each nail and works best on nails under 7 mm, so the design stays comfortable and less likely to snag.
Clean the knit crevices daily with a soft brush and warm soapy water to prevent buildup.
- Trim and prep nails
- Apply matte gel base
- Brush on acrylic powder to create ridges
- Shape texture with a fine brush
- Seal with matte topcoat
Regular use of cuticle oil helps preserve the acrylic and gel layers, and scheduling fills every 2-3 weeks keeps the texture intact.
- realistic knit feel
- works on short nails
- can snag on fabric if too long
- cleaning is time‑consuming
12. Olive Green with Abstract Gold Foil
Olive green with abstract gold foil gives a muted holiday vibe that you can wear into January without screaming Christmas. You begin with a dark sage olive polish, a shade that leans toward an edgy, autumn feel.
You press random gold foil flakes onto the still‑wet polish to create a speckled, abstract pattern. You’ll see depth and a subtle shimmer that catches light without overwhelming the nail.
You finish with a high‑gloss top coat and run a brush along each foil edge for extra adhesion so the flakes stay in place. This sealing step keeps the metal in place for up to a week of wear.
You’ll find it works best on medium to long nails where the foil can spread out; on very short nails, the abstract pattern may look crowded.
Choose a matte finish to mute the sparkle for a nature‑inspired feel, or use a glossy top coat to keep the design fresh.
- sophisticated transition
- subtle sparkle
- foil may lift on short nails
- requires careful sealing
Press the top coat over each foil piece with a flat brush to seal edges and prevent lifting
Which Look Are You Trying First
You start with a clean, lightly buffed surface so the gel or polish adheres without lifting. You choose a topcoat that matches the finish, matte for burgundy or glossy for cherry red, to lock in color and protect against kitchen splatters. A quick weekly soak in warm water keeps your nail bed healthy during the season.
You pick a design that fits your daily routine: negative space for easy touch‑ups, velvet cat‑eye for a low‑maintenance shine, or cable‑knit accents for a festive vibe that won’t chip under gloves. Save this post to your holiday board and share it with a friend who needs a reliable, party‑ready manicure.
Frequently Asked Questions
What are the most popular winter holiday nail design trends?
Current holiday nail trends favor minimalist negative space designs, deep velvet cat-eye textures, and rich alternative earth tones like olive green, chocolate brown, and deep plum.
How do you stop 3D holiday nail art from catching on winter clothes?
To prevent catching, seal all 3D charms, pearls, or sweater-knit textures with a thick layer of clear builder gel or brush-on resin to smooth out sharp edges.
Is gel or regular lacquer better for detailed holiday nail art?
Gel polish is highly recommended for detailed nail art because it remains wet and malleable until cured under an LED lamp, allowing you to perfect intricate lines without the polish drying on your brush.