
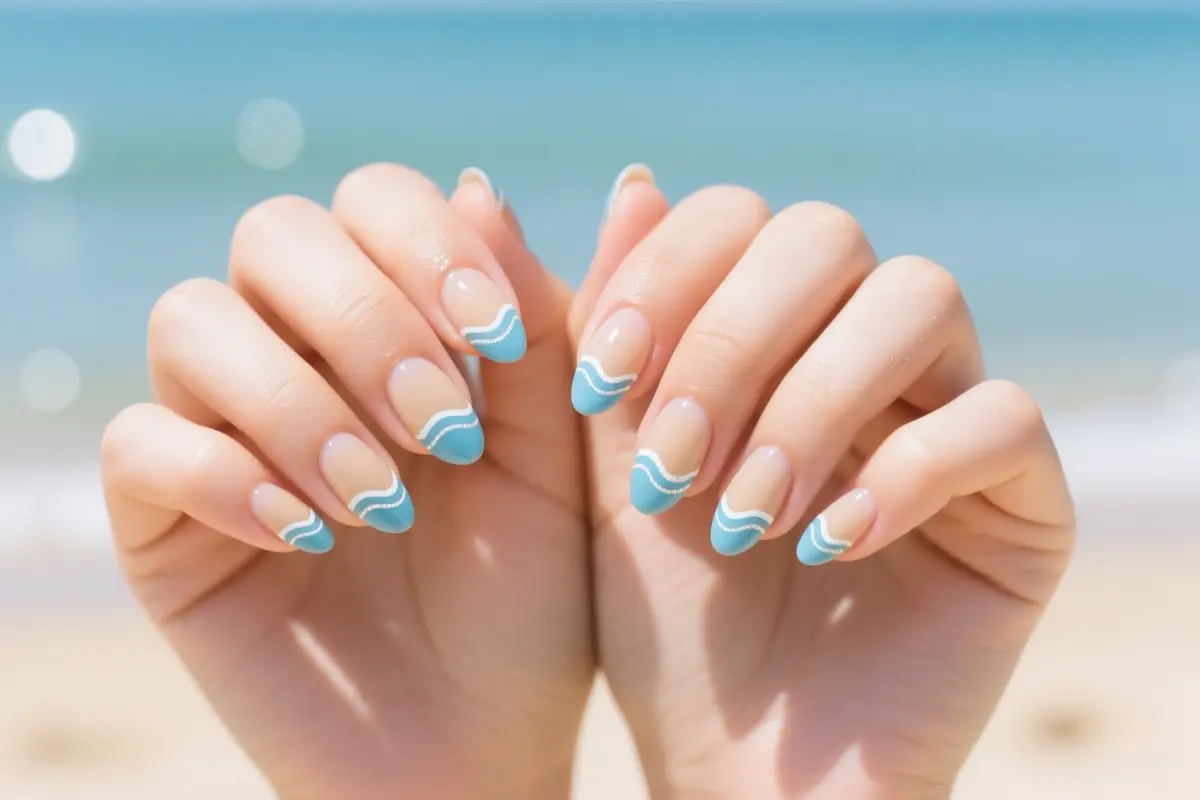
12 Stunning Beach Nail Art Ideas for Your Perfect Summer Vacation
Are you ready to dive into the sun-kissed spirit of summer with a fresh new nail look? From oceanic ombre to seashell-inspired designs, we’ve got you covered with the most stunning beach nail art ideas to make you vacation-ready. Whether you’re a fan of bold and bright or understated and elegant, this list is perfect for anyone looking to add a touch of coastal charm to their summer style.
1. Ocean Waves Gradient
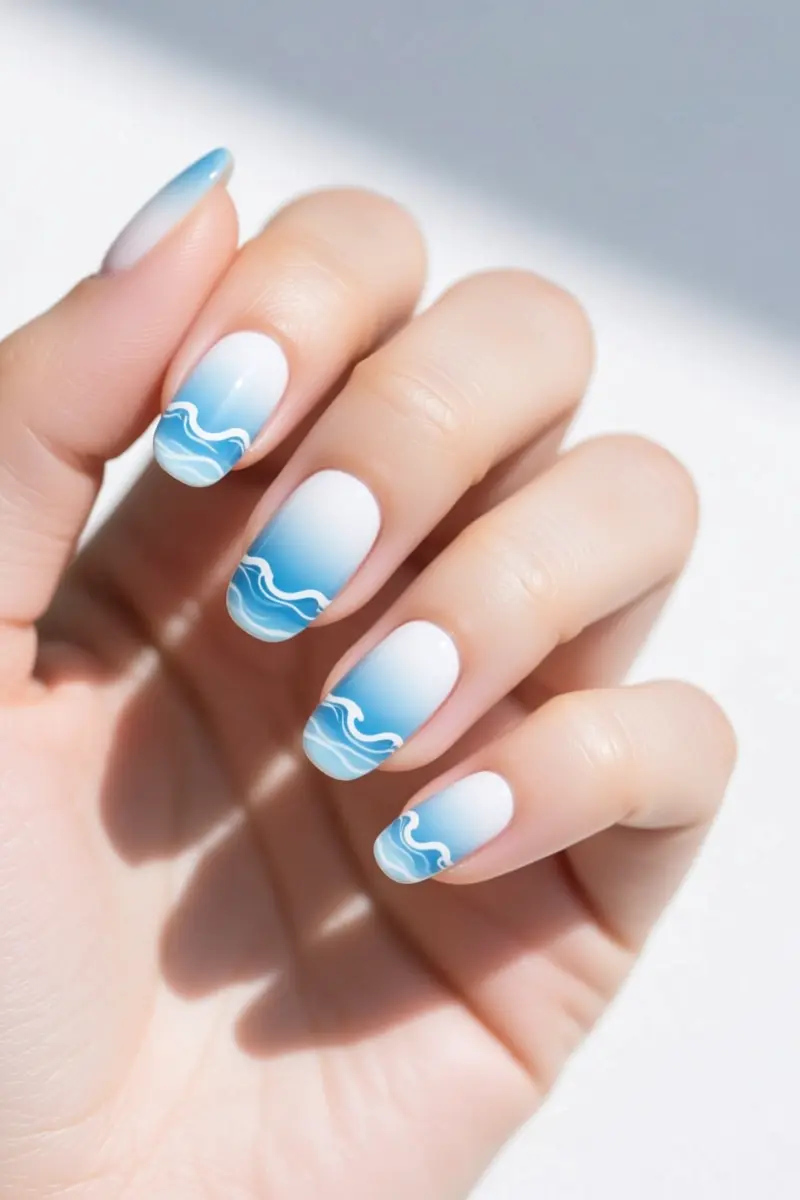
To create a serene ocean waves gradient, start with soft blue and white hues. These calming colors evoke the feeling of gentle waves. Blending them seamlessly is key to achieving this look.
A sponge is the best tool for this, as it allows for subtle movement in the design. The visual impact is stunning, with the gradient seeming to shift as you move your hands.
For a seamless blend, choose a sponge with the right density and a polish with a medium consistency. This will help you achieve a smooth transition between colors.
A pro tip is to use a quick-dry topcoat between layers to speed up the process. Be careful not to apply too much polish, as this can lead to a messy finish.
For short nail beds, a more subtle gradient is best, while longer nails can handle a more dramatic intensity. By mastering the sponge technique and polish consistency, you can create a beautiful ocean waves gradient that’s perfect for your summer vacation.
2. Sandy Beach French Tip
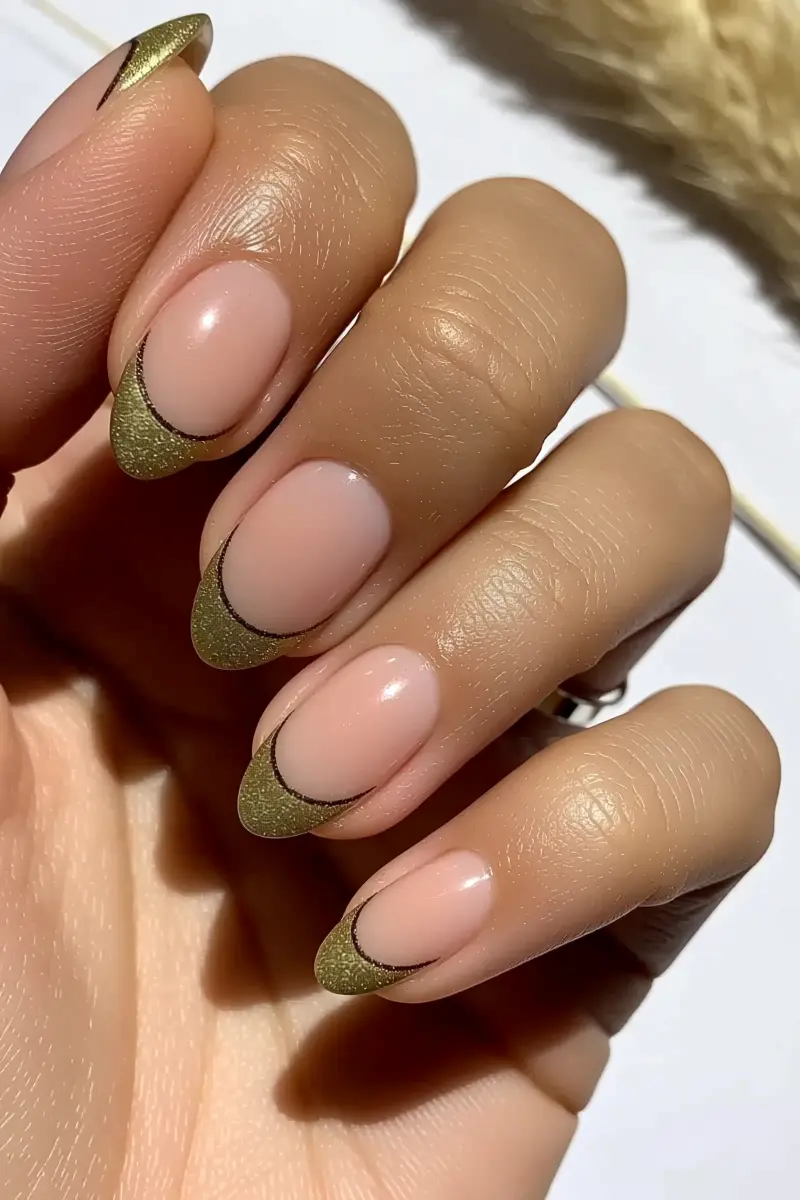
The Sandy Beach French Tip is a chic twist on a classic design. It features a nude or beige base coat paired with a shimmering gold or textured ‘sand’ tip. To achieve precise French tip lines, use a steady hand and a fine brush.
Incorporating textured polishes or fine glitter adds a unique touch. For a professional finish, apply a thin layer of glitter polish. Using striping tape or French tip guides helps create clean lines.
This design suits most nail shapes, from oval to square. However, beware of uneven or too-thick tips, as they can ruin the look.
For a flawless finish, use a light hand when applying the tip color. Oval nails showcase the sandy tip beautifully, while square nails add an edgy touch.
3. Tropical Sunset Ombre
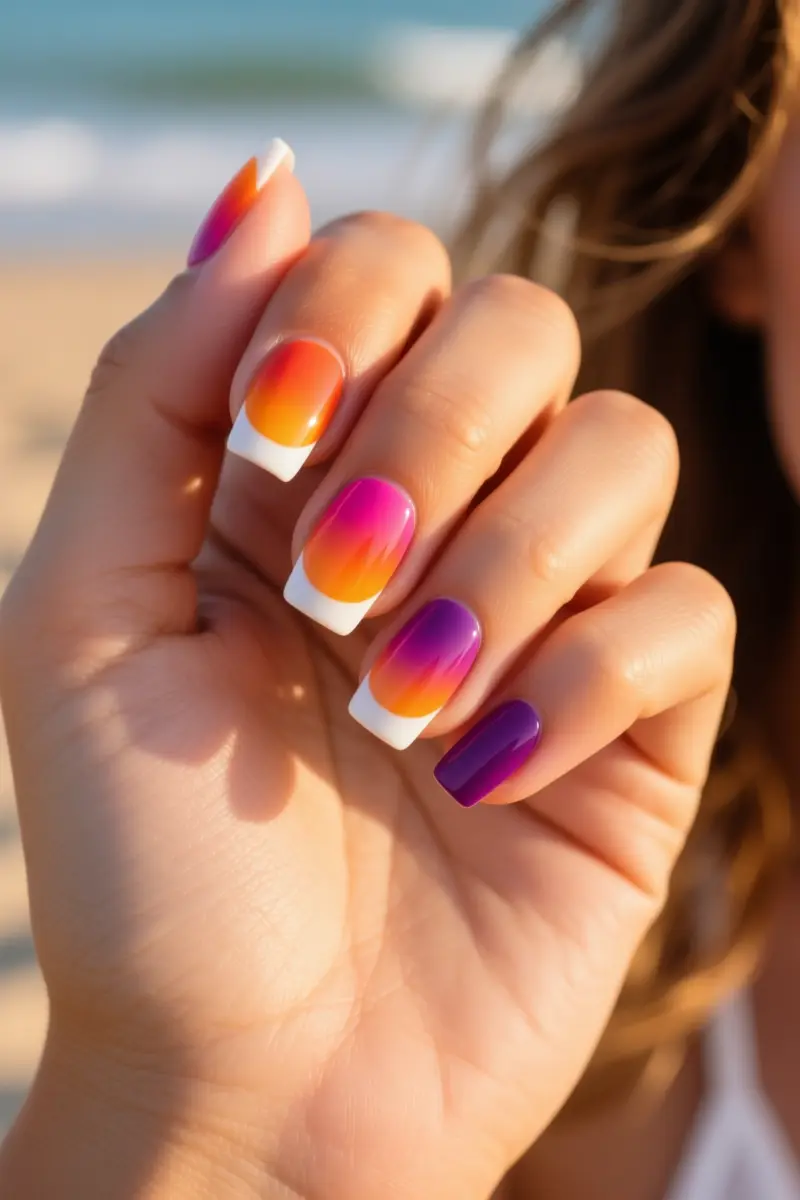
Tropical sunset ombre nails evoke a sense of warm, lazy evenings by the ocean. This design transitions seamlessly from fiery orange to fuchsia, and then to a deep purple or indigo. The visual impact is stunning, with the colors blending to create a breathtaking effect.
To achieve this look, expertise is required in blending the colors smoothly. Sponge application techniques are key, as they allow for a soft, gradient-like effect.
Choosing highly pigmented shades is also crucial, as they provide the best color payoff. Complementary colors work well together, creating a harmonious and visually appealing design.
Using a white base coat can make the colors pop, adding an extra layer of depth to the design. Apply a thin layer of white polish before adding the ombre colors for maximum impact.
To make the design last longer, seal with a quality top coat. This will prevent chipping and fading, keeping the colors vibrant for days.
4. Seashell Accents
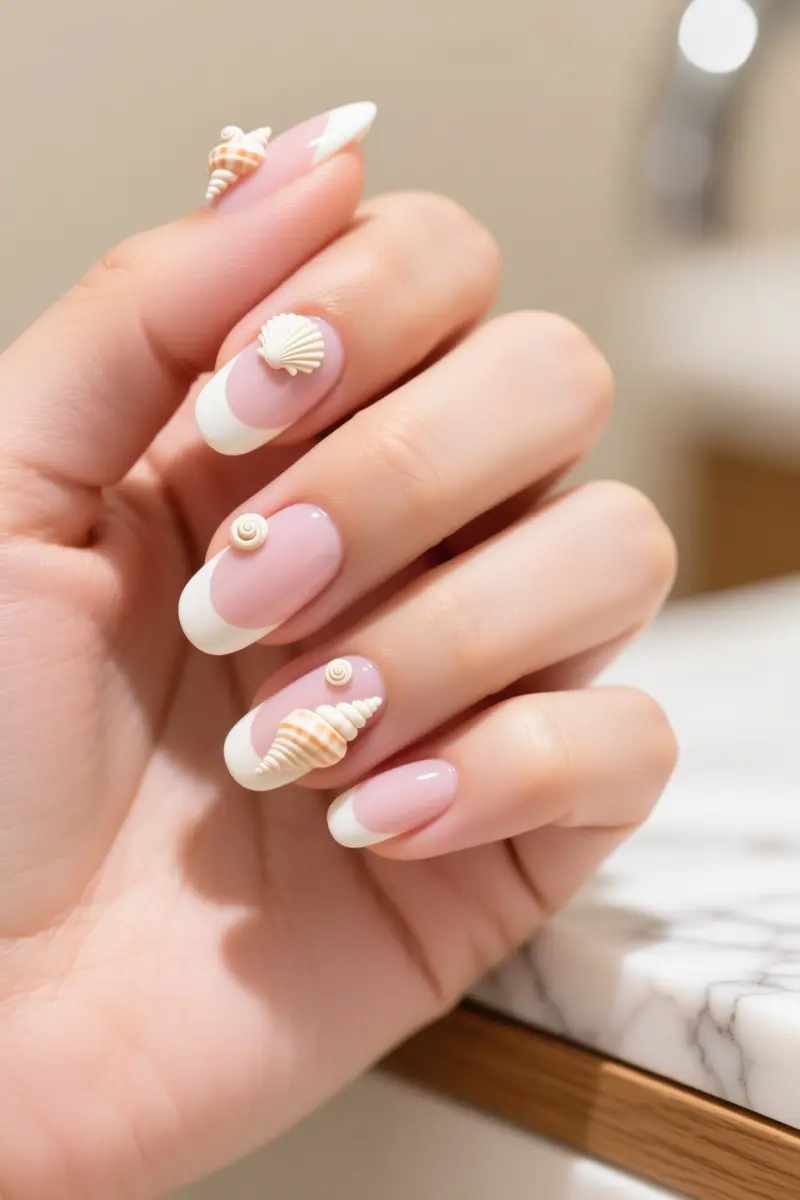
Tiny seashells add a unique touch to beach nails. They can be used as 3D nail art on an accent nail. To apply them, you need expertise in using nail glue or a strong gel top coat.
This ensures the shells stay in place. Having seashells on your nails is not just visually appealing; it’s also tactile. The texture feels natural and interesting.
When applying seashells, seal the edges with a top coat to prevent snagging. A common mistake is not securing the embellishments properly.
To avoid damage to your natural nail, apply the seashells carefully. Use a small amount of glue and gently press the shell onto your nail.
This will help prevent lifting and promote a long-lasting finish. With proper application, seashell accents can elevate your beach nail art.
5. Starfish & Coral Motifs
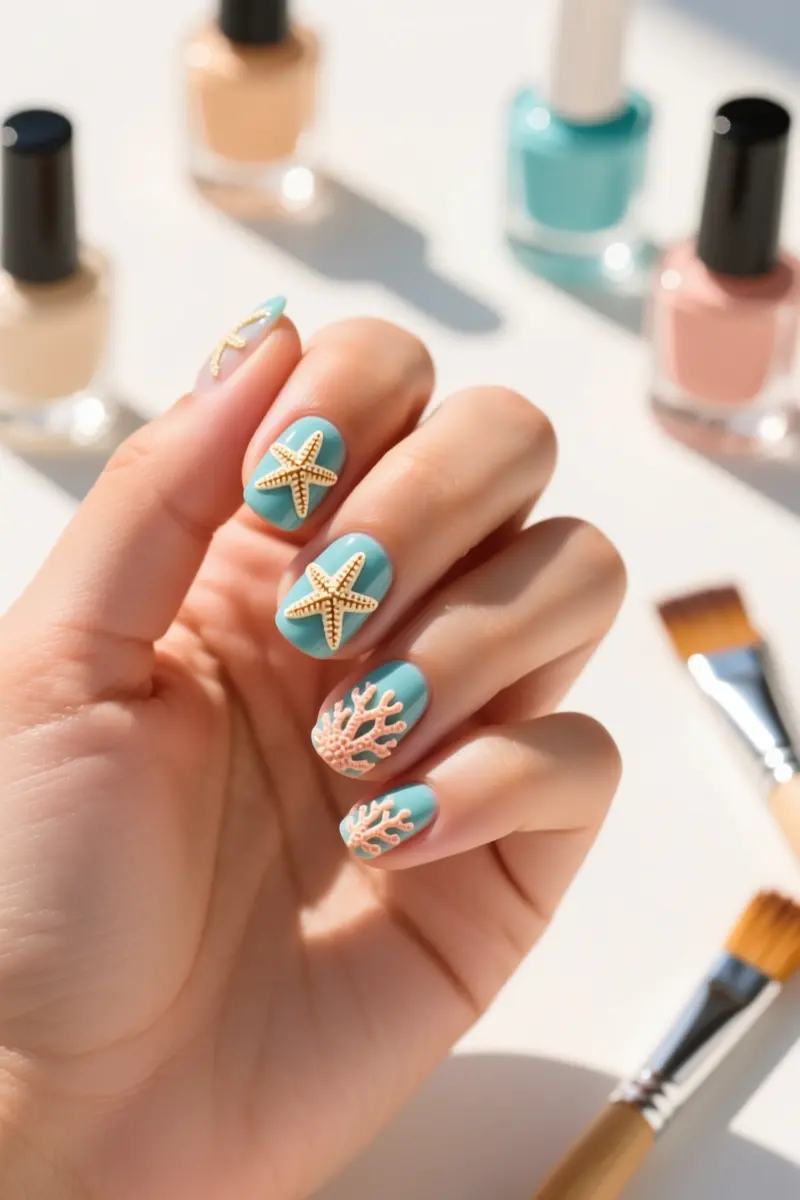
Starfish and coral motifs bring a playful touch to your beach nails. Fine brushes are essential for hand-painting intricate details like starfish arms and coral textures. To achieve a smooth finish, use a light touch and build up layers of polish.
For a quicker option, water slide decals are a great alternative. Apply them smoothly to avoid bubbles by using a damp brush to slide the decal onto your nail.
Pro tip: layer different colors to add depth to your design, starting with a base coat and building up to the main motif.
Simplify the design by using a single starfish or coral branch, or elaborate by adding seaweed or shell details.
If you’re short on time, focus on one accent nail with a bold motif and pair it with solid colors on the other nails.
6. Mermaid Scales (Glitter & Iridescent)
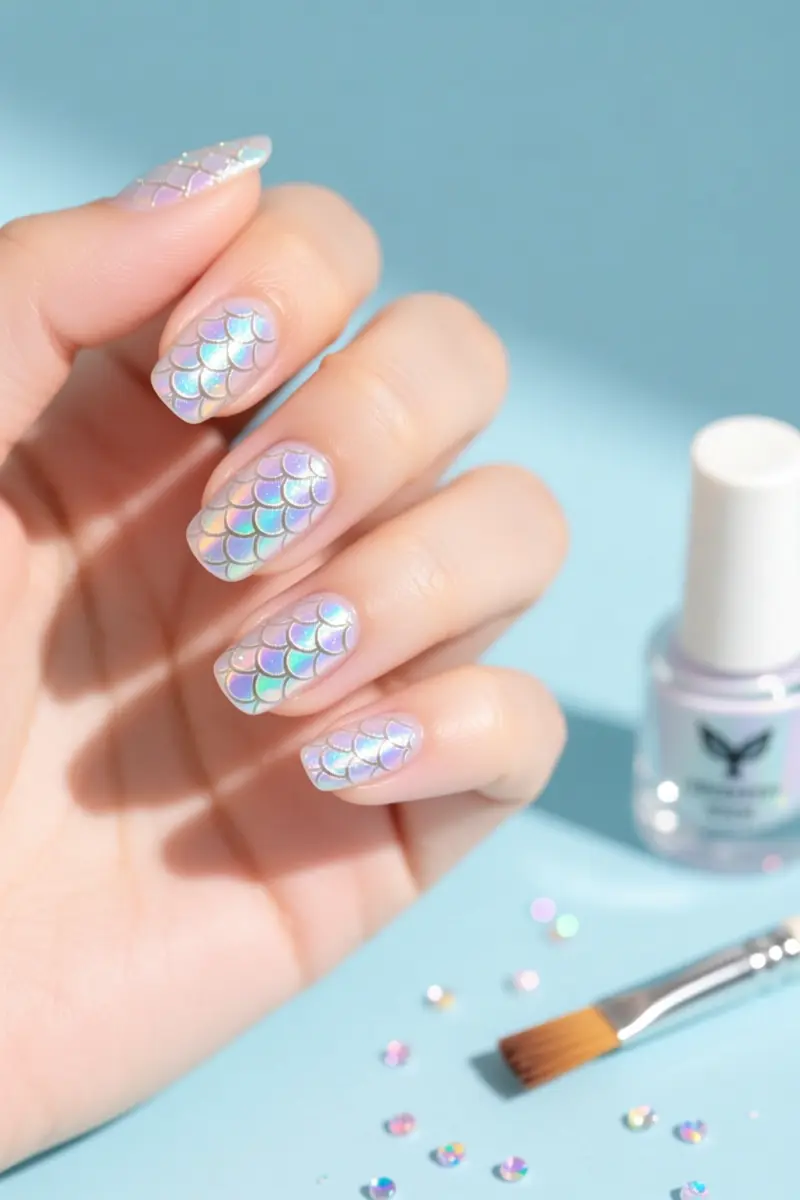
Mermaid scales nail art is a stunning way to add some underwater magic to your summer look.
Iridescent polishes and holographic glitters create a shimmering effect that’s perfect for catching the light. To apply glitter effectively, use a light hand and a small brush to minimize fallout.
A stamping technique can also be used to create crisp, uniform scale patterns. This method requires some practice, but the result is well worth it. When light catches the iridescent colors, it’s mesmerizing – the scales seem to shift and shine like real treasure.
To prevent glitter fallout, try applying a glitter-bonding top coat. For a bold mermaid look, pair iridescent glitters with deep blues or purples. Pastel shades can also work well, especially with softer, more subtle glitters.
7. Palm Tree Silhouettes
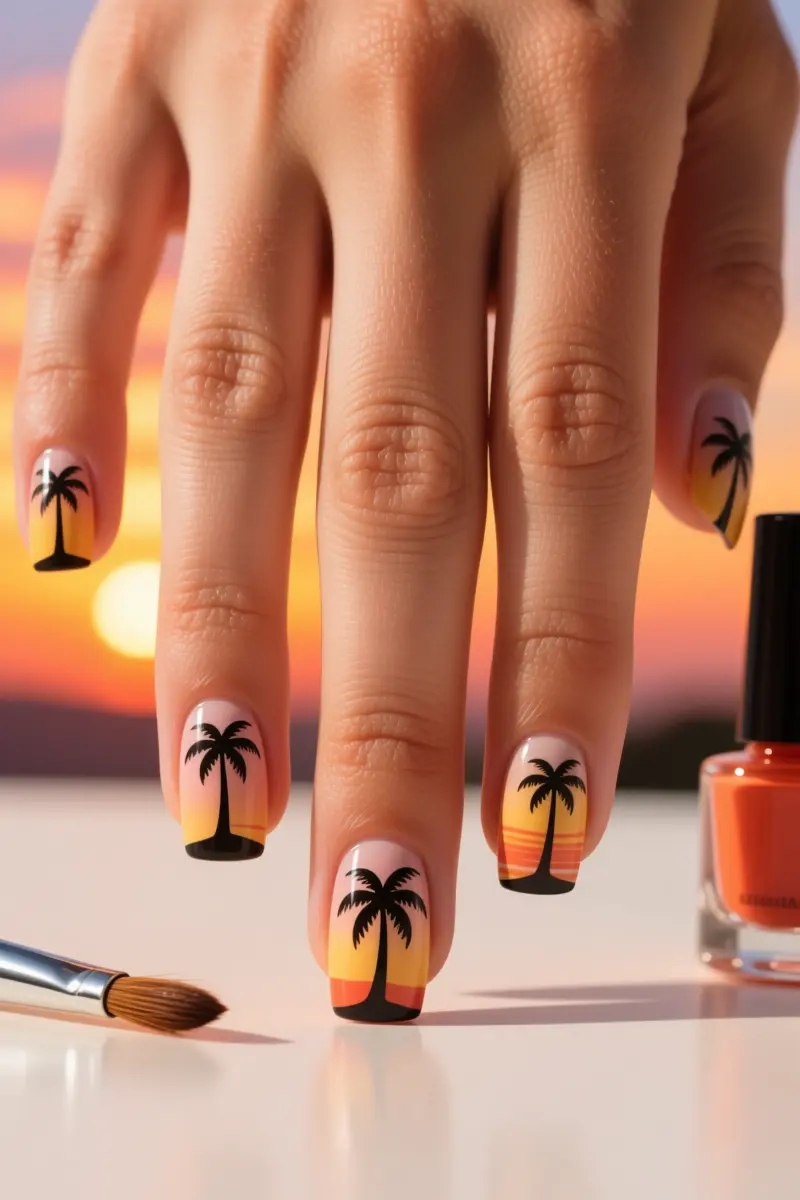
Black palm tree silhouettes against vibrant sunset or clear blue sky backdrops evoke instant beach and vacation vibes.
To create this iconic look, you need expertise in freehand painting delicate palm fronds or using stamping plates for crisp outlines. A steady hand is crucial for painting intricate details.
To maintain a steady hand, try painting with your dominant hand while resting it on a flat surface. Varying palm tree types, such as a single tree or a cluster, allows you to fit the design to different nail sizes.
For smaller nails, a single palm tree is a great option, while larger nails can accommodate a cluster of trees.
You can also experiment with different palm tree heights and angles to add visual interest. Using a nail art brush with synthetic fibers can help you achieve smooth, even lines.
8. Geometric Beach Huts
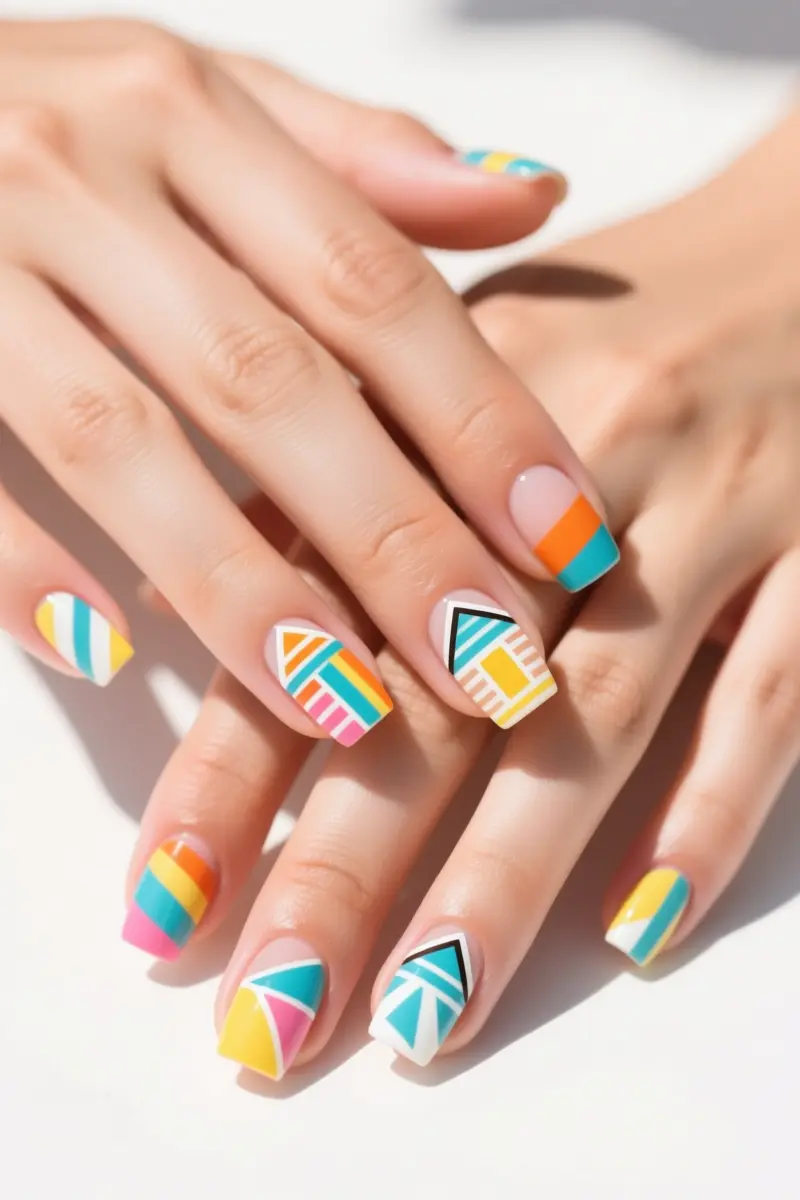
Geometric beach huts inspire a modern, chic nail art look. Bright colors and abstract patterns create a playful vibe. To achieve clean lines, use striping tape. This technique requires expertise, but with practice, you can master it.
For a flawless design, plan your layout before painting. Consider the colors and shapes you want to use. A pro tip is to sketch your design on a nail wheel or a piece of paper. This helps you visualize the final result.
When using striping tape, make sure to let each layer dry completely. This prevents colors from bleeding under the tape. Proper drying times are crucial to a successful design. Apply thin layers of polish and wait for each layer to dry before adding more tape or polish.
With precise color blocking, you can create a stunning geometric pattern. This technique is all about contrasting colors and sharp lines.
9. Dainty Anchor & Ship Wheel
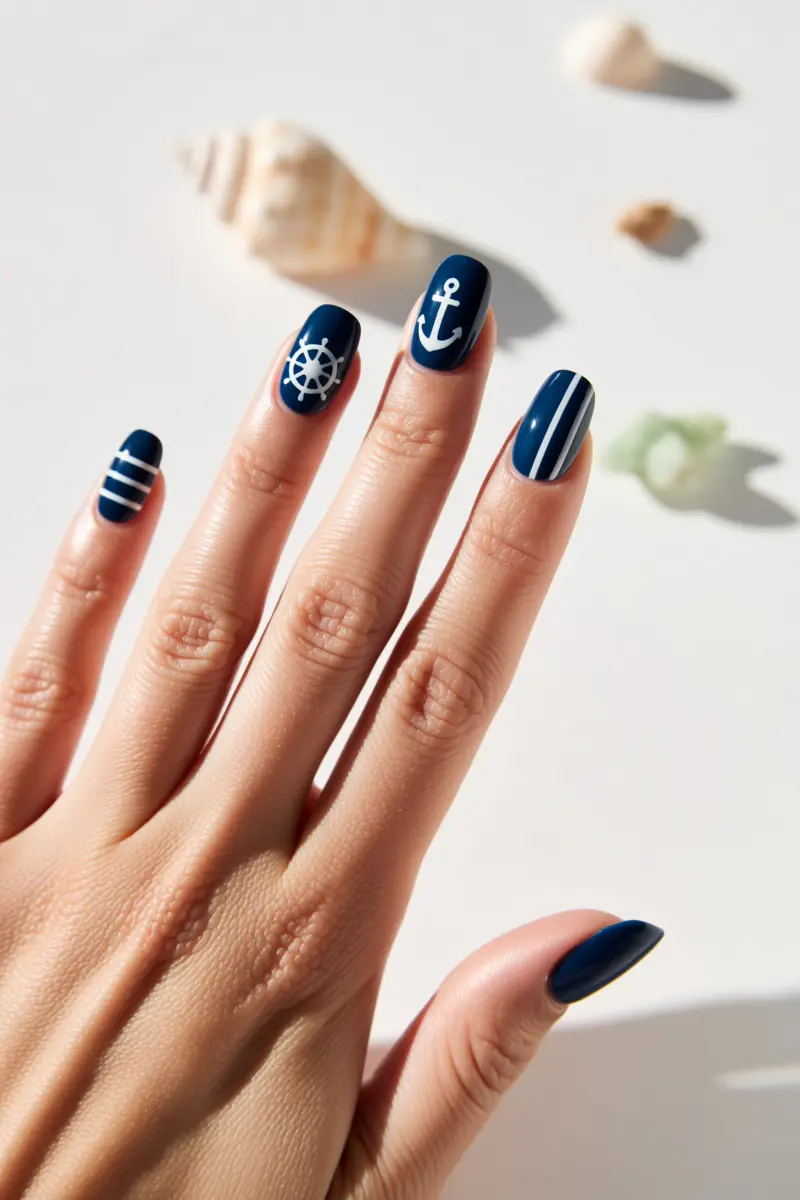
Subtle nautical themes are perfect for summer. Tiny anchors and ship wheels add a touch of elegance to your nail art. Fine-tipped nail art pens or tiny brushes are essential for intricate detailing.
To achieve a minimalist yet impactful design, use a light hand when applying details. Navy, white, or red base colors complement nautical themes perfectly.
For a classic look, pair a navy base with white anchors or stripes. Red and white stripes are also a timeless combination.
When using fine-tipped pens, start with simple designs and build up to more complex ones. This will help you achieve precise lines and details.
With practice, you can create stunning nautical nail art that’s perfect for your summer vacation.
10. Glassy Water Effect
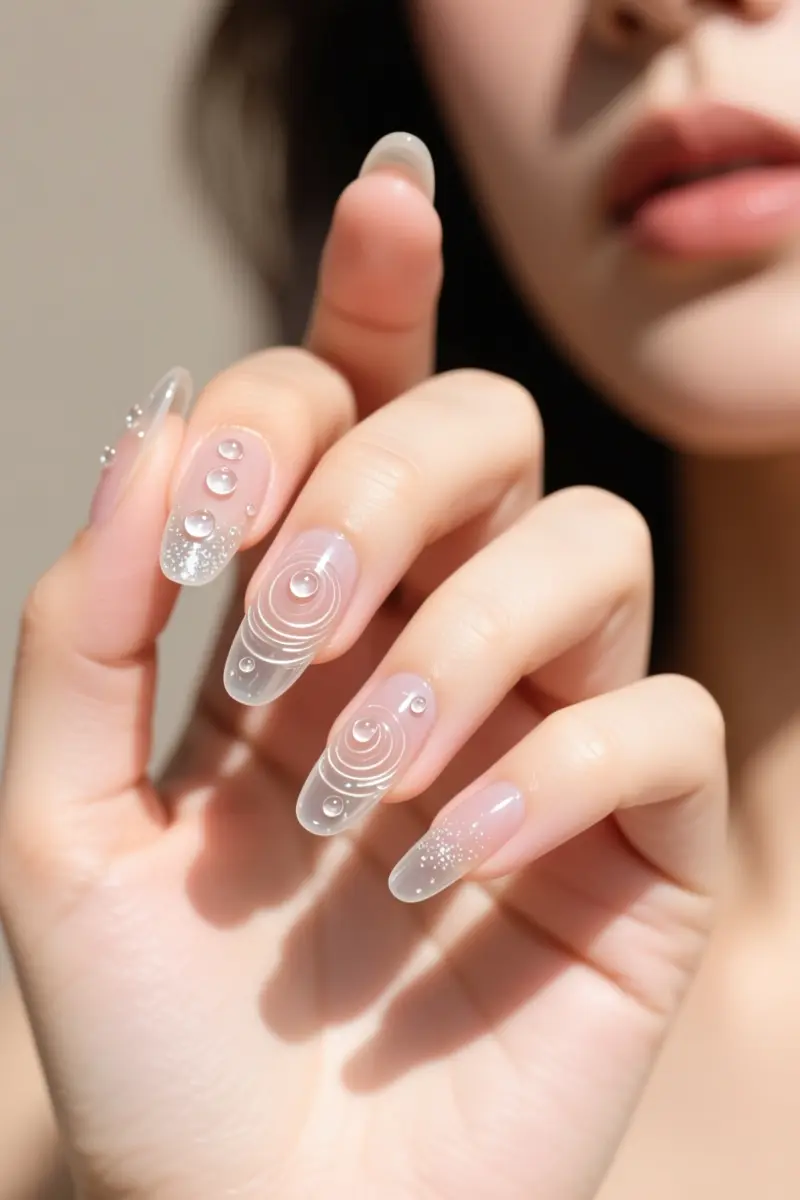
To achieve a glassy water effect, layer clear or translucent jelly polishes. This builds depth and creates a sense of movement. Add subtle glitter for a shimmering finish.
Strategically place clear topcoat droplets to mimic water ripples. The result is an optical illusion that gives the appearance of wet nails.
The key to this look is layering. Apply thin coats of jelly polish, allowing each to dry before adding the next. This prevents cloudiness and ensures a smooth finish. For a truly wet look, finish with a clear topcoat and add a few carefully placed droplets.
This technique requires patience, but the result is mesmerizing. The depth and shine are captivating, like gazing into calm water.
A pro tip is to use a small brush to place the clear topcoat droplets, allowing for precise control. This helps avoid cloudiness and achieves a realistic, glassy finish.
11. Vibrant Fruit Slices (Pineapple, Watermelon)
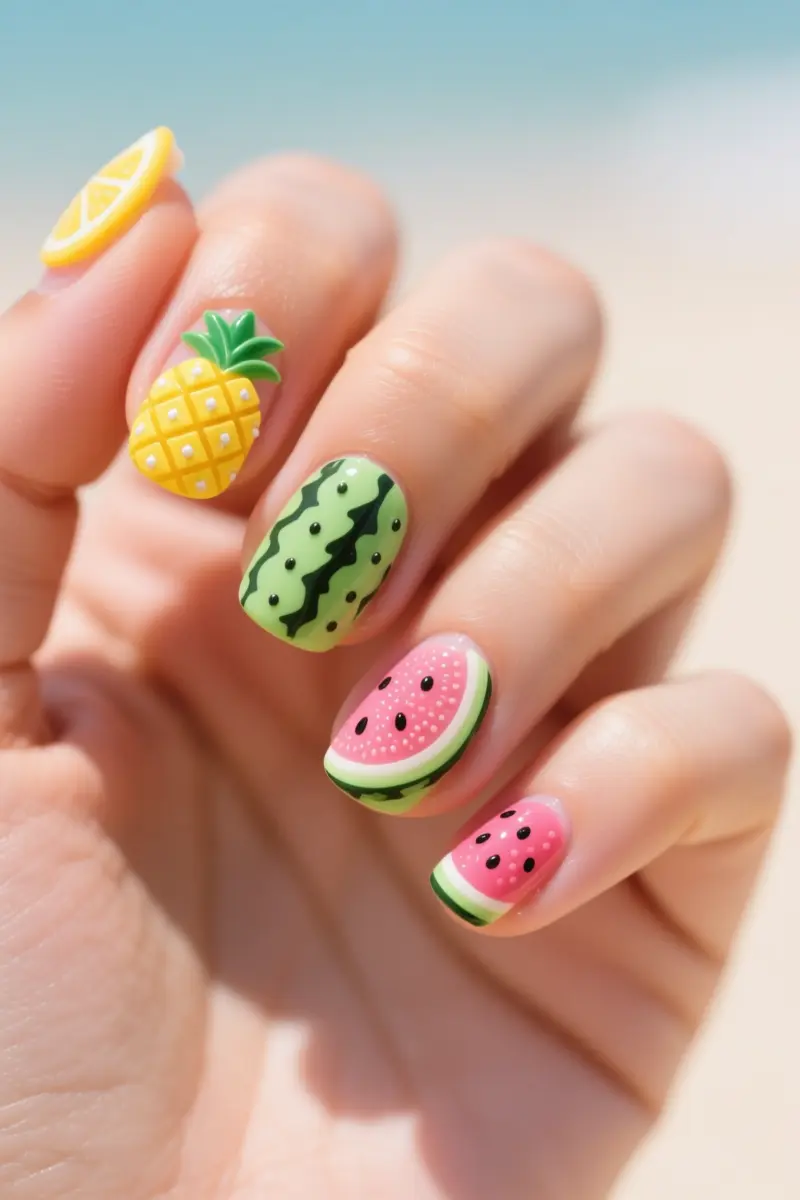
Vibrant fruit slices are a great way to add a pop of color to your beach nails. Pineapples and watermelons are popular choices and can be paired with other summer fruits like citrus slices. To create these fun designs, use dotting tools and fine brushes to add texture and dimension.
For a realistic look, use bright, opaque polishes in shades of yellow, green, and pink. Scale the designs according to your nail size; a smaller nail can feature a single slice, while a larger nail can fit multiple.
Use a small dotting tool to create the texture of a pineapple’s skin or the seeds of a watermelon. Fine brushes are perfect for painting on the thin lines of a citrus slice.
By using these tools and techniques, you can create a unique and eye-catching nail art design that’s perfect for your summer vacation.
12. Pearl Embellishments
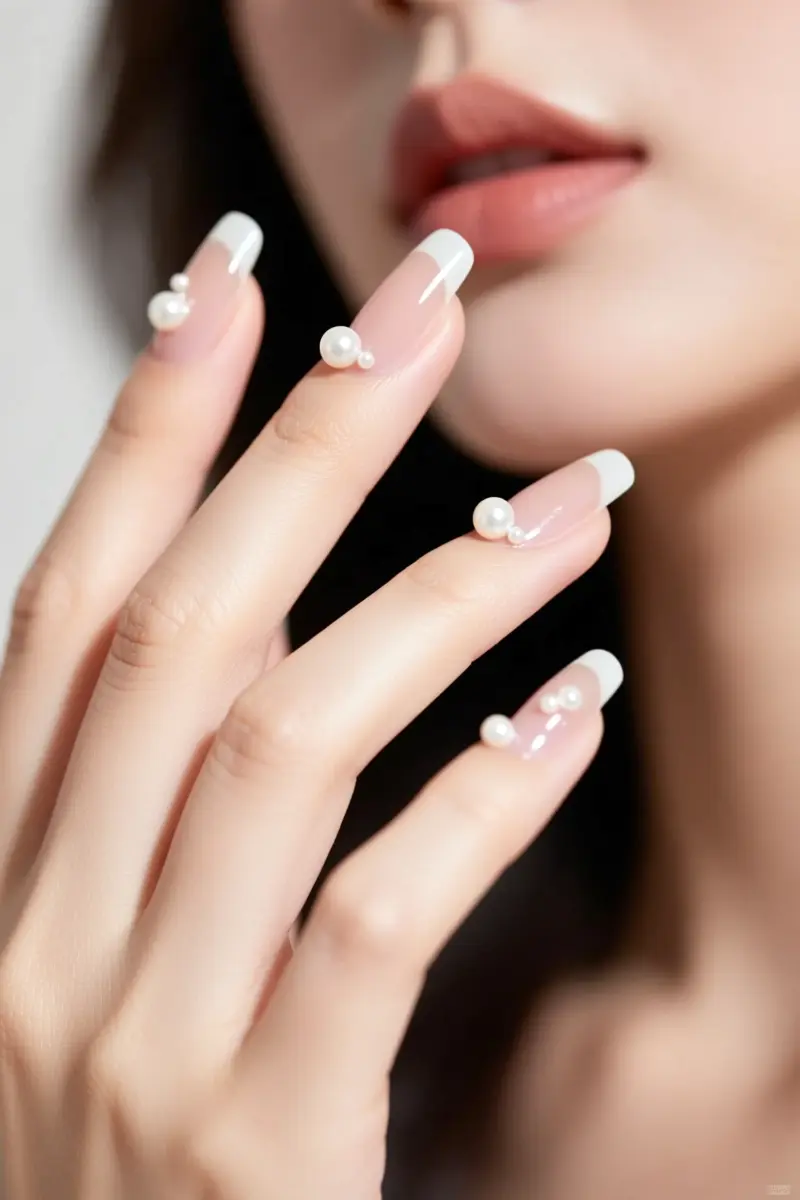
Small pearl beads add a touch of sophistication to nude, pastel, or clear nails. They evoke the elegance of ocean treasures.
To secure these embellishments, use strong nail glue or a durable gel top coat. This expertise ensures your pearl nails remain intact throughout your summer vacation.
The tactile and visual richness of pearls is undeniable. Running your fingers over the smooth surface is a sensory delight.
Visually, the subtle sheen of pearls catches the light, exuding luxury and refinement. For a pro tip, slightly embed the pearls into a tacky top coat layer to enhance adherence.
A common mistake is applying pearls too loosely, causing them to fall off easily. To avoid this, make sure the top coat is still slightly tacky when applying the pearls. Proper application is key to preventing snags or discomfort.
Time To Get Beachy
With these 12 gorgeous beach nail art ideas, you’ll be inspired to create a look that’s as unique as you are. Remember to keep your nail art simple with a base coat, and don’t forget to finish with a top coat to seal in your design. Save this for your next salon visit or share with a friend who needs a summer beauty pick-me-up, and get ready to make a splash with your new beachy nails!
Frequently Asked Questions
How can I make my beach-themed nail art last longer in saltwater and sand?
To extend the life of your beach nail art, always start with a clean, prepped nail surface, use a high-quality base coat, and finish with a durable, chip-resistant top coat. Opt for gel polish for ultimate longevity. Reapply top coat every 2-3 days, and rinse your hands with fresh water after swimming in saltwater to prevent polish degradation.
What nail polish finishes are best for vacation nails?
For vacation nails, gel polish or long-wear traditional polishes with a glossy, chip-resistant finish are ideal for durability. Matte finishes can look chic but may show dirt more easily. Iridescent, glitter, or jelly finishes are also excellent choices for capturing that summery, beachy sparkle.
Are gel or regular polishes better for beach vacations?
Gel polishes are generally superior for beach vacations due to their extended wear (2-3 weeks), high durability, and resistance to chipping, fading, and saltwater effects. Regular polishes, while offering more design flexibility, typically last only a few days before showing wear, especially with frequent water exposure.
Can I do intricate beach nail art designs at home, or should I visit a salon?
Many intricate beach nail art designs can be achieved at home with practice, the right tools (e.g., dotting tools, fine brushes, stamping plates), and quality polishes. However, for highly detailed, precise, or long-lasting designs like gel art or elaborate 3D embellishments, visiting a professional salon is recommended for optimal results and durability.
What are popular nail colors for summer?
Popular nail colors for summer include vibrant shades like turquoise, coral, fuchsia, sunny yellow, and electric blue. Pastels such as lavender, mint green, and baby pink also remain a classic choice. Nudes with a hint of shimmer or sheer jelly polishes are trending for a more subtle, ‘clean girl’ aesthetic.