9 Wearable Christmas Bow Nail Designs That Won’t Snag on Your Sweaters
Bows look dreamy, but can you actually wear them without snagging your favorite holiday sweater or losing a charm by day two? Instagram feeds are flooded with elaborate bow nails that sparkle under twinkling lights, yet catching on knitwear is a buzzkill.
This list pulls the most practical, chic twists on the trend, styles that stay put while you sip cocoa and shop gifts.
From ultra‑fine line bows that whisper festive flair to micro‑decals that glide over sheer pink, nude, or milky white bases, each design is built to last three weeks or more.
We’ll also show why a builder gel overlay is the secret weapon for anchoring 3D charms without sharp edges. Ready to pick a bow that’s as functional as it is festive?
Dive into the nine looks below.
1. The Micro-Bow on a Sheer Pink Base
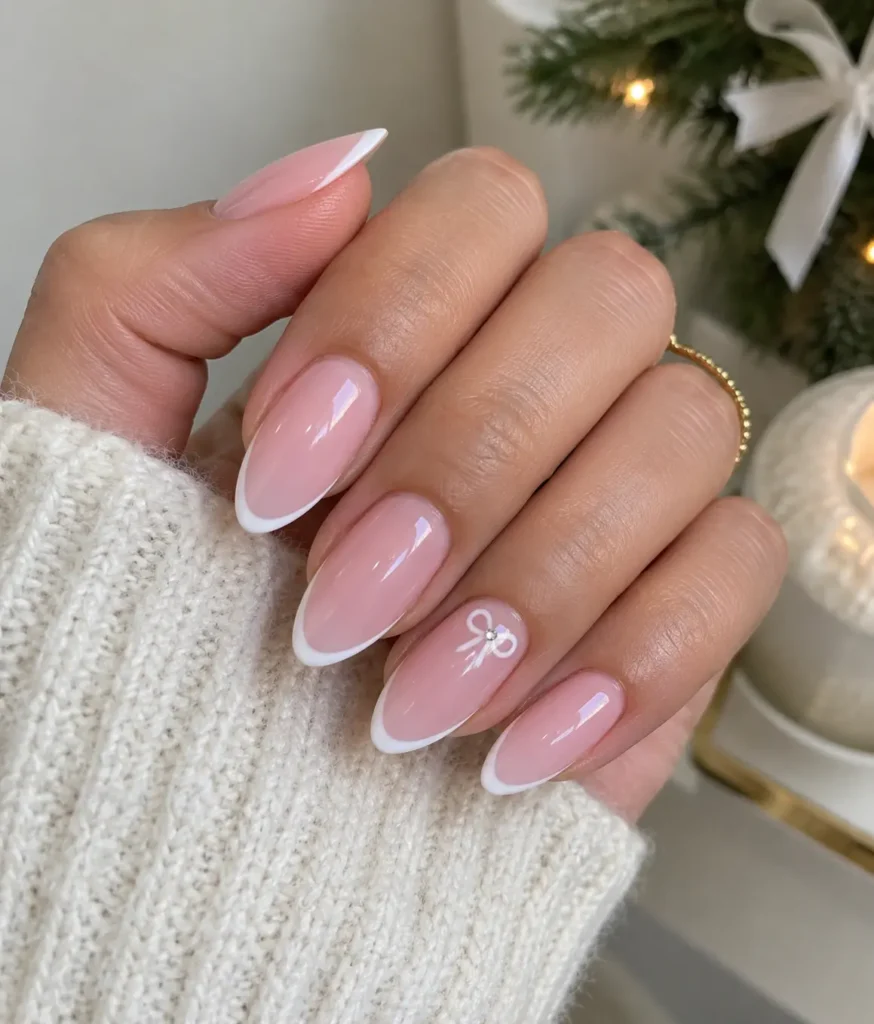
A micro‑bow on a sheer pink base gives a minimalist, work‑friendly festive nail. Use a short almond shape and a sheer pink shade such as milky baby pink or blush.
A fine white French tip frames the nail while a tiny white bow sits near the cuticle on the ring or middle finger.
The glossy finish can be lifted with a single micro pearl or one rhinestone for extra sparkle.
Grab an ultra‑thin striping brush and dip it lightly in gel polish. First, press a dotting tool at the bow’s anchor point, then sweep the brush to draw the loop.
Keep the brush barely loaded; too much gel turns the delicate bow into a blob.
The sheer neutral base masks new growth, so regrowth looks soft instead of stark. Because the bow stays tiny, it rarely catches on sweaters or office fabrics.
This design fits workdays, brunches, and spring events without feeling over‑done.
Many people find that textured bows can snag on delicate knits, so keeping the loops small is key for low‑maintenance wear.
Users report that a pink micro‑bow instantly makes them feel more put‑together, delivering a subtle “I did something” vibe.
2. Magnetic Velvet Bows with Soft Dimension
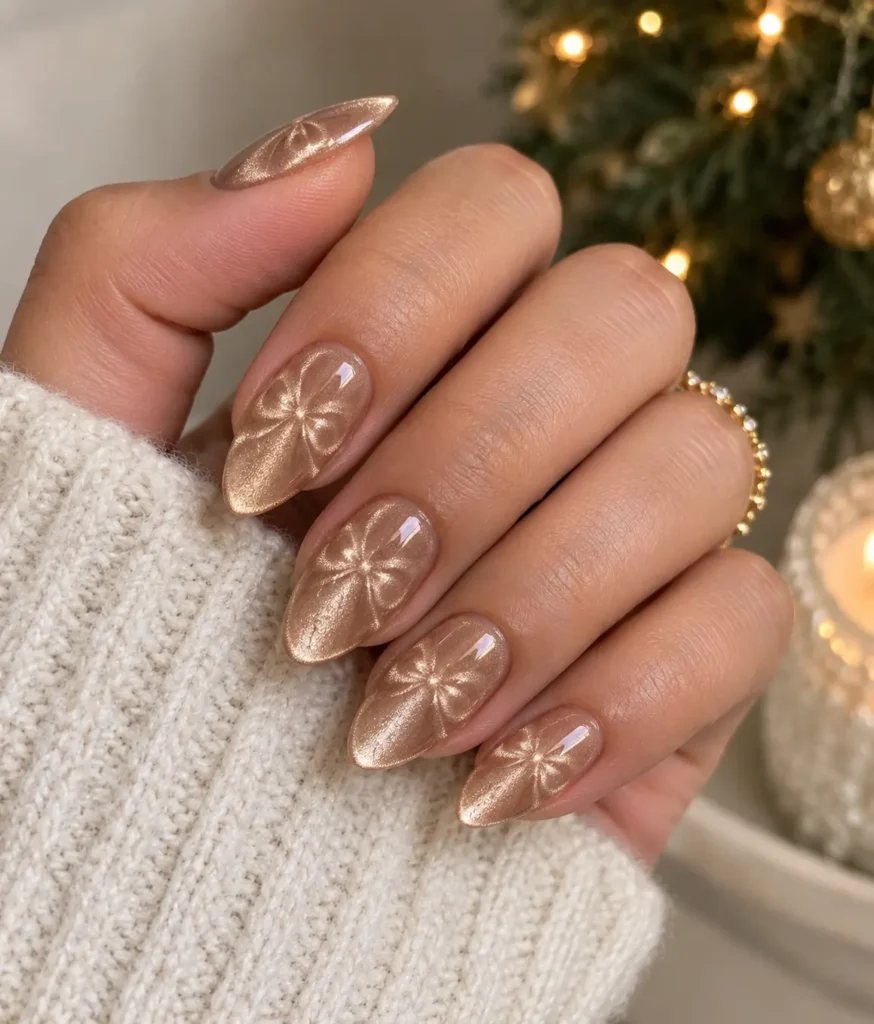
Magnetic velvet bows create a soft‑dimensional ribbon illusion using cat‑eye gel and a magnetic wand. Start with a base coat, then apply a magnetic gel polish loaded with high‑density silver particles.
Hold the dual‑head rectangular magnet 3‑5 mm from the nail side and glide it parallel for five seconds; repeat on the opposite side for five seconds, then sweep the bottom near the cuticle and the top near the free edge to pull shimmer into the center of each bow loop.
The plush depth appears as a velvet finish that mimics crushed fabric. When the shimmer settles, flash cure under a UV/LED lamp for ten seconds to lock the effect.
Warm skin tones pair nicely with gold‑tone velvet, giving a rich holiday glow; cool undertones look best with silver‑pine velvet for a frosty contrast.
Work one finger at a time to prevent the magnetic pattern from fading before curing.
A common error is curing too early; the gel will harden before the particles settle, leaving a blurry or grey cat‑eye.
Keep the magnet close and move swiftly to preserve the crisp bow shape.
3. The Encapsulated 3D Acrylic Bow
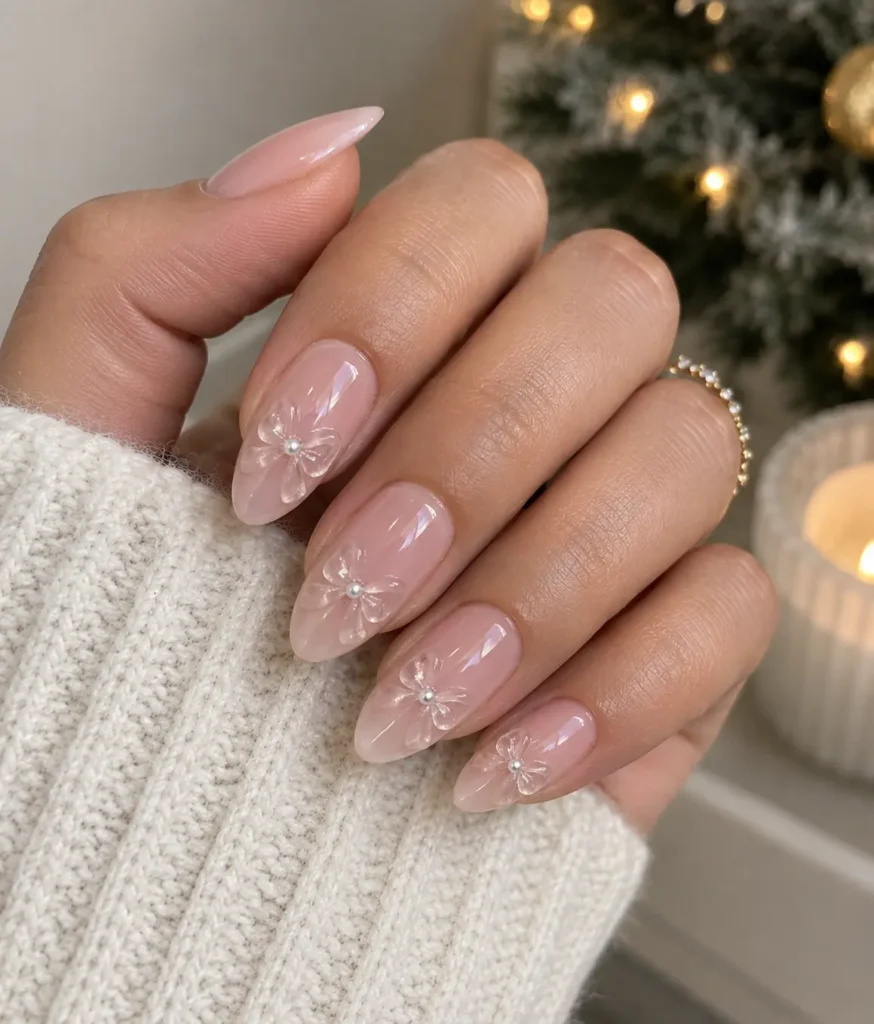
The Encapsulated 3D Acrylic Bow stays secure when the bow is sealed into a thick builder gel overlay rather than simply glued on top.
A loose glue edge catches sweater fibers the moment you brush against it, causing the charm to pull off the nail.
By embedding the acrylic charm in builder gel and finishing with a clear overlay protection, the edges are smooth, and the bow becomes part of the nail’s surface.
This method adds durability and prevents the bow from snagging on fabrics.
A basic full set of acrylic nails runs roughly $30-$60. Each encapsulated charm starts at about $3, and a builder‑gel overlay can add $5 to $20 per nail, so a single 3D bow may increase the total bill by $8 to $30.
Acrylic fills are needed every 2 to 3 weeks, typically $20 to $40, to keep the gel seal intact and avoid lift.
Skipping fills often leads to breakage or a ragged look. Professional removal, costing $10-$30, is recommended to protect natural nails.
The technique works best on medium‑length nails; very short tips may not support the extra weight, and frequent maintenance is essential for a polished finish.
4. Negative Space French Tips with Crimson Bow Accents
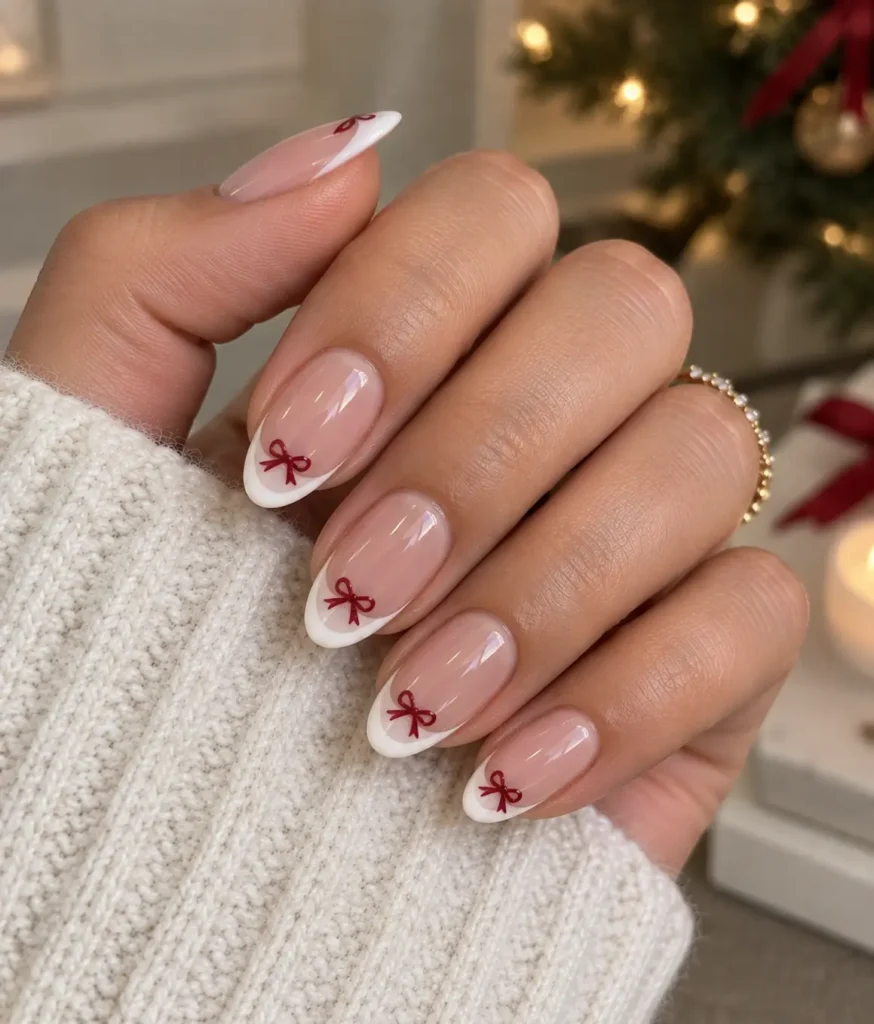
Negative space French tips with a tiny crimson bow at the smile line give short nails an instant elongating effect.
The design keeps the nail mostly bare, so the pink‑nude base and clean white tip create a sleek silhouette, while the hand‑painted bow in crimson paint adds just enough festive flair.
Because the bow sits right on the smile line, the eye is drawn upward, making the nail bed appear longer without extra length.
The look fits the coquette nail mood, which favors playful details like bows and a refined, flirtatious vibe.
A subtle glossy finish mirrors the soft femininity typical of coquette aesthetics, and the #coquettenails community often showcases similar negative‑space French styles.
Avoid painting the bow loops too wide; an oversized bow splits the nail visually and can make short nails look wider rather than longer.
Keep the loops narrow and centered for the best elongating illusion.
This design works best on short oval or almond shapes; very square or wide nails may not benefit from the same lengthening effect.
A top coat is essential to prevent the crimson paint from chipping during holiday sweater wear.
5. Liquid Chrome Ribbon Trails
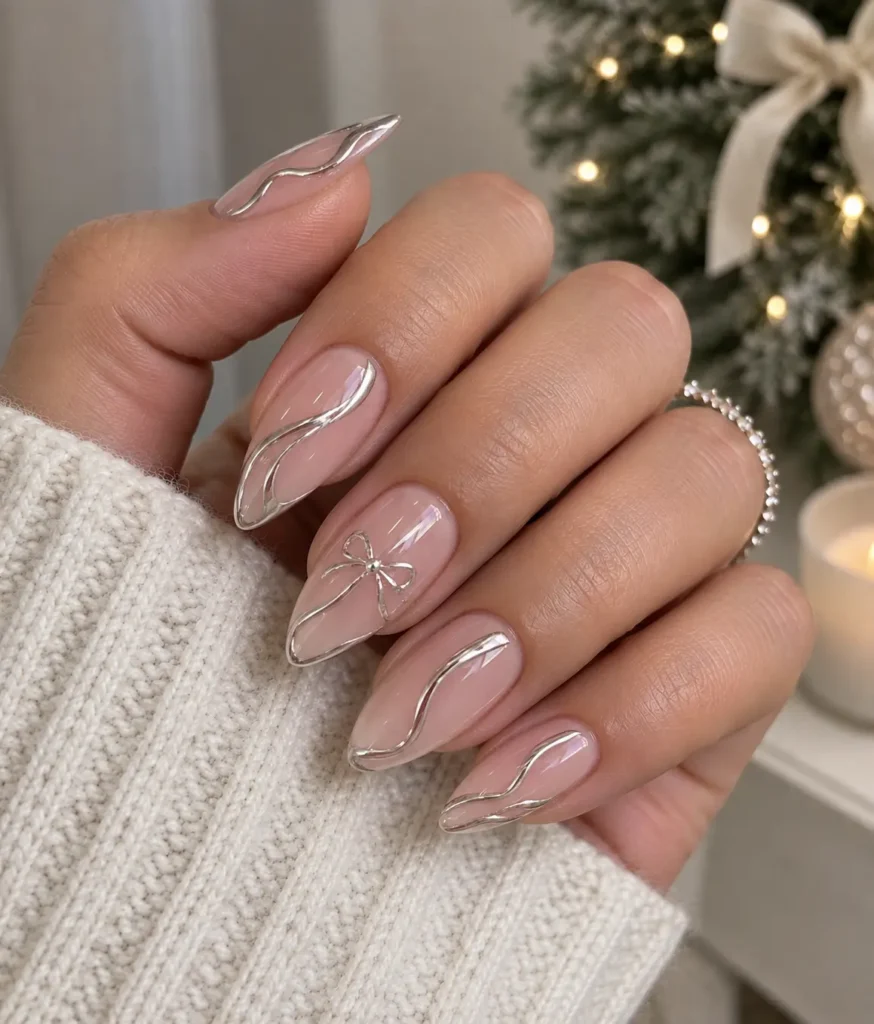
Liquid chrome ribbon trails give a sleek, futuristic nail look that stays festive yet wearable.
The design uses a chrome painting gel to draw fluid, abstract ribbon lines that converge into a tiny bow, creating a subtle metallic finish that catches light without overwhelming holiday sparkle.
For a lasting metallic finish, cure the chrome gel for the full 60‑second LED cycle before sealing with a non‑wipe top coat; under‑curing causes the chrome to peel off within days.
Lightly swipe the top coat to lock in the ribbons while preserving the glossy sheen.
The elongated shape of almond and stiletto nails frames the ribbon lines, making the bow appear balanced and elongating the fingertip.
Pre‑made options like Joyee Chrome Rebellion, priced around $36, showcase this technique on reusable press‑on stiletto nails with a liquid metal design.
A common downside is the extra maintenance: the chrome surface can snag on rough fabrics if the top coat is thin or if the cure time is shortened, so careful sealing is essential for durability.
6. Deep Emerald and Forest Green Velvet Ribbons
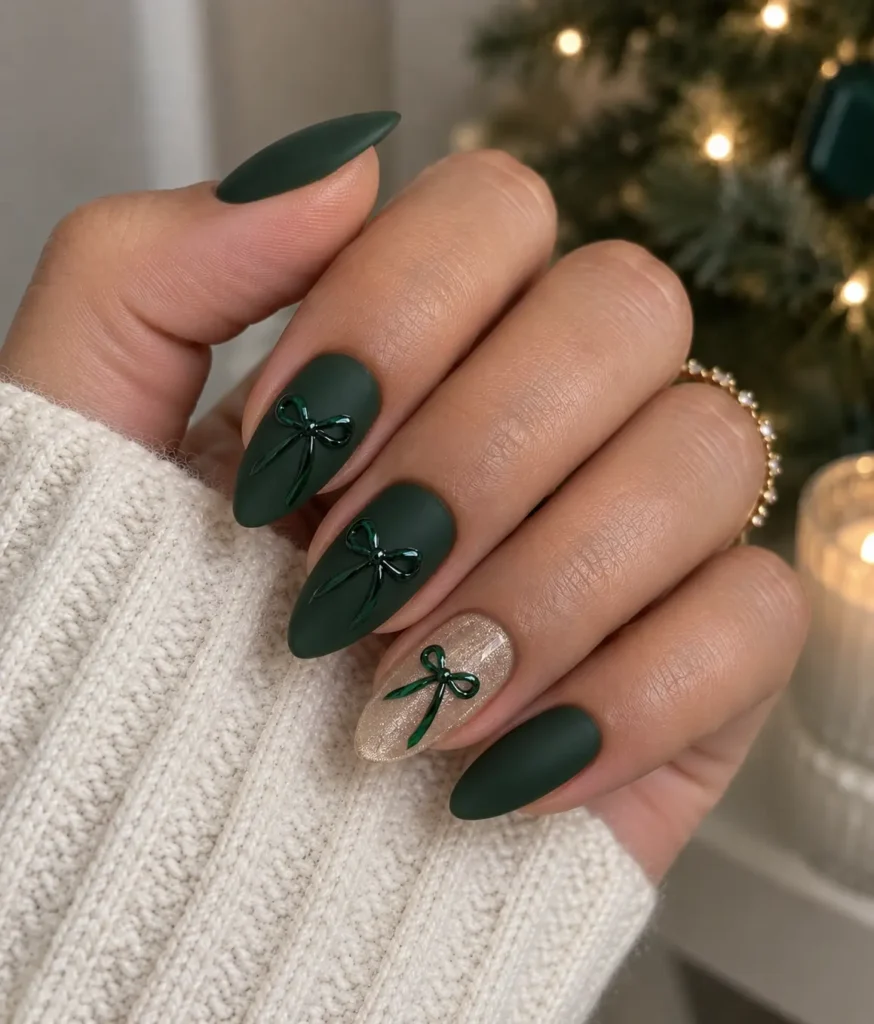
Deep emerald and forest green velvet ribbons give a rich, non‑red holiday nail option. Start with a matte top coat in a forest green shade; the 2024 cottagecore trend highlighted this hue as the season’s dream color.
Zoya’s Merida delivers the perfect emerald green gel for the bow loops, while the matte base creates a velvety backdrop that feels luxurious.
Paint a small triangle, fold the sides into loops, and fill the loops with glossy emerald; the matte base and shiny loops create a jewel‑tone contrast.
A glossy finish on the bow, such as OPI Mirror Shine, adds a glassy sparkle that catches light without overwhelming the look.
Pro tip: add a single drop of black gel polish to the emerald green before curing; use a fine brush to pull the mixture into the bow’s inner curves for subtle shadow detailing that mimics depth.
The matte base may chip faster than a glossy coat, so a quick top‑coat refresh after two days keeps the ribbons crisp.
Those with very light skin may find the dark green appears harsher, so pairing a sheer champagne wash on one accent nail can soften the overall vibe.
7. The Half-and-Half Accent Nail
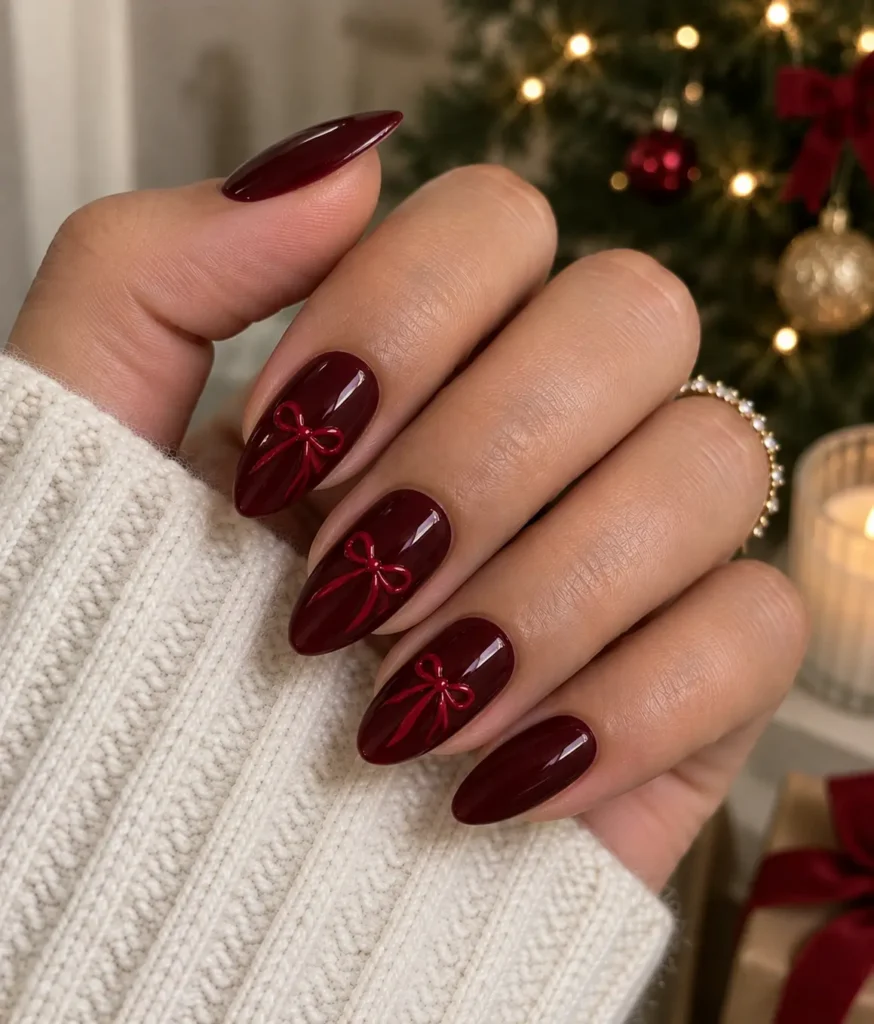
The half-and-half accent nail pairs a single hand‑painted bow on one or two fingers with the rest of the manicure in a solid, high‑gloss finish.
This layout follows the 2026 Coquette and Balletcore aesthetics that celebrate delicate ribbon bows while staying practical for everyday wear.
Use a deep burgundy polish for the base color; the glossy top coat keeps the look festive and snag‑free against sweaters.
Start by coating all ten nails with the burgundy polish and let it cure. Then, on the dominant hand’s easiest‑to‑paint fingers, usually the index and middle, apply the bow using a 000‑size fine line brush and a contrasting red or black gel polish for the ribbon details. The “dominant hand trick” reduces tremor and speeds up the hand‑painted step.
A single accent nail is enough to create visual interest, so the design stays low‑maintenance.
Many people find that limiting detailed work to two fingers prevents the manicure from becoming time‑consuming.
Finish with a non‑wipe glossy top coat to seal the bow and maintain the high‑gloss finish. The result is a wearable Christmas look that feels elegant without the risk of catching on knitwear.
8. Water-Slide Decal Bows (The DIY Cheat Code)
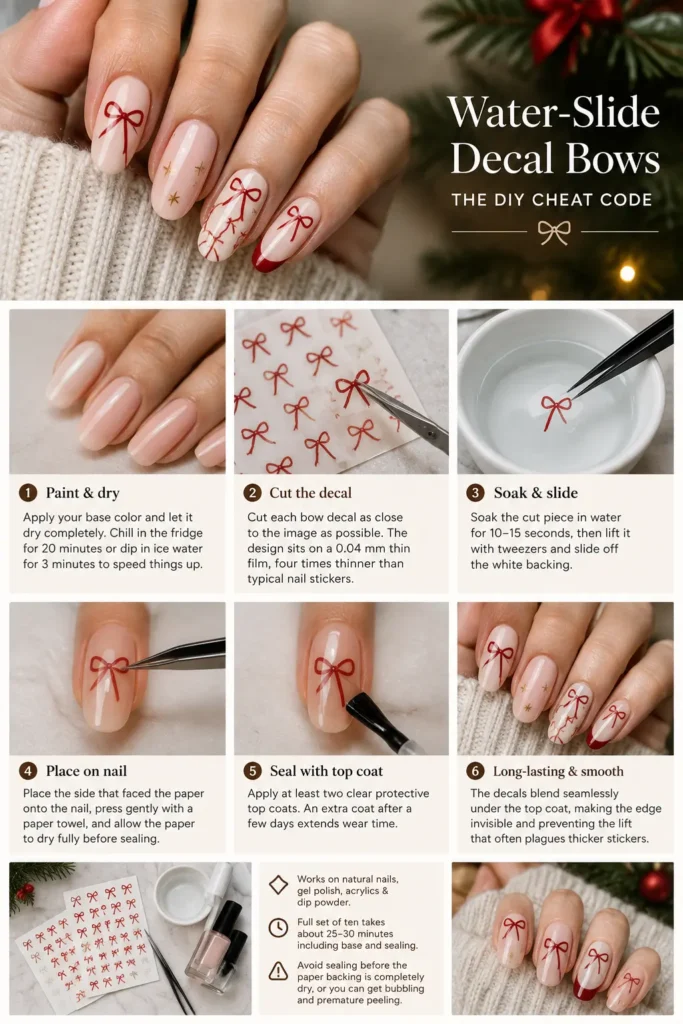
Water‑slide decal bows give a crisp, bubble‑free finish without the time‑consuming hand-painting. Paint each nail in your base color, then let it dry completely; a quick 20‑minute chill in the fridge or a 3‑minute ice‑water dip speeds the process.
Cut each bow decal as close to the image as possible, because the design sits only on a 0.04 mm thin film, four times thinner than typical nail stickers.
Soak the cut piece in water for 10-15 seconds, then lift it with tweezers and slide off the white backing.
Place the side that faced the paper onto the nail, press gently with a paper towel, and allow the paper to dry fully before sealing.
Apply at least two clear protective top coats; an extra coat after a few days extends wear time.
The decals blend seamlessly under the top coat, making the edge invisible and preventing the lift that often plagues thicker nail stickers.
They work on natural nails, gel polish, acrylics, and dip powder, and a full set of ten takes about 25-30 minutes, including base and sealing.
A common pitfall is sealing before the paper backing is completely dry, which can cause bubbling and premature peeling.
9. Coquette Style Bows on a Frosted Pearl Base
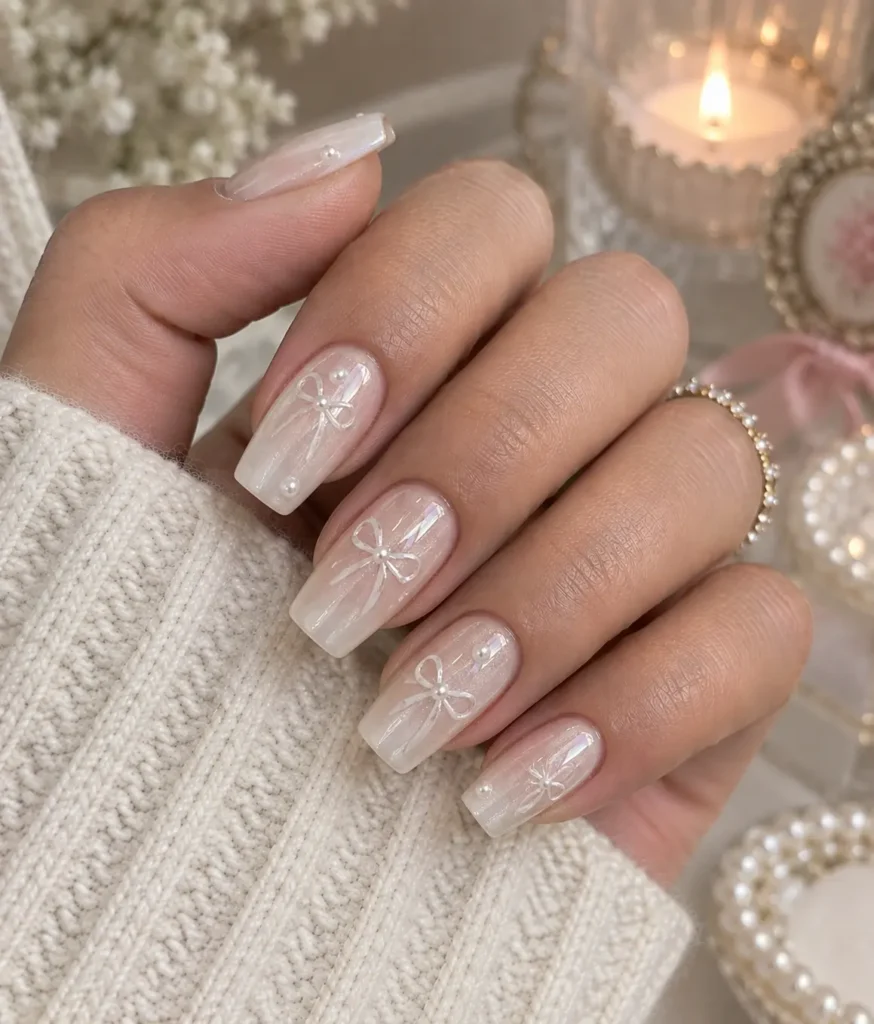
Coquette style bows on a frosted pearl base create a soft, ultra‑feminine nail look. The design uses a milky white or pastel base that shimmers with a glazed finish, then adds tiny hand‑painted white bows and subtle pearl accents for a romantic, vintage‑inspired vibe.
Because the pearl layer reflects light, the effect looks most elegant on active‑length square or squoval nails, where the flat corners keep the bows centered and the shape adds visual balance.
Shorter almond or oval nails work too, but the square silhouette maximizes the coquette aesthetic without feeling cramped.
A simple top coat every few days is essential; many people find the frosted pearl base shows scratches quickly, and the coating preserves both shine and the delicate bow details.
Applying the top coat also secures the glaze, preventing the design from snagging on sweaters or scarves.
If you favor low‑maintenance manicures, this style may feel a bit high‑maintenance due to the frequent top‑coat refresh.
It suits anyone who loves vintage elegance and can devote a few minutes to upkeep, especially when the nails are kept at a practical length for everyday wear.
Your Next Holiday Nail Moment Awaits
To keep your bows from turning into sweater traps, start with an ultra‑fine line brush or a micro‑decal for a delicate bow that won’t catch.
Pair it with a sheer pink, nude, or milky white base; these shades blend as the nail grows, stretching the manicure well past three weeks.
Finally, cap any 3D charm with a builder gel overlay; the extra seal smooths sharp edges and locks the ornament in place.
Now you’ve got festive flair that survives the holiday hustle. Save this pin for your next salon visit or share it with a friend who needs a snag‑free Christmas nail look.
Frequently Asked Questions
How do you stop 3D nail bows from catching on hair and knitwear?
To prevent snagging, use a fine liner brush to fill any gaps beneath the 3D bow charm with a thick builder gel or clear gel top coat, curing it thoroughly to create a smooth, sloped barrier that hair can slide right over.
Can you wear bow nail designs on very short nails?
Yes, bow nail designs work beautifully on short nails when kept tiny, placed near the cuticle or the very tip of the nail, and paired with a sheer base to maintain an elongated look.
Which polish formula is best for hand-painting bows at home?
Highly pigmented gel liner polish is the best formula for hand-painting bows because it does not dry or self-level while you work, allowing you to perfect the lines before curing under a UV/LED lamp.
How do you safely remove 3D bow charms without damaging your natural nails?
Do not pull or pry the charms off; instead, file down the surrounding gel bulk with an e-file or heavy-grit hand file, soak the nail in pure acetone to soften the adhesive, and gently slide the charm off.