
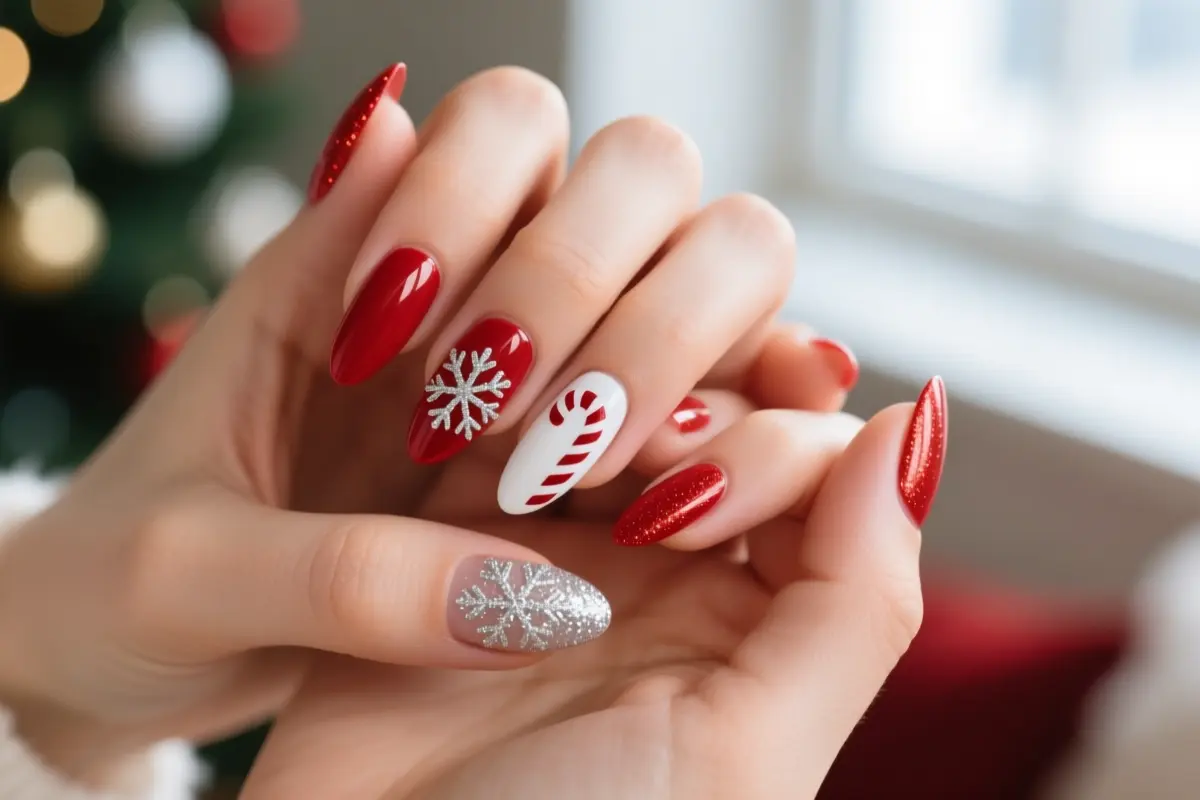
10 Christmas Nail Art Designs That Stand Up to Real Holiday Wear
Studio‑lit holiday nail photos show flawless snowflake tips while you wrestle with tape, gift boxes, and wool sweaters. Those perfect images hide the fact that a busy kitchen or a chunky knit can quickly ruin a delicate design.
In this list, we match each design to a realistic wear level. Hand‑painted snowflakes need a 000 striping brush or dotting tool for crisp lines. 3D cable‑knit textures should be sealed with tack‑free builder gel to keep dirt out. Heavy decals and candy‑cane charms stay put when you encapsulate them in a thick structure gel.
And bright red polish stays true without yellowing only with a high‑quality base coat.
1. Minimalist Negative Space Snowflakes
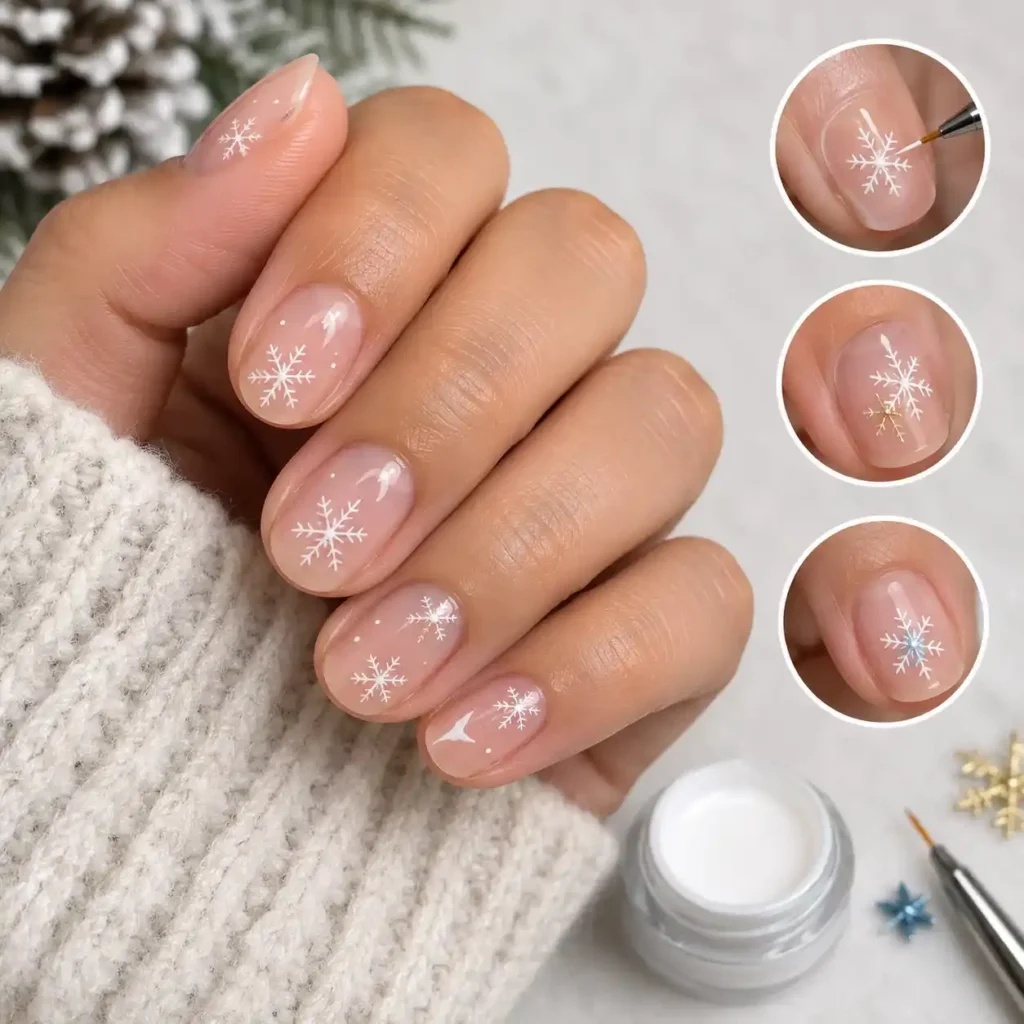
A minimalist negative space snowflake design delivers a clean, modern holiday manicure. The look uses a sheer base with a few crisp white snowflakes left exposed on the nail’s natural surface.
Snowflake nail art remains one of the most popular winter manicure trends in 2024‑2025, working well with colors like white, icy blue, pink, gold, red, and green.
Short, natural nails showcase the design better than long, busy styles, as the negative space keeps the look proportional.
Because most of the nail remains polish‑free, visible nail growth simply extends the negative space, making touch‑ups forgiving.
Start with a clear or pale nude base, then dip a 000 detail brush into high‑pigment gel for the snowflake outlines.
Draw each flake in one swift motion to avoid pooling; the fine tip prevents smudging on the exposed nail.
A common mistake is using regular, thick‑bodied polish, which dries slowly and can blur the delicate lines.
Swap to a high‑pigment gel that cures in 30 seconds; the opacity stays sharp through several weeks of wear.
If you prefer a pop of color, add a tiny gold or icy blue accent on one nail, but keep the rest simple to maintain the minimalist vibe.
2. Magnetic Velvet Emerald and Gold Foil
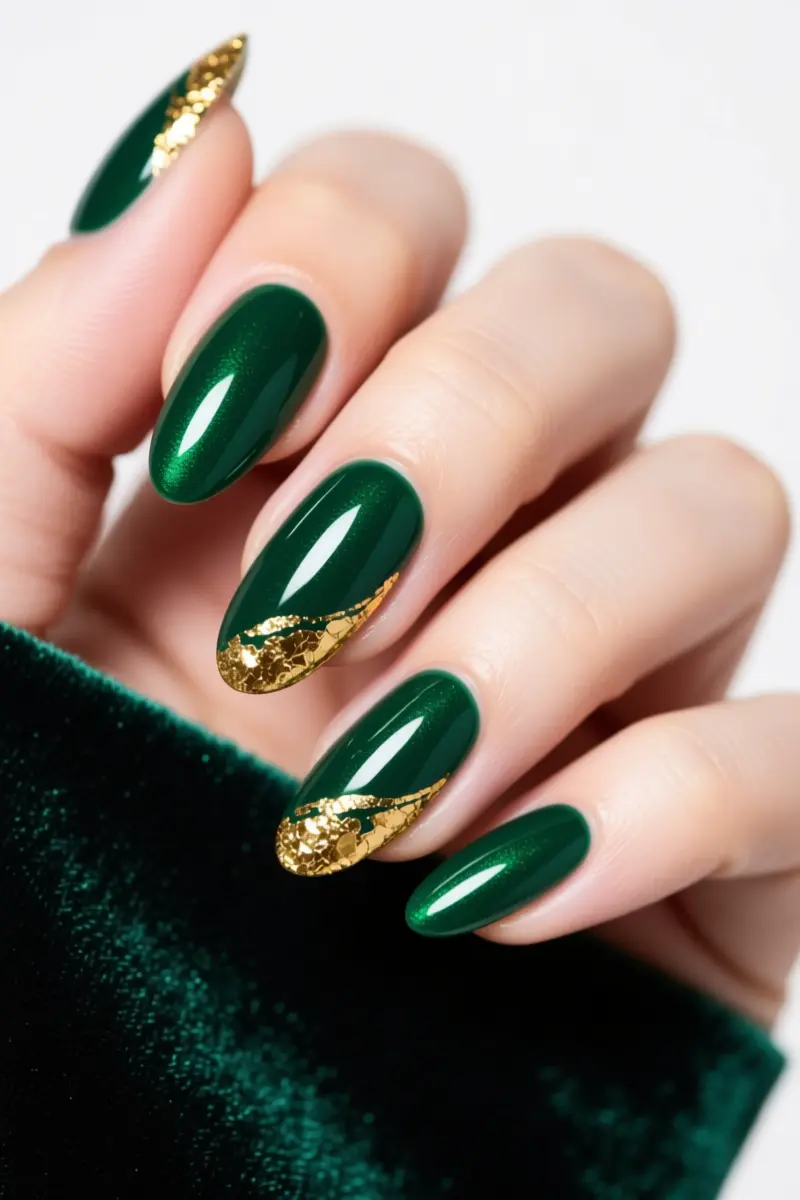
Magnetic velvet emerald nails with gold foil deliver a plush, jewel‑tone look that survives holiday gatherings. Start with a magnetic cat‑eye gel base in emerald; the finer magnetic particles create sparkle without a black undercoat.
While the gel is still tacky, sweep a dual‑head magnet across the surface to align particles into a deep velvet texture; Hannah Lee calls the result “magical and modern.”
Once the velvet effect sets, press gold foil flakes onto the accent areas and seal everything with gel encapsulation.
Proper encapsulation locks the design for 14 to 21 days of wear.
Salon pricing reflects the extra steps: a basic gel manicure with extensions runs around $150, and detailed magnetic art adds roughly $14 per nail.
Because velvet nails are a tier‑one design, they remain cheaper than intricate tier‑three artwork, yet the appointment can feel lengthy, which some clients find uncomfortable.
Deep emerald undertones pair best with cooler skin tones, while the gold foil injects warmth for a balanced look on neutral or warm complexions.
Keep in mind that economic pressure may steer shoppers toward simpler designs, so offering this striking yet affordable option can be a strong selling point.
3. Fine-Line Candy Cane Accent Nails
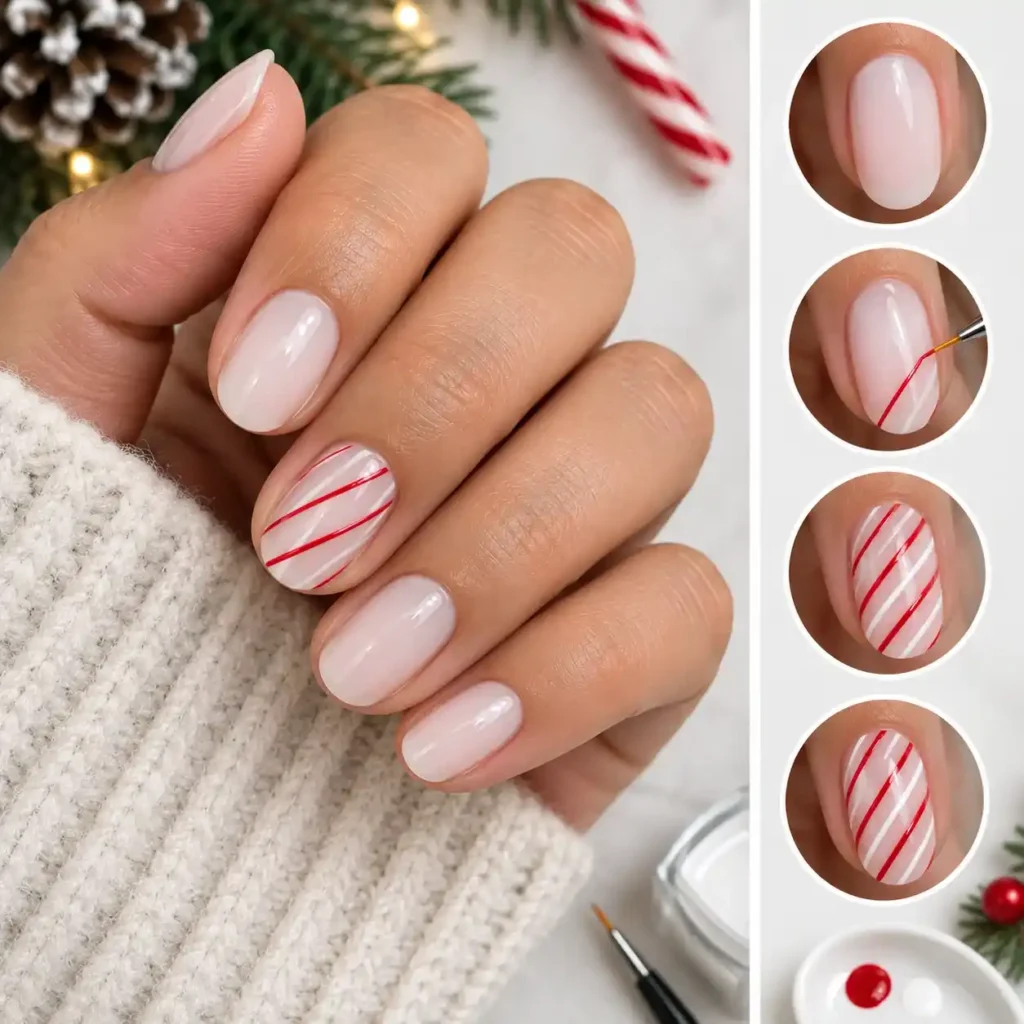
Fine‑line candy cane accent nails place thin red and white stripes on a single nail for a clean holiday look.
Start with a base coat to protect the nail surface. Apply a milky white base instead of a stark chalky white; the soft hue makes the red lines pop and reduces visual clutter.
If you prefer precision, lay a piece of striping tape across the accent nail before painting. Using a fine nail‑art brush, draw a narrow red stripe on the index finger. While the red is still wet, add a thin white stripe beside it to complete the candy‑cane pattern.
Gel polish holds the stripes through the curing cycle better than regular polish, which often smudges when the top coat is applied. A gel finish can keep the design intact for the typical 2, 3‑week wear time.
A common mistake is painting the stripes too thick. Excess paint hinders proper curing and leads to premature peeling, especially on gel.
For best results, keep the accent nail neat and avoid heavy hand movements. This style works best for steady‑hand users and may require a touch‑up after two weeks.
4. Textured 3D Cable Knit Sweater Nails
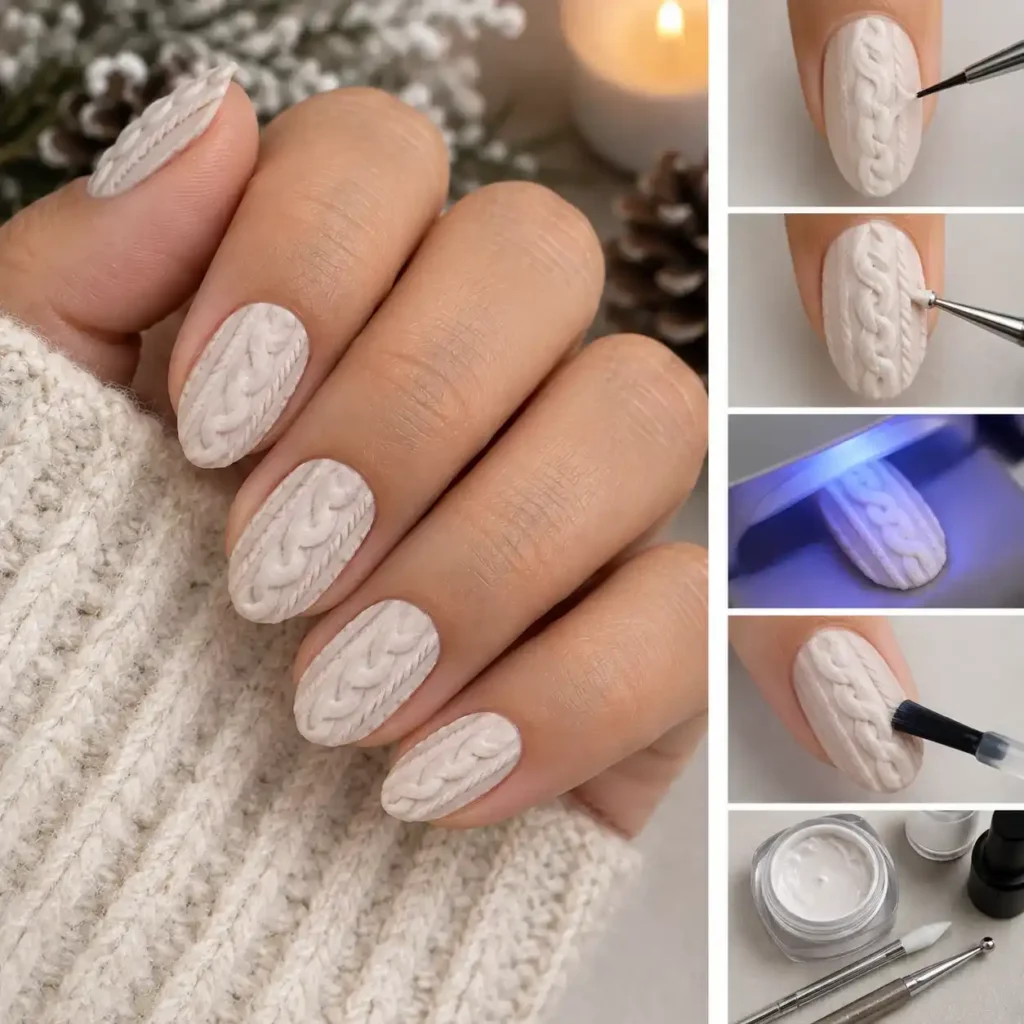
Textured 3D cable‑knit sweater nails create a cozy, matte look that mimics a chunky sweater.
Build the pattern with a thick builder gel or mix acrylic powder into gel polish, then shape the raised stitches using fine‑point silicone tools and a dotting tool.
The high‑viscosity 3D nail art gel stays pliable until cured under a UV/LED lamp, allowing you to sculpt realistic cable loops.
A matte top coat seals the design, but the textured surface quickly attracts lint, makeup residue, and dye from dark denim.
Frequent wipes with rubbing alcohol keep the surface clean and prevent discoloration. Many users report that the finish feels soft to the touch but shows dirt more readily than glossy nails.
This style works best on hard gel or acrylic overlays because very flexible natural nails can flex enough to crack or lift the 3D texture.
If your nails are naturally pliable, consider a thinner sculpting layer or skip the cable‑knit effect. The technique requires a slip solution for smooth sculpting and a UV/LED lamp for reliable cure.
Expect a maintenance routine of cleaning every few days to preserve the fresh, snowy appearance.
5. Micro-Glitter Ombre ‘Winter Sparkle’ Tips
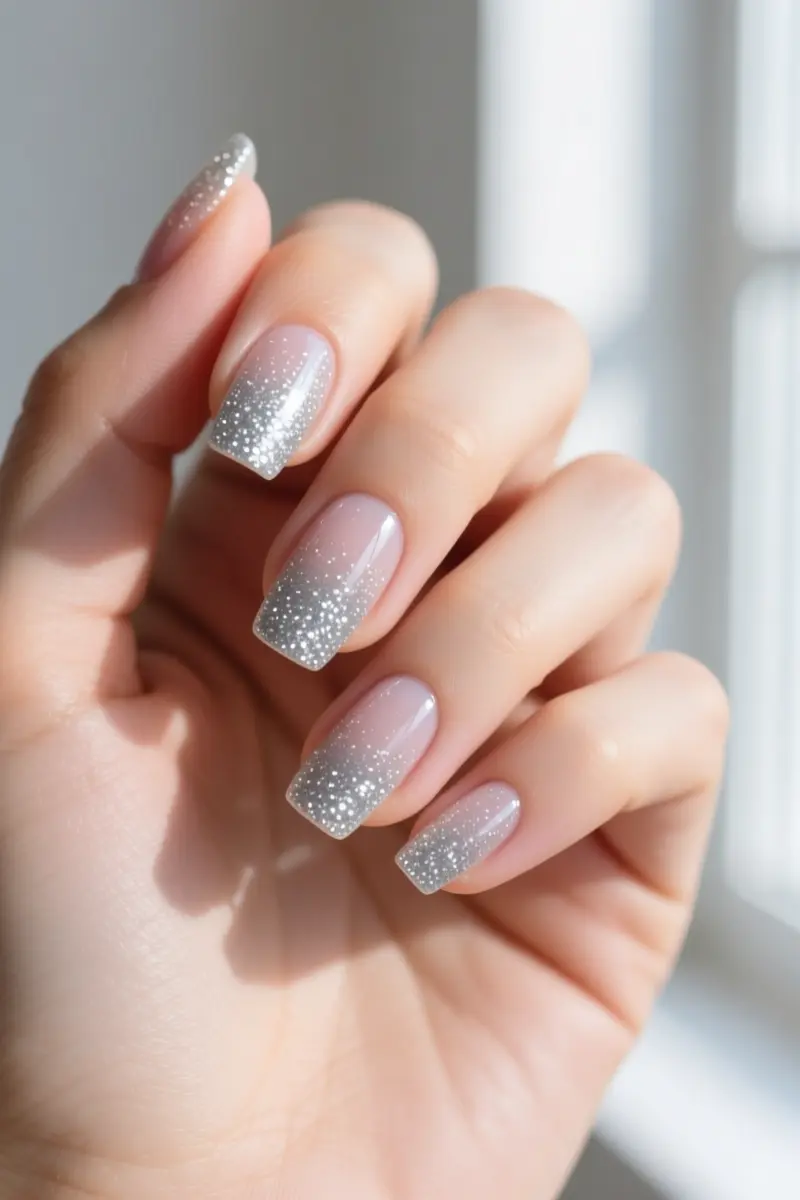
The micro‑glitter ombre “Winter Sparkle” delivers the most durable, low‑maintenance look for holiday wear.
Fine silver or champagne glitter fades from the free edge toward the cuticle, so any chip blends into the gradient and growth hides behind the shimmer.
Users describe the ombre glitter nails tutorial as simple and flawless, thanks to the sponge‑dab method that creates a seamless glitter gradient without brush streaks.
A soft makeup sponge pressed lightly onto the base coat spreads the glitter evenly, while a brush leaves visible lines.
Before dabbing, apply a peel‑off latex barrier along the cuticles; it catches stray particles and protects the skin, then peels away cleanly.
After the gradient sets, finish with a clear top coat to lock in sparkle and add extra resistance to wear.
This technique works best on nails at least three millimeters long, where the free‑edge fade has room to develop.
The result stays glossy through gift‑opening, dinner parties, and a full day of festivities without noticeable chipping.
6. Matte Cranberry Red with Glossy Holly Swirls
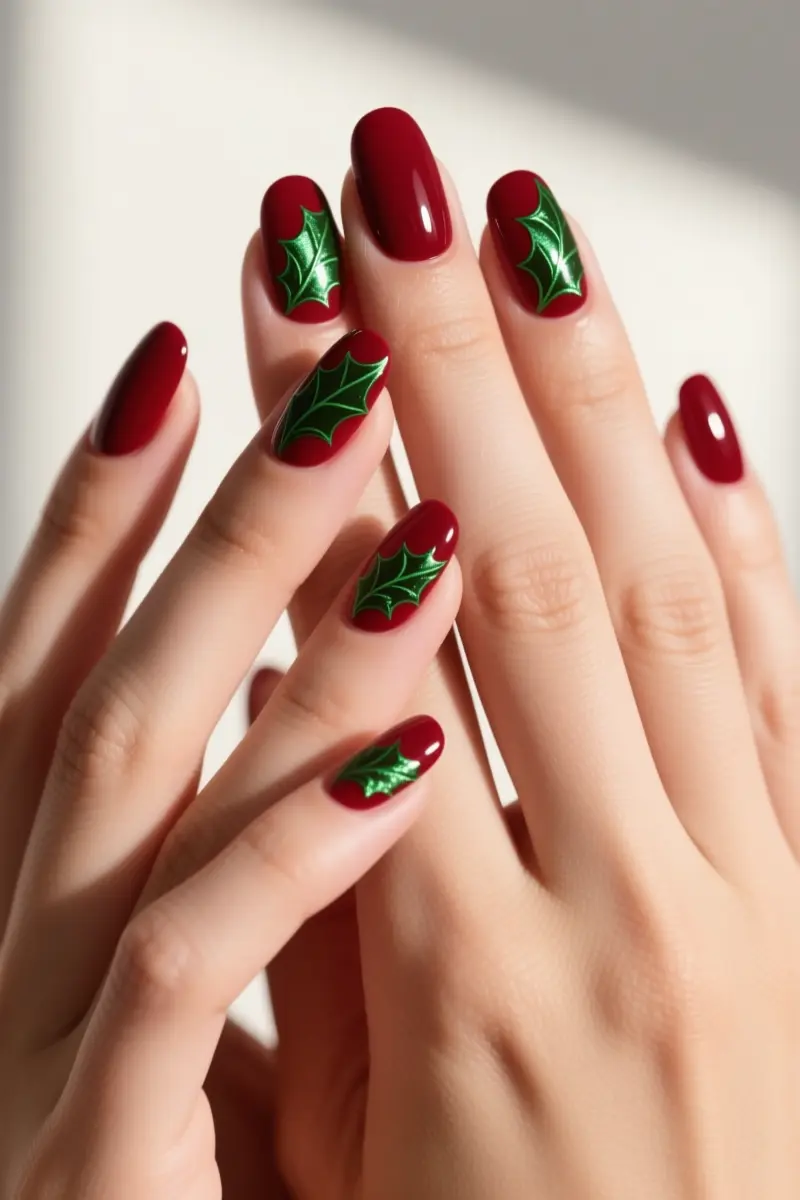
Matte cranberry red with glossy holly swirls creates a sophisticated holiday nail that balances depth and shine.
The base uses a rich cranberry red matte topcoat, which absorbs light and gives a velvety feel.
Because matte finishes highlight skin oils, a quick wipe with a lint‑free pad restores the smooth look after a few hours.
For the holly accents, apply a thin line of non‑wipe glossy top coat and drag a tiny brush to form swirls. The high‑shine gloss lifts the design, adding texture contrast without looking childish.
Users report that mixing matte and glossy finishes delivers a modern contrast that works well for festive occasions.
Keep cuticles tidy and seal the entire nail with a thin matte layer to protect the background.
The glossy swirls should be sealed individually; otherwise they may chip faster than the matte field. This design suits cooler skin tones and those comfortable with occasional touch‑ups.
Expect the matte base to need a light wipe mid‑day, but the overall effect stays elegant through dinner parties and gift exchanges.
7. Muted Sage Green and Subtle Pearl Decals
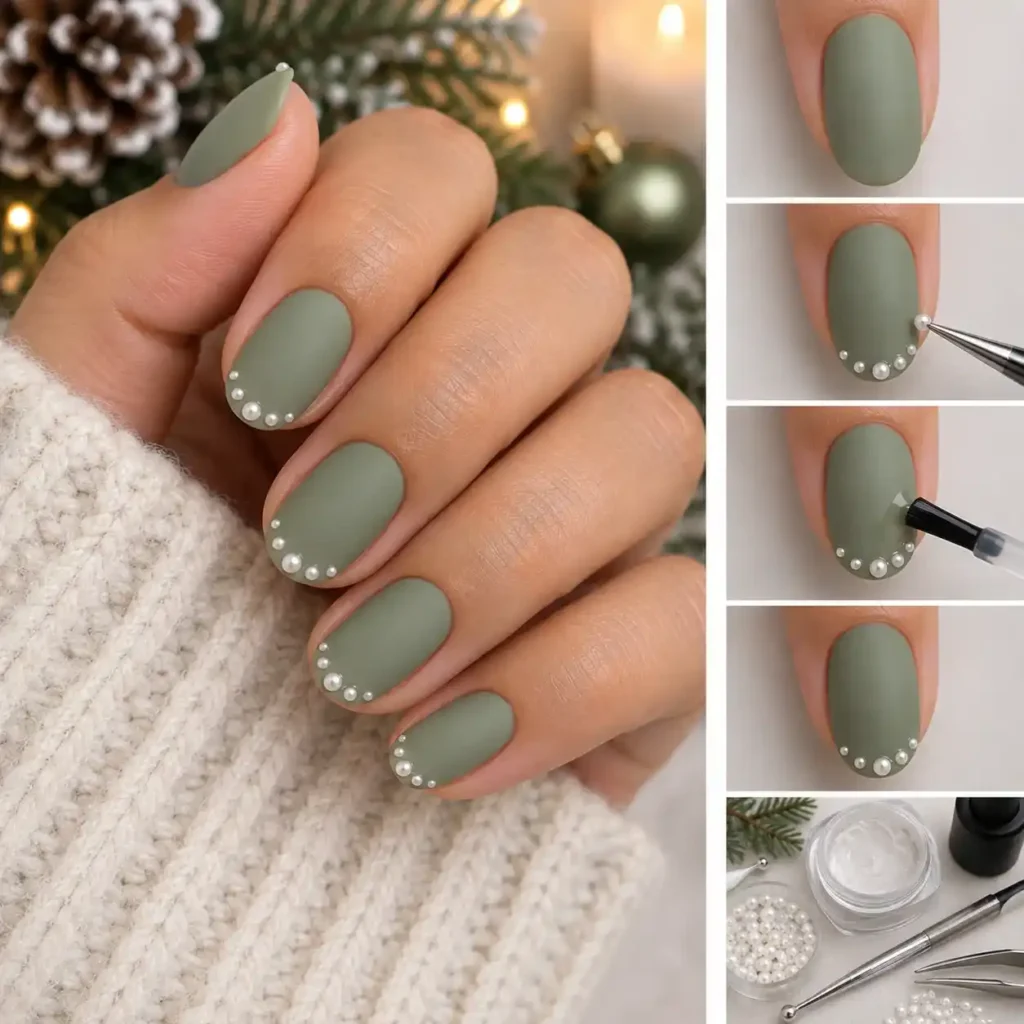
Muted sage green and subtle pearl decals create a low‑key holiday manicure that feels both festive and sophisticated.
The shade has already attracted 1.6 million views and 67 000 reactions, proving its popularity beyond the usual reds and golds.
Start with a matte sage base, then place flat‑back pearl decals sparingly along the free edge for a hint of sparkle without overwhelming the eye.
Secure the tiny pearls with a dab of rhinestone glue, then immediately cover each with a thin layer of jewelry gel or structure gel.
Cure the gel under a UV lamp to lock the embellishments in place; this prevents the pearls from catching on hair, scarves, or sweaters.
Many people find that without this protective coating, the micro‑pearls begin to lift after a few days of regular hand use.
A realistic warning: even with gel reinforcement, micro‑pearls rarely survive more than a week of heavy manual work.
If you expect frequent dishwashing or typing, consider swapping the pearls for a matte top coat after five days to keep the look tidy.
This approach offers a refined alternative to bright holiday shades while remaining manageable for everyday wear.
8. Champagne Shimmer and Starburst Accents
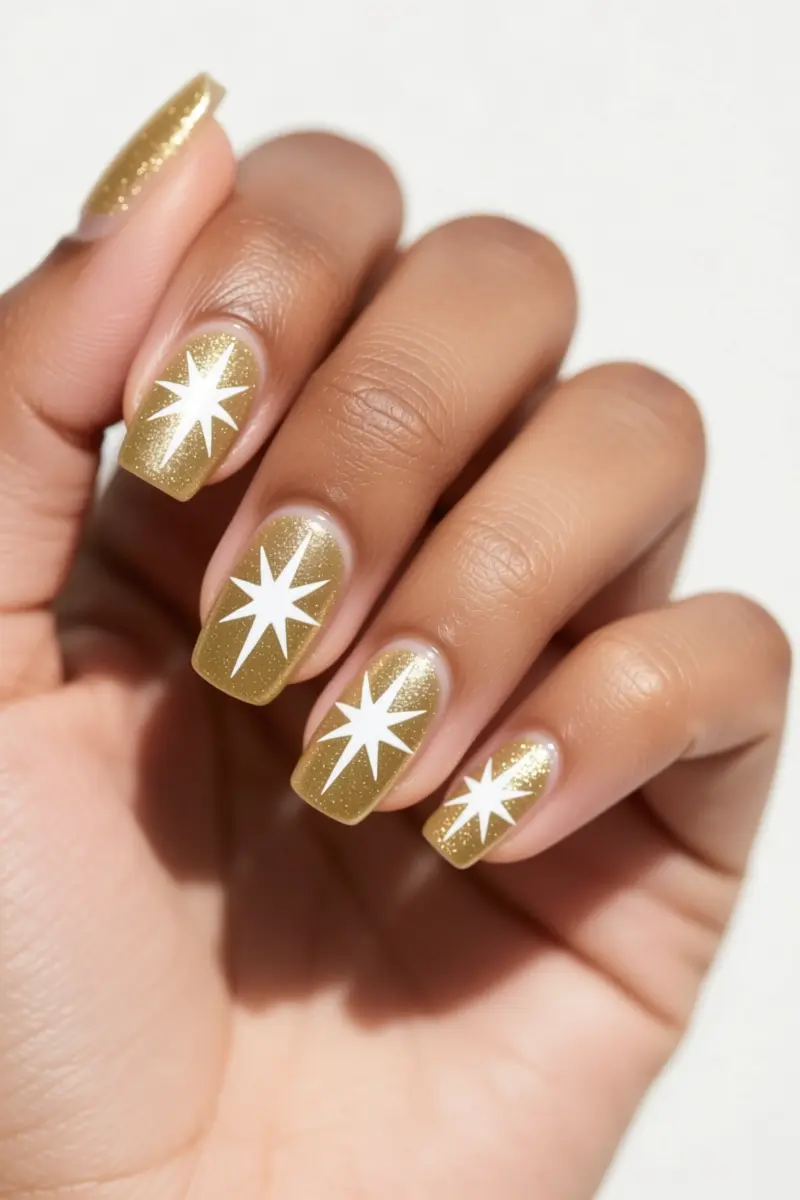
Champagne Shimmer and Starburst Accents combine a warm‑toned base with delicate white bursts for a sophisticated holiday‑to‑New Year look.
The muted gold sheen flatters warm and olive skin tones, while crisp starbursts add sparkle without overwhelming the nail.
Apply a creamy champagne shimmer polish, then hand‑paint tiny white starbursts with a fine brush or dotting tool.
Choose a high‑pigment metallic polish in a matching shade to avoid extra coats and keep the finish smooth.
The Fenty Beauty Match Stix Shimmer Skinstick in Champagne Heist sells for about $30 and blends well into a polish base.
Low‑pigment metallic polishes often need three or more layers, creating a thick, bubbly texture that chips faster.
Applying starbursts before the base cures can cause lifting when the nail flexes. Finish with a quick‑dry top coat to lock in sparkle through both holidays.
The neutral hue lets you move from Christmas dinner to a New Year’s party without swapping polish, boosting cost‑per‑wear.
One polish bottle and a steady hand keep the look fresh for weeks, a festive investment.
9. Deep Navy Blue Ice with Silver Foil Flakes
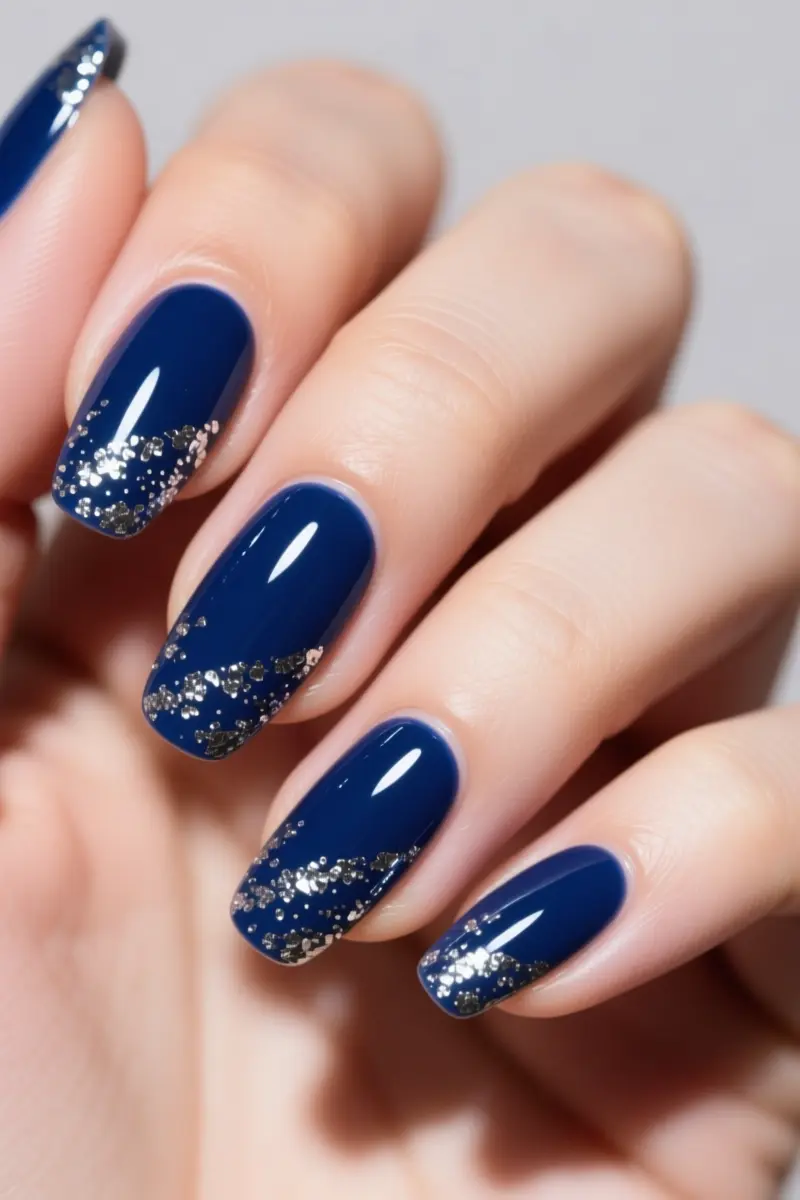
A deep navy blue ice design with silver foil flakes creates a moody, cool‑toned holiday nail.
Start with a gel base coat in midnight navy, then apply the inhibition layer and press a piece of silver foil onto the tacky surface using foil adhesive glue or a foil transfer polish.
Burnish the foil with tweezers until it adheres fully, then wipe away excess with a lint‑free wipe and a dab of rubbing alcohol.
Finish with a clear top coat and cure under a high‑output LED lamp for a full 60 seconds; dark, highly pigmented gels like navy need the extended cure to avoid under‑cured gel pockets.
A dark navy base intensifies the holographic shimmer of the foil, a trick shared by many nail‑art enthusiasts on Instagram.
Essential tools include the navy gel polish, foil adhesive, tweezers, cuticle pusher, and lint‑free wipes. The foil itself is a thin, shimmery transfer that can be delicate, so handle it gently.
If the foil isn’t pressed correctly, the design can turn patchy or leave a sticky residue, which is a common complaint among DIY users.
This look works best on medium to long nails where the foil has enough surface to spread without clumping.
10. Holiday French Manicure with Greenery Tips
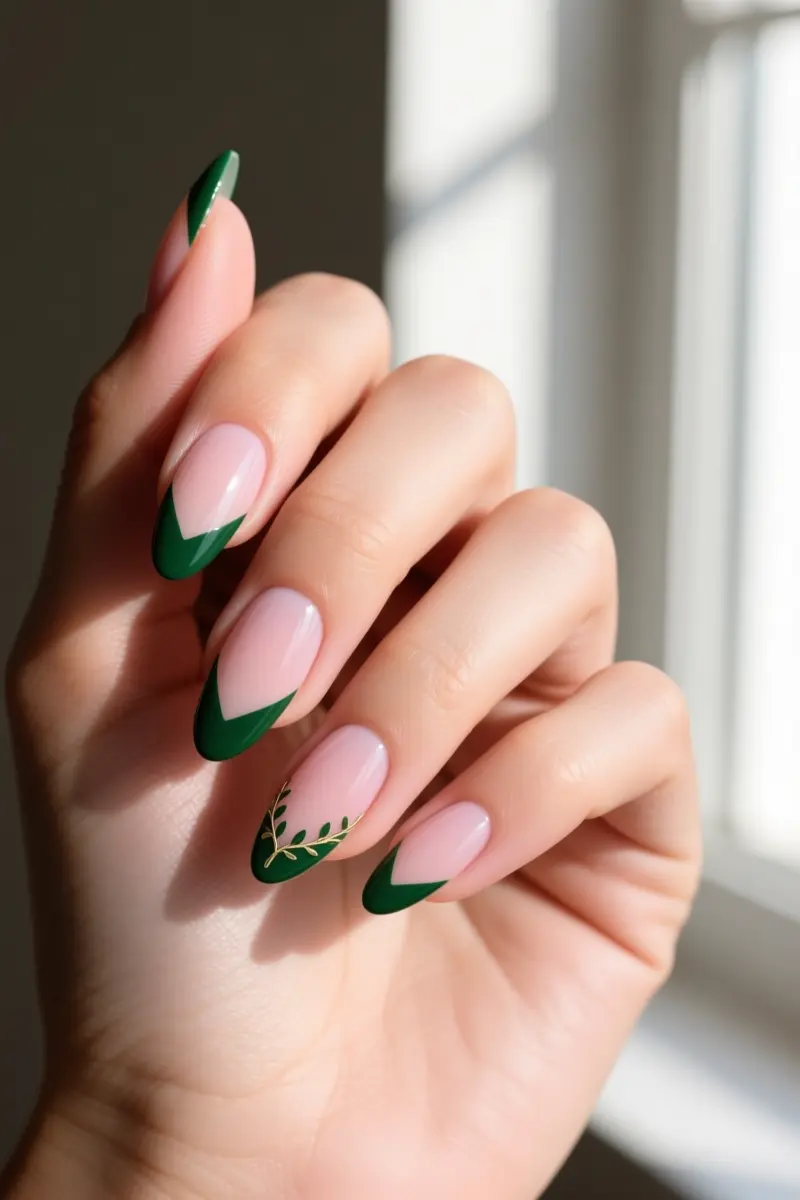
A Holiday French manicure swaps the classic white tip for a deep forest‑green edge or a delicate garland detail.
FabMood lists green French festive nails as a Christmas nail art inspiration that adds a magical, festive touch to holiday celebrations.
The look can feel timelessly elegant or playfully charming, fitting many holiday outfits.
Medium‑to‑long almond or coffin nails showcase the green tip best; the elongated shape lets the color stretch gracefully.
Short square nails often appear visually truncated, so they are less ideal for this style. The almond shape especially highlights the clean smile line of a micro‑French finish.
Start with a sheer pink or nude base coat that matches your natural nail bed. A mismatched sheer base can turn the manicure washed out or yellowed, defeating the intended sparkle.
Apply the green polish only to the tip, keeping the base translucent for subtle winter shine.
Reddit users share step‑by‑step tutorials, noting that DIY holiday French nails are easy and affordable. Expect a single top coat to protect the design through several holiday parties.
If you prefer a low‑maintenance look, skip the garland detail and keep the tip solid green.
Your Next Holiday Nail Moment Awaits
Tip 1: Clean and dry your tools before each design to keep lines sharp.
Tip 2: Use a quick‑dry top coat to lock sparkle and stop snags on chunky sweaters.
Tip 3: If you love bright red, start with a high‑quality base coat to stop yellowing.
Tip 4: For heavy decals, apply a thick structure gel so charms don’t catch on wool.
Tip 5: Keep a small nail file handy for quick touch‑ups between gift‑wrapping sessions.
Pick the design that fits your schedule and let your nails survive the festivities. Save this guide for your next salon visit, or pin it for a quick reference when holiday chaos hits.
Holiday Nail Art FAQ
How to do candy cane nail art?
Apply a semi-sheer milky white base coat, cure completely, and then use a long 000 striping brush dipped in highly pigmented red gel polish to paint thin, diagonal parallel lines before curing and sealing with a high-gloss top coat.
What are some festive Christmas nail ideas?
Popular and durable options include minimalist negative space snowflakes, magnetic velvet emerald green bases, micro-glitter ombre tips, and subtle sage green matte finishes with gloss accents.
How do you keep Christmas nail gems and charms from snagging on sweaters?
Apply a dedicated thick rhinestone gel glue around the base of the charm, cure it fully, and then use a fine liner brush to encapsulate the edges of the charm with a non-wipe top coat to create a smooth, catch-free transition.
Why do textured 3D sweater nails get dirty so quickly and how do you clean them?
The matte, porous surface of 3D builder gel or acrylic powder traps dirt, makeup, and dyes easily; you can clean them by gently scrubbing the surface with a lint-free wipe saturated in 91% rubbing alcohol.