
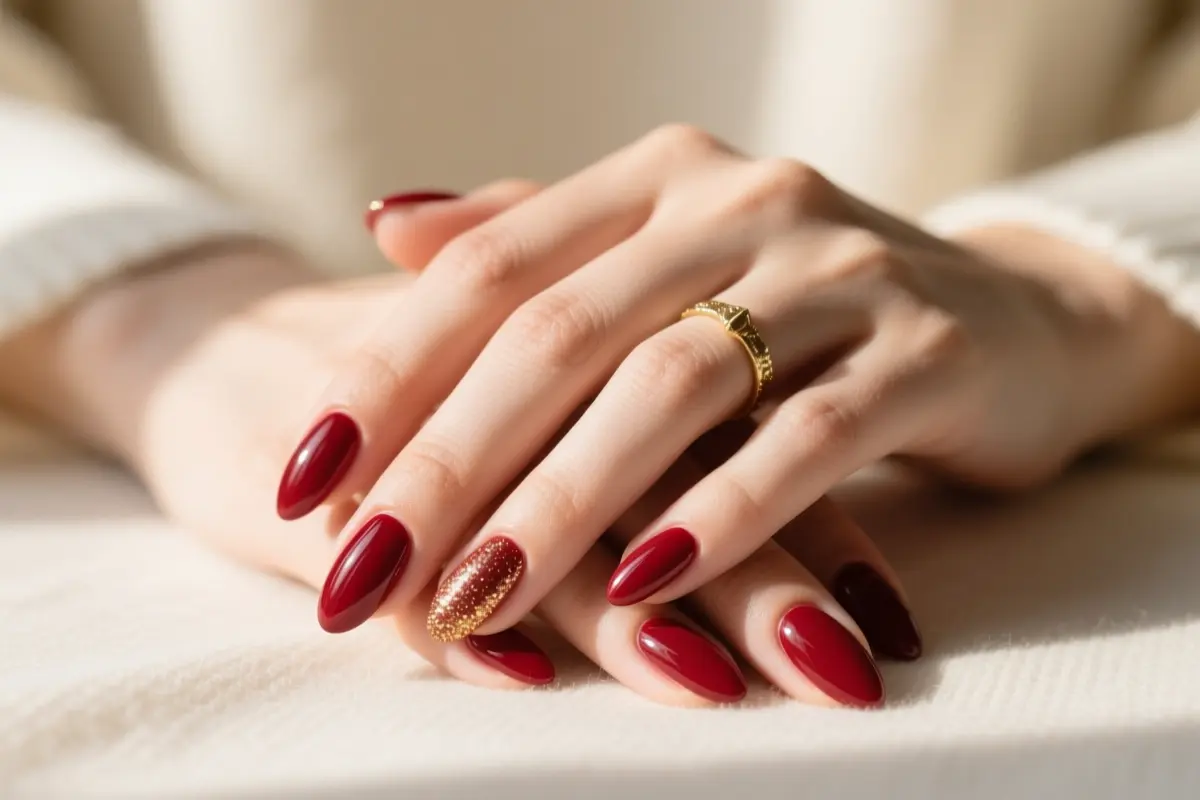
9 Practical Holiday Nail Designs That Actually Last Through the Season
Those flawless, glitter‑laden holiday nails you see on Pinterest often crumble under a single gift‑wrap session.
You’ve likely spent hours perfecting a design only to watch chips appear while stirring batter or opening presents. This guide flips the script, helping you choose festive looks that survive the season without constant salon rescues.
We rank nine designs by salon commitment, DIY difficulty, and real‑world durability: magnetic velvet polishes that need a 45‑degree magnet for 10‑15 seconds, jelly plaid built with thin translucent layers to avoid early peeling, glossy gel tops that last three weeks versus matte tops that fade in a week, and short micro‑French styles that outlast long extensions during holiday hustle.
1. Deep Ice-Blue Velvet Nails
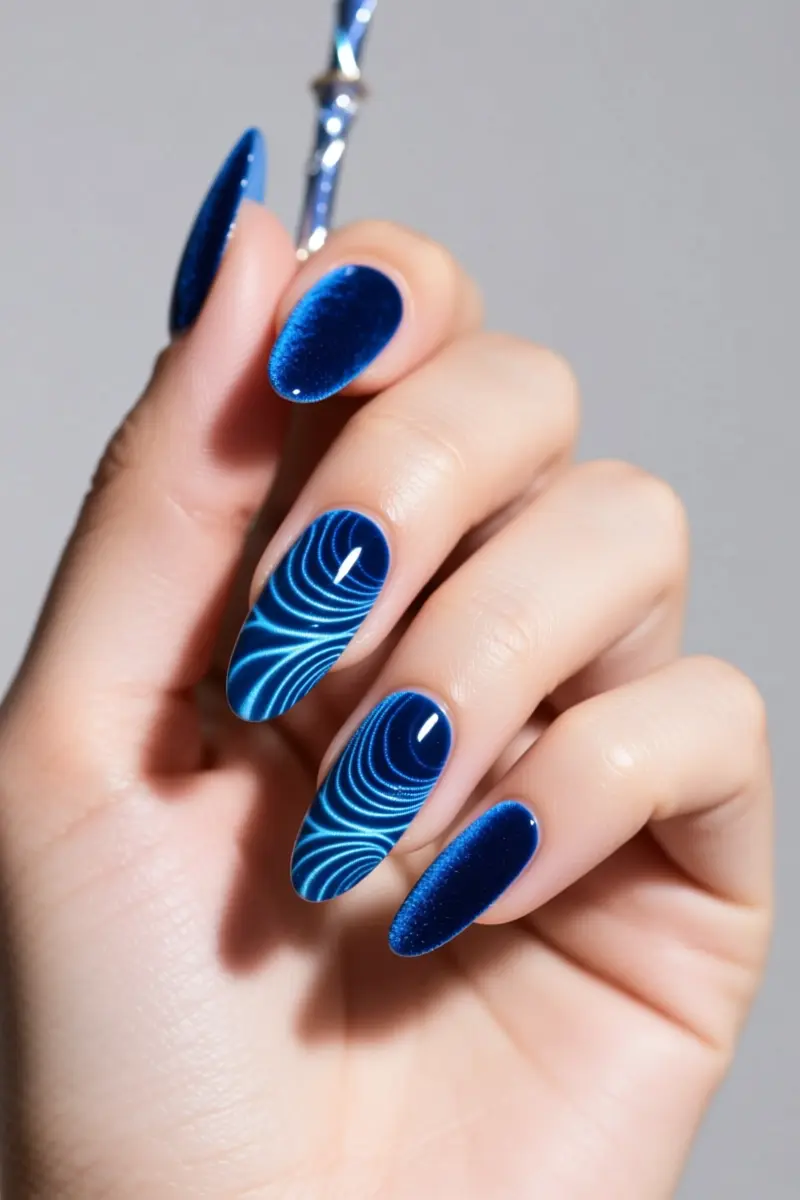
Deep ice‑blue velvet nails give a magnetic, fabric‑like sheen that outshines classic red.
The finish looks like crushed velvet and shifts from a deep sapphire under warm indoor lights to a frosty teal in cool daylight.
Start with a magnetic gel base, such as a cat‑eye gel, and apply a fresh wet layer of the same shade.
Run a magnetic wand over the surface for 5‑7 seconds; the wand pulls iron particles into a subtle ripple pattern.
Immediately cure for 30 seconds under an LED lamp; this lock‑in cure time prevents the shimmer from diffusing.
After curing, wipe away tacky residue and seal with a glossy top coat to protect the texture. The top coat also adds extra sparkle when festive lights hit the nails.
2. Sheer Cranberry Jelly Plaid
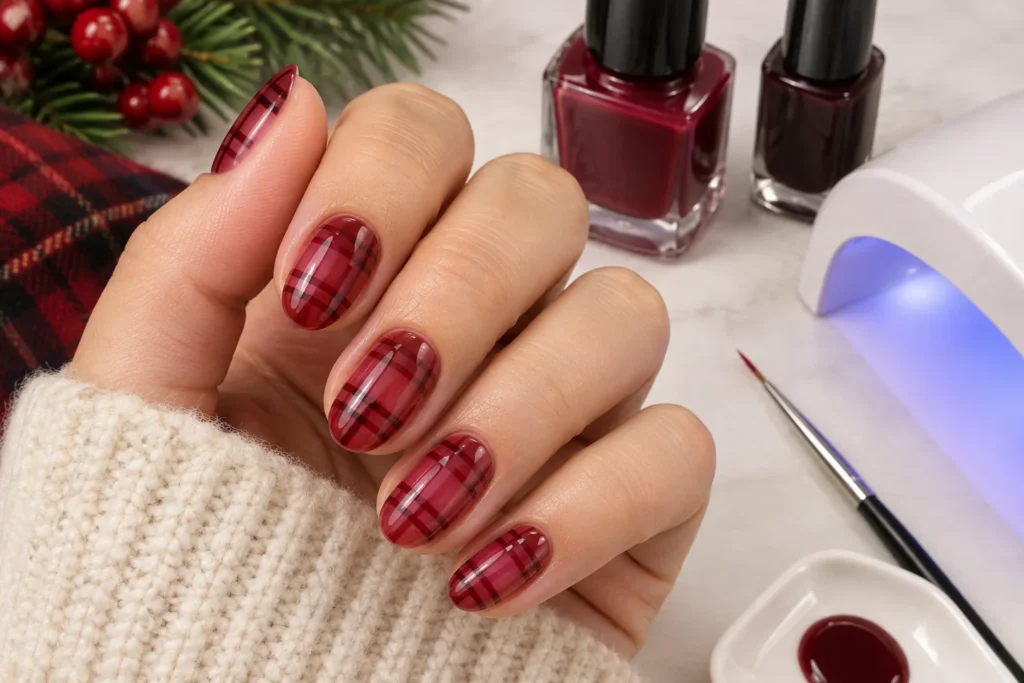
Sheer cranberry jelly plaid combines translucent red jelly polish with thin plaid lines for a festive, dimensional look.
Start with a clear base coat, cure it under a UV lamp, then apply one thin coat of sheer cranberry jelly polish.
While the polish is still tacky, use a fine nail art brush dipped in a darker red or burgundy jelly shade to draw the plaid’s vertical and horizontal stripes.
Keep each stripe no wider than a pencil line and space them evenly across the nail.
A common mistake is layering the jelly too thickly; the extra volume blocks UV light, so the polish won’t cure fully and bubbles appear under the top coat.
Apply each color in a single, sheer layer and cure for the recommended 30 seconds per coat. A clear top coat sealed with the UV lamp locks in the design and adds the hard‑candy gloss that jelly nails are known for.
Sheer layers let the natural nail show through, so the cuticle line stays soft and less harsh during busy weeks when growth is visible.
This effect works best on short almond or short square shapes, where the nail’s natural line is still prominent.
For extra durability, add a thin builder gel layer under the jelly polish. The builder gel strengthens the nail without hiding the translucent effect, keeping the plaid pattern bright throughout the holiday season.
3. Champagne Gold Micro-French
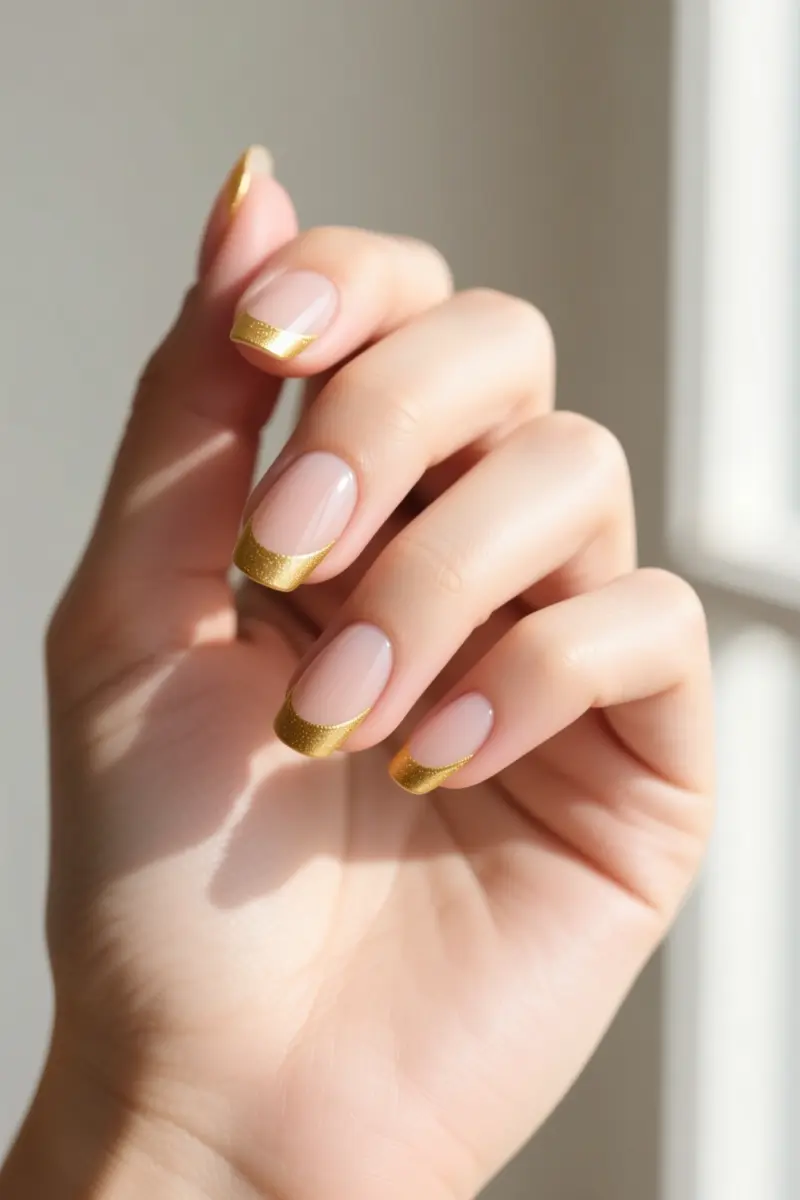
Champagne Gold Micro‑French delivers a sleek, low‑maintenance look that hides nail growth.
The design uses a sheer nude or pink base, letting a fine gold line define the free edge without a stark contrast. A fine liner brush creates an ultra‑thin tip, which stays crisp even on short, active nail shapes.
Because the tip is narrow, new growth appears as a subtle extension of the gold line rather than a glaring white gap.
Users report that champagne gold tones catch light softly, adding an eye‑catching shimmer without overwhelming the hand.
Choose a translucent nude base for the most wearable version; the gold tip remains the focal point while the nail bed stays neutral.
This style works better on short, naturally shaped nails than on long extensions, where the thin line can look lost.
Maintenance is simple: a quick top coat refreshes the metallic sheen, and the minimal tip means fewer touch‑ups throughout the season.
The result is an elegant, everyday‑ready manicure that feels festive without demanding constant salon visits.
4. Hunter Green Matte and Glossy Contrast
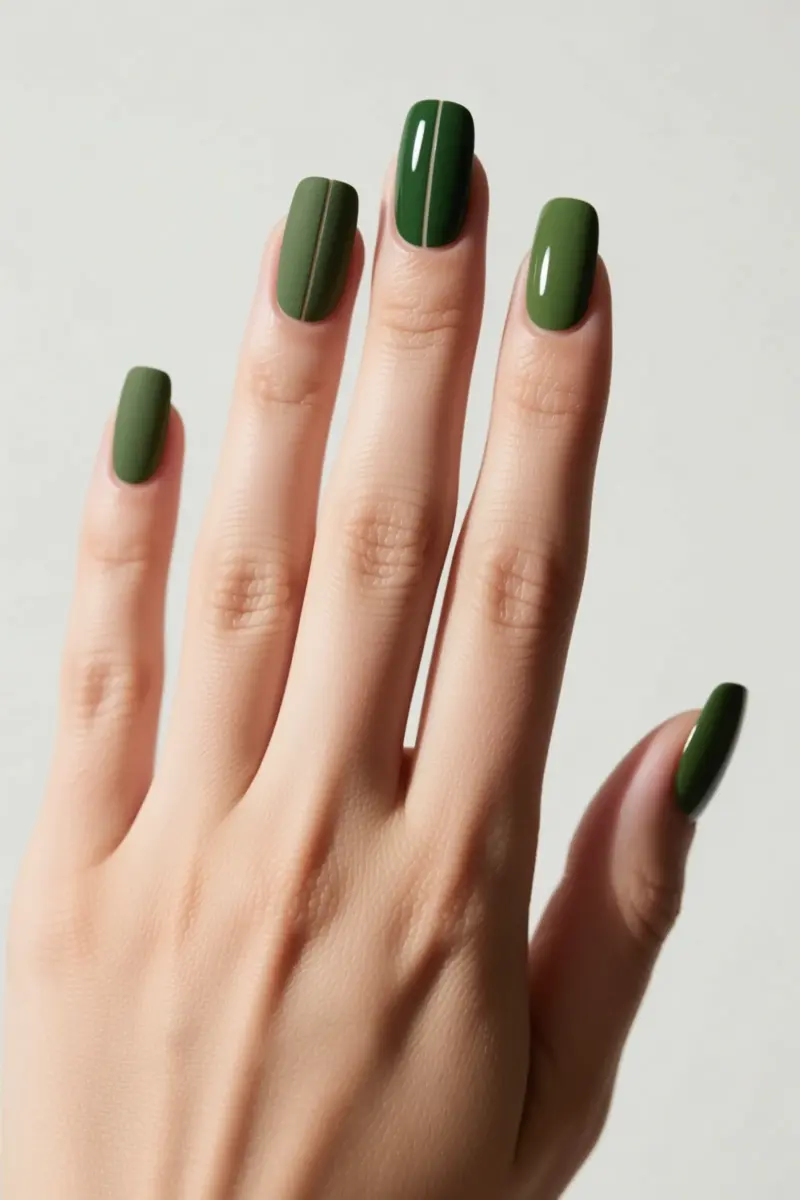
A hunter green base with alternating matte and glossy top coats creates subtle texture without bulk.
Start with a deep forest green gel like No. 034 Royal Hunter Green, then apply a matte top coat over half the nail and a glossy finish on the remaining portion. The contrast catches light while keeping the look sophisticated.
Eco Created Colors offers a hunter green shade called HUNTRESS‑Matte Green/Camo Nail Polish, a vegan, cruelty‑free acrylic‑type liquid that costs roughly $15 for 0.35 fl oz. This matte polish pairs well with a clear glossy top coat for the accent sections.
Many people find matte formulas prone to staining from hair dye, dark denim, or kitchen spices, so regular cleaning with a cotton pad and cleansing alcohol is essential to maintain a pristine look.
Pro tip: to revive a dulled matte area at home, gently wipe the surface with a cotton swab dampened with cleansing alcohol, then reapply a thin layer of matte top coat.
Avoid rubbing the glossy sections; a light dab protects the shine. Allow the matte layer to cure fully before touching any glossy accents to prevent smudging.
This design works best on medium to long nails, where the split‑tone can be showcased without looking crowded. Short nails may lose the visual impact of the contrast.
If you prefer a completely glossy look, skip the matte step, but you’ll miss the tactile depth that makes this holiday nail idea stand out.
5. Negative Space Peppermint Swirls
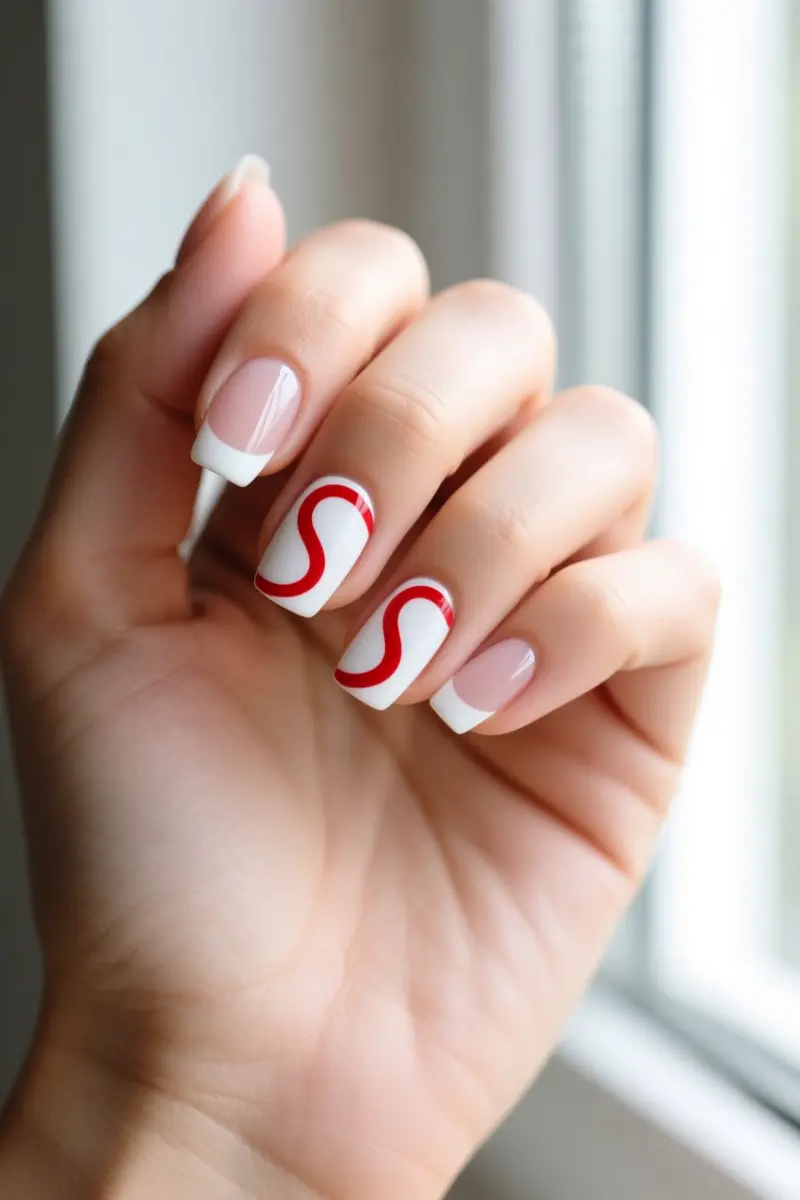
Negative space peppermint swirls place white and red swirls on a clear nail base for a festive look.
Start with a clean, well‑moisturized nail and apply a thin coat of sheer top coat to protect the natural surface.
While the base is still tacky, use a fine‑tip striping polish in white to draw a loose “S” shape near the cuticle, then follow with a red swirl that overlaps the white line.
Keep the design away from the free edge; the untouched space at the cuticle hides new growth and boosts manicure longevity.
The key to durability is using professional‑grade striping polish. Cheap alternatives often shrink as they dry, creating gaps that chip quickly at the free edge. Many people find this issue leads to premature wear.
A user reported a set of these nails lasted four weeks; another saw three weeks of wear before touch‑ups.
Negative space nail art remains a hot 2026 trend, praised for clean lines and subtle cutouts, though some consider the peppermint swirl a bit controversial.
The style works best on short to medium nails where the negative space can be clearly seen without overwhelming the finger. Regular top‑coat refreshes keep the swirls vivid through the holiday season.
6. Warm Tortoiseshell with Embedded Gold Foil
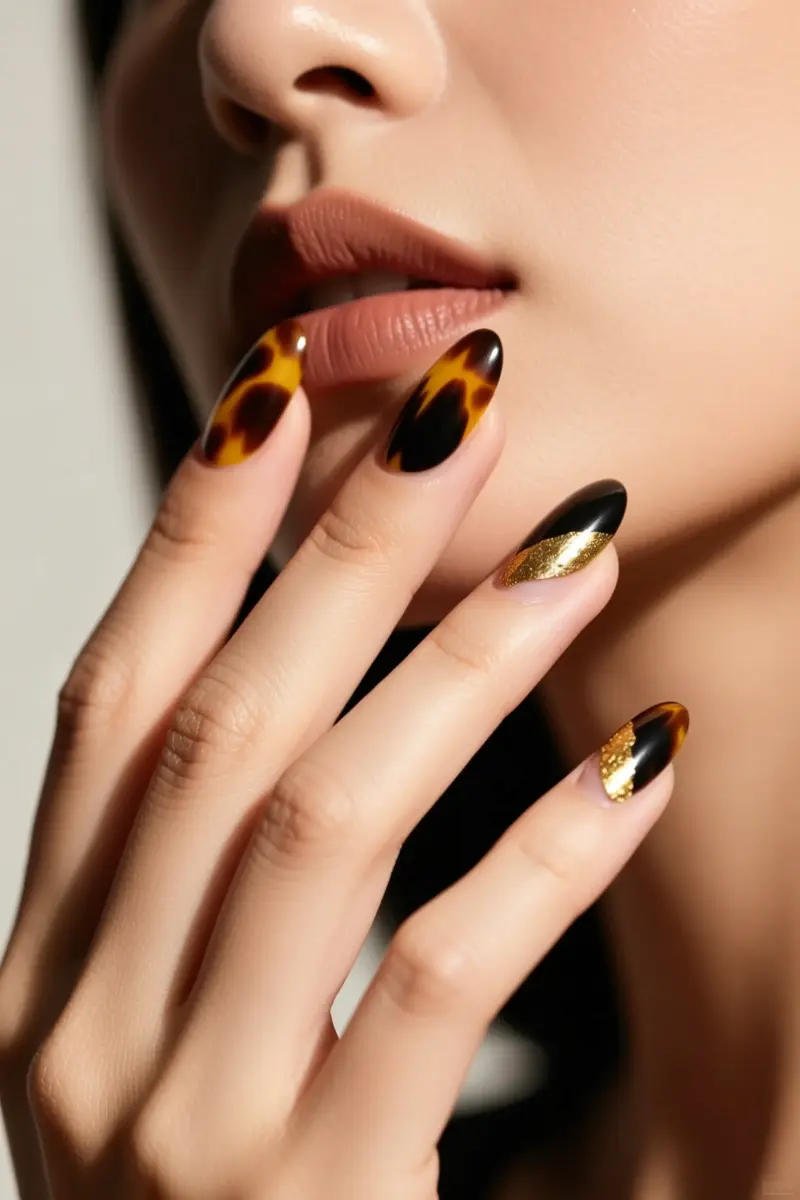
Warm tortoiseshell with embedded gold foil layers amber gel, brown, and black to create a realistic, marbled shell effect topped with delicate gold foil.
The look follows the classic autumn‑winter trend that loves warm tones; translucent amber, chocolate brown, and soft black blend for depth while the neutral palette stays versatile for any holiday outfit.
Start with a thin base coat, then apply a glass yellow amber gel as the first translucent layer. Dab brown over the surface and add black accents.
A liner brush can tap the edges of each shade, blending them into a natural tortoiseshell swirl.
Spread a light inhibition layer or foil transfer glue before placing the gold foil; this stops the foil from peeling under the final top coat. Press tiny gold foil pieces near the cuticle for a chic sparkle, then seal with a glossy top coat.
Medium‑length almond nails give enough surface to showcase the layered pattern and foil shine; the tapered tip adds extra depth, making the marbled effect appear three‑dimensional.
Foil lift is common if the inhibition layer is skipped, so the extra step is essential. The design also loses impact on very short nails, where the layers can look flat.
7. Press-On Burgundy Coffin Nails
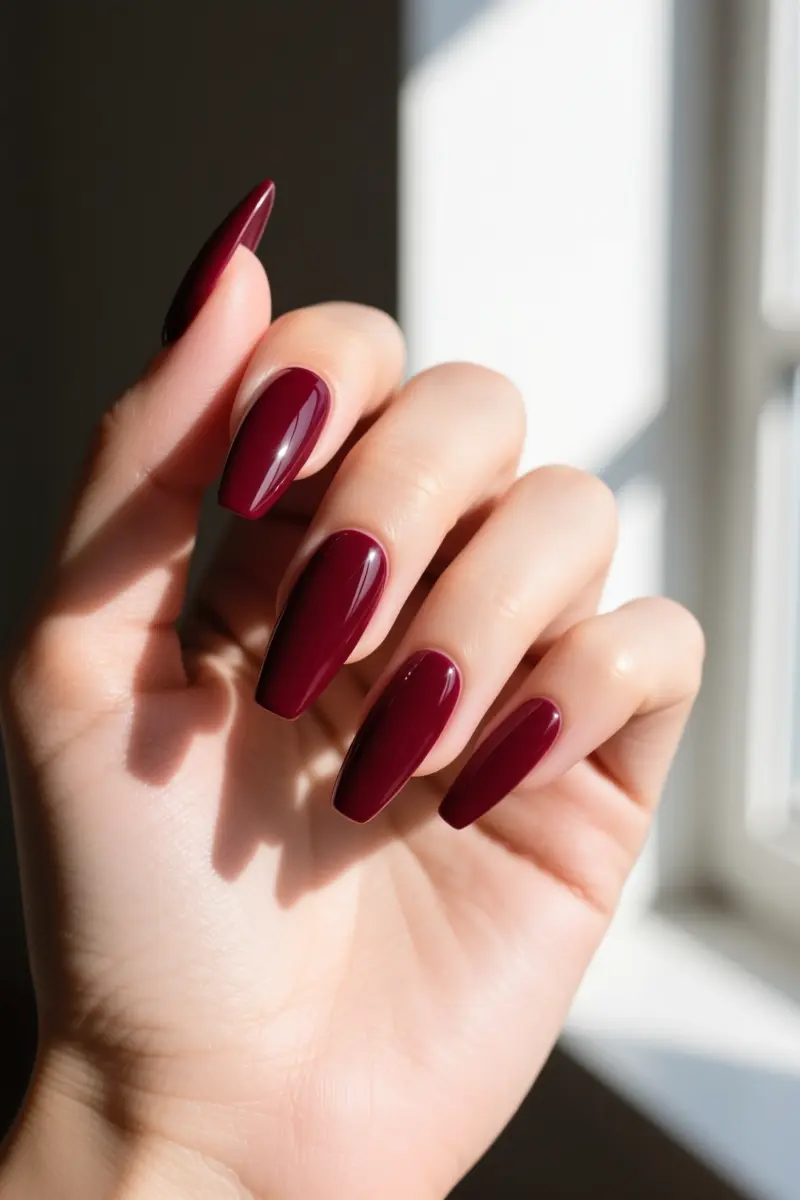
Press-on burgundy coffin nails give a festive look in minutes. Choose a high‑quality set in a deep wine shade and the coffin shape to elongate the finger.
Start by cleaning the natural nail, then apply a nail dehydrator to remove surface oils; this stops moisture from trapping under the press‑on and reduces bacterial growth.
For a short‑term budget option, stick the adhesive tabs onto each nail and press firmly for 30 seconds. Expect wear of three to five days before lifting becomes noticeable.
If you need longer wear, replace the tabs with professional‑grade press‑on glue; this can extend durability to ten to fourteen days, though removal may require a gentle soak.
The method is cheap, fast, and safe when the nail plate is properly prepped. A common limitation is that the adhesive may not hold on very oily or uneven nail surfaces, so those with naturally slippery nails might prefer a glue‑only approach.
Also, the glossy finish can chip sooner if you work with your hands a lot, so a clear top coat adds a protective layer and keeps the burgundy shine vibrant through holiday parties.
8. Classic Ruby Red with Micro-Shimmer
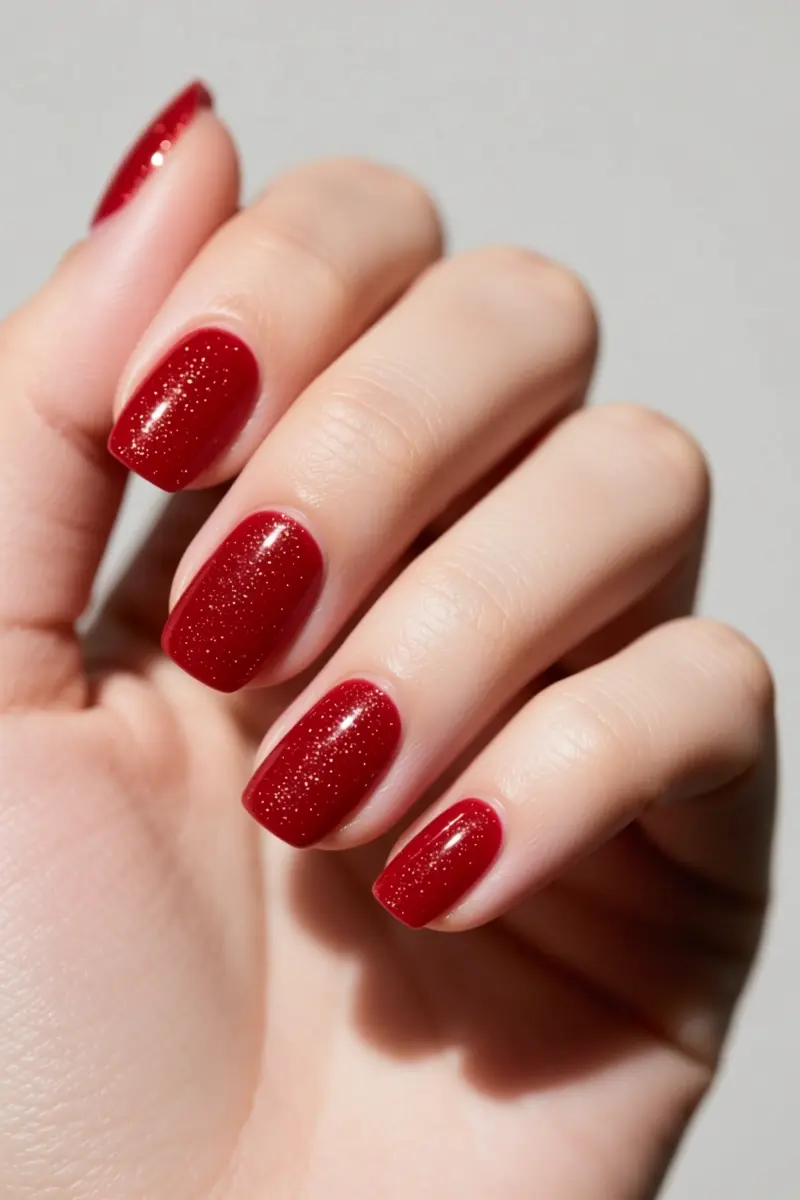
Classic Ruby Red with Micro‑Shimmer offers a timeless festive look with a modern twist.
The shade delivers a pure, bright red that leans warm, and the superfine shimmer polish adds sparkle without chunky glitter.
Because the pigment density is high, the polish needs a full 60‑second UV cure time under a standard LED lamp (365‑405 nm) to prevent a soft, dentable surface.
Ruby Red One Step Gel provides up to two weeks of wear, requires no separate base or top coat, and comes in a 15 mL bottle for around $29.
A professional gel application adds salon time and a higher cost, while a regular polish version saves money but may chip sooner and lacks the micro‑shimmer depth.
Store the bottle in a cool, dry place, keep the lid tightly closed, and wipe the neck with an isopropyl‑alcohol‑soaked lint‑free wipe to keep it easy to open.
Many users note the price difference as a drawback compared with traditional polish, so budget‑conscious nail lovers might reserve the gel for special events.
9. Bare Nails with Starburst Accent Decals
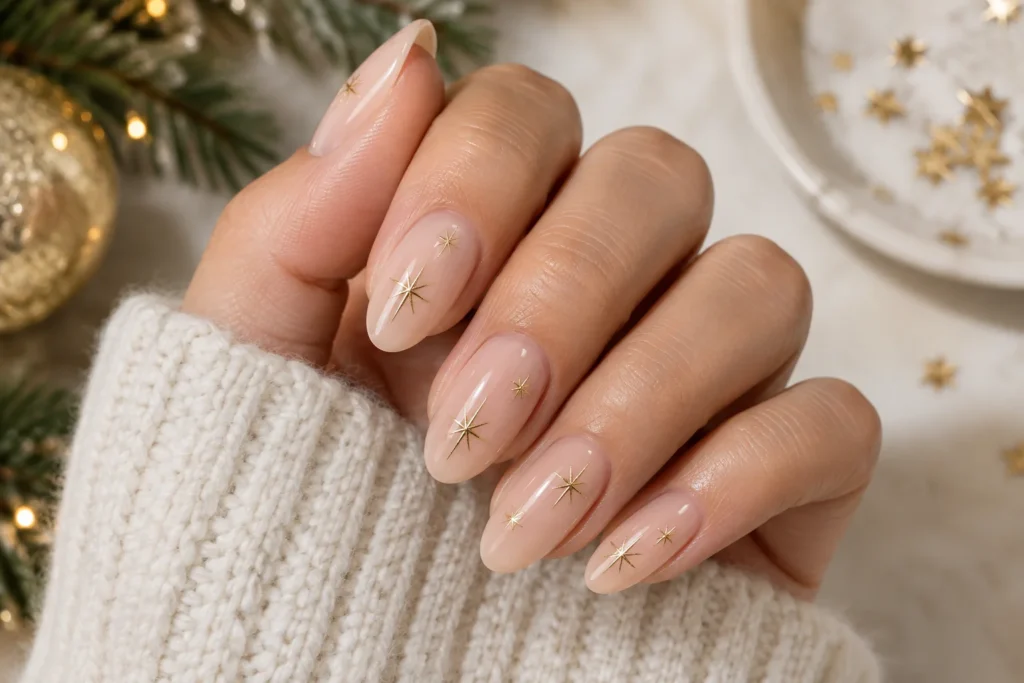
Bare nails with starburst accent decals are the ultimate zero‑stress, time‑saving holiday look. Apply a sheer nude base coat, then place tiny gold starburst nail decals where you like.
Prep the nail by removing polish, pushing back cuticles, lightly buffing, cleaning, then applying a thin base coat and adhesive; cure for 60 seconds. Proper prep is essential for a strong builder gel set.
Cover the decals with a thin layer of builder gel, using Ezmio Builder Gel for extra reinforcement and a smooth apex; cure and add a second thin coat if needed. Thin, controlled layers improve wear and reduce lifting, letting the design last three to four weeks.
The sealed gel forms a barrier that stops decal edges from catching on winter knit sweaters, making chips less visible and requiring virtually zero maintenance.
Users say the process becomes pretty easy after a few applications, and they love the clean look.
This style works best on nails in decent health; very brittle nails may need extra strengthening before the gel overlay.
Your Next Holiday Nail Moment Awaits
Start each manicure with a clean, lightly buffed surface to help any polish grip longer. Pair magnetic velvet shades with a strong magnet held at a 45‑degree angle for the full 10‑15 seconds, and keep jelly plaid layers thin to stop premature gel peeling.
Choose glossy gel top coats for up to three weeks of wear, or opt for short micro‑French styles if you expect lots of gift‑wrapping.
Pick the design that fits your schedule, grab the right tools, and let your nails stay merry all season. Save this guide for your next salon visit or share it with a friend who needs a stress‑free holiday mani.
Frequently Asked Questions
What are some festive holiday nail ideas?
Festive holiday nail ideas include deep blue magnetic velvet designs, negative space peppermint swirls, sheer cranberry jelly plaid patterns, and metallic champagne micro-French tips that grow out seamlessly.
What nail colors are trending for holidays?
The leading holiday nail colors include deep hunter green, rich cranberry red, frosted ice blue, metallic champagne gold, and warm amber tortoiseshell tones.
How do I prevent my holiday gel manicure from peeling during winter?
Prevent peeling by capping the free edge of the nail with top coat, applying thin layers of gel, and using cuticle oil daily to stop the natural nail from drying out and separating from the gel polish.
How can I make holiday press-on nails last through multiple events?
Ensure your press-on nails last by dehydrating your natural nail plate with isopropyl alcohol, buffing the shine away slightly, and selecting shapes like short oval or squoval to reduce snagging.