
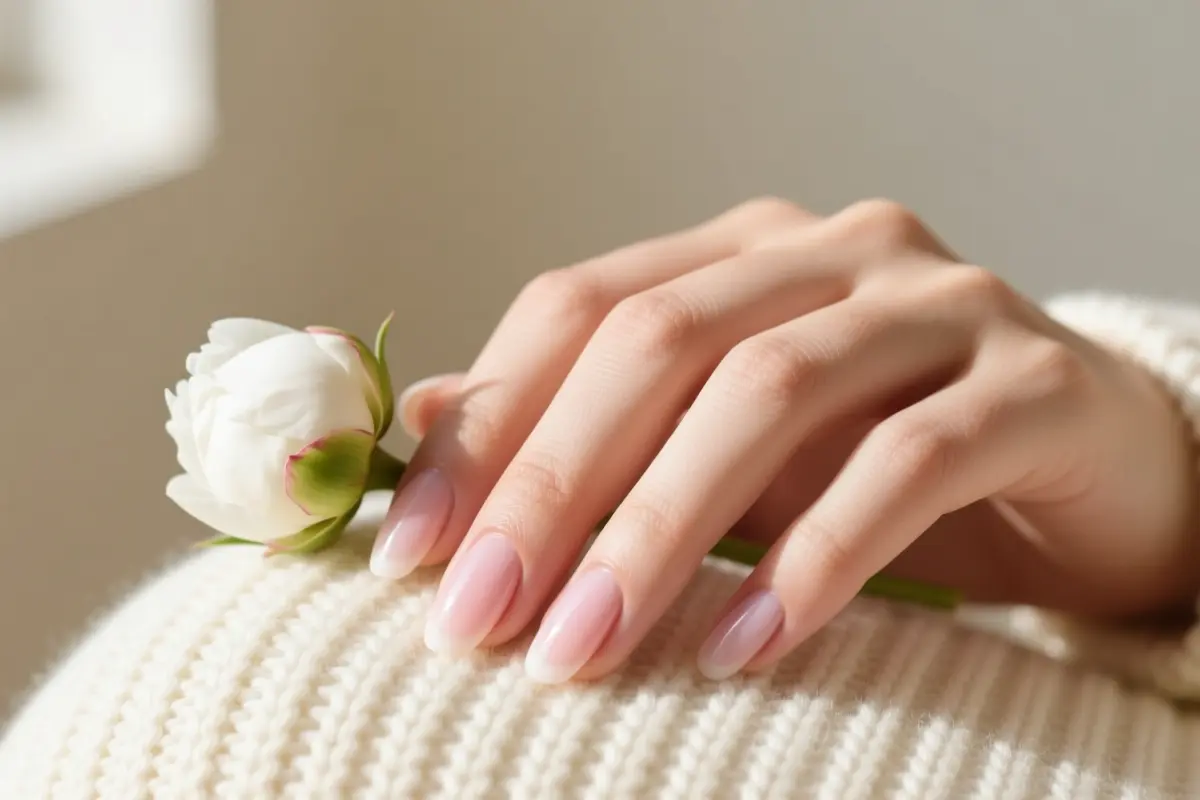
10 Realistic Oval Nail Designs: Classy, Cute, and Wearable Options for Every Season
Tired of stiletto or coffin nails that chip at the slightest snag?. Oval nails give you the same sleek silhouette without the constant upkeep. Because they lack sharp corners, they’re one of the strongest shapes, resisting chips and side‑wall cracks even when you’re juggling daily tasks.
Plus, the gentle taper visually elongates shorter fingers, flattering almost any hand structure.
Whether you prefer a short natural finish or a longer gel‑enhanced tip, the oval shape adapts effortlessly.
Seasonal transitions become simple too: choose the right base color to match shifting skin undertones, and let gel or builder gel (BIAB) reinforce the length without worrying about breakage.
1. The Classy Micro-French Tip
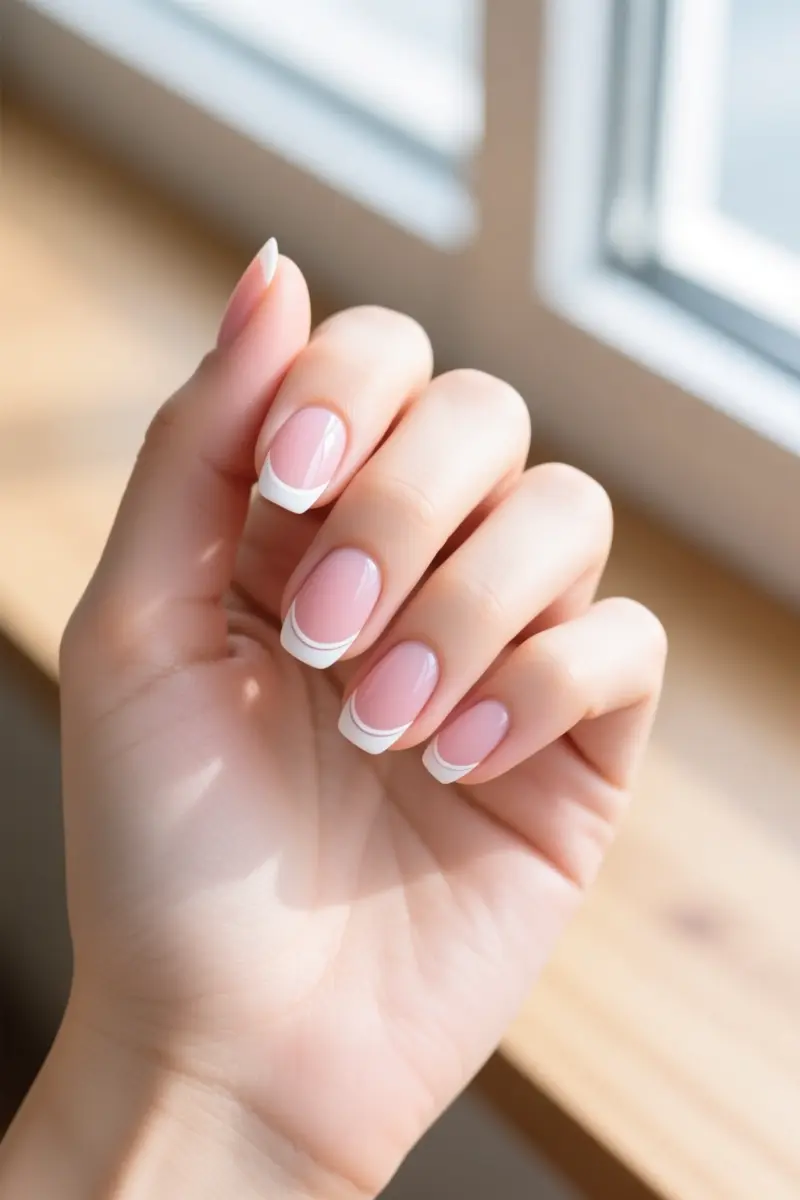
The classy micro‑French tip adds a barely‑there white smile line to an oval nail for a modern, ultra‑refined look.
This tiny 2026 trend replaces the thick white band of a classic French with a sub‑mm tip, so the manicure stays fresh instead of looking dated.
A sheer base in pinkish tones flatters cool undertones, while peach shades complement warm skin, letting the smile line pop without overwhelming the nail.
Many people notice that the micro tip hides nail growth for up to three weeks; the thin line slides forward as the nail lengthens, so no stark gap appears at the cuticle.
The design works on short nails because the subtle tip is still visible, but on very long nails the effect can look too faint.
A common DIY mistake is taping the tip with regular masking tape, which often tears the base coat when removed. Swap the tape for a silicone stamper: press the stamper onto the nail, then swipe the white polish across the edge for a clean, crisp line every time.
This style suits those who prefer low‑maintenance polish and can tolerate a light sheen. It may feel under‑dressed for formal events that call for a bold accent nail.
2. Rich Espresso Monochrome for Fall
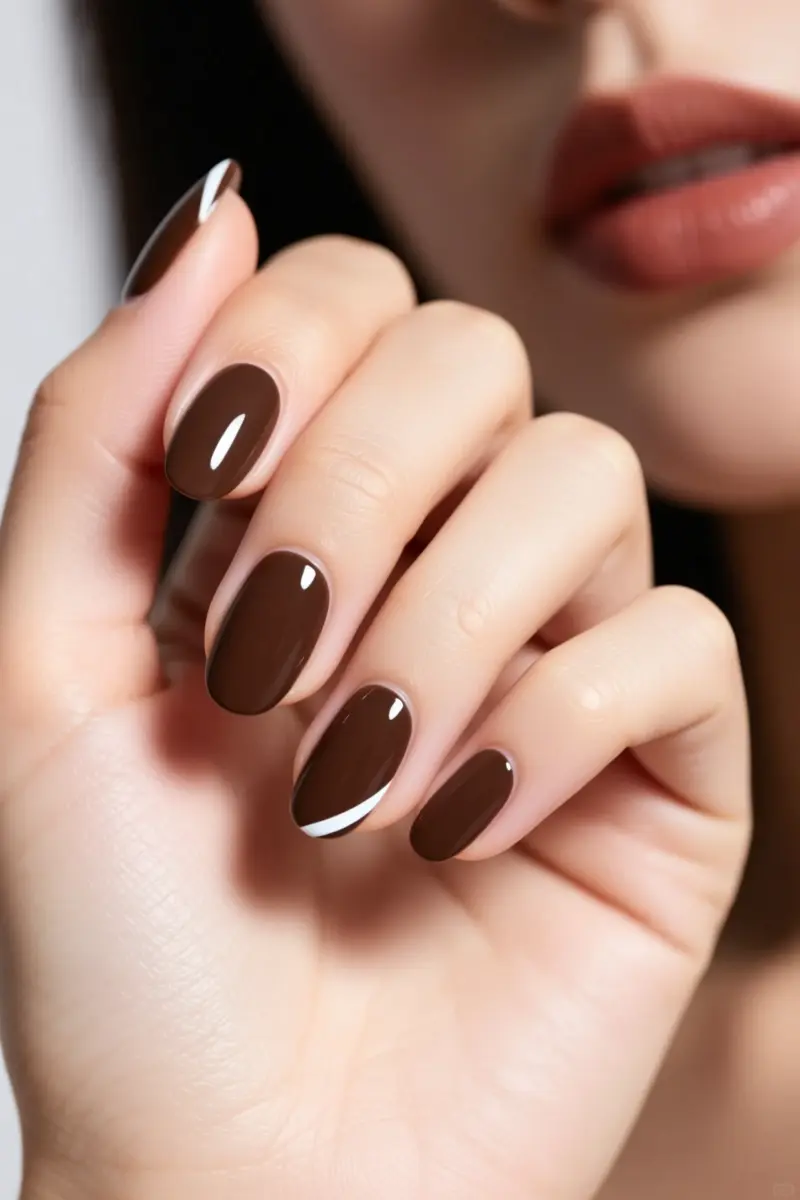
Rich espresso monochrome delivers a deep, warm brown manicure that feels instantly seasonal.
The shade sits between stark black and lighter neutrals, offering less visual weight than jet black while still providing high opacity.
High‑pigment gel formulas are ideal for this hue; they require a slightly longer gel cure time, about 30 seconds extra on a UV/LED lamp to avoid surface wrinkling.
On short oval nails, the dark color can visually widen the tip, so apply the polish thinly and leave a narrow nail side margin at each edge.
This margin creates the illusion of length without sacrificing coverage. A clear gloss overlay, as seen in the espresso micro‑French design, adds extra depth without changing the hue.
Finish with a high‑gloss top coat to boost shine and lock in color; the clear gloss also adds a subtle reflective layer that softens the intensity of the espresso.
Many people find the shade understated enough for daily wear yet elegant for evenings, making it a versatile fall choice.
A practical note: deep pigments tend to chip faster on busy hands, so schedule touch‑ups every two to three weeks to keep the edges crisp.
3. Retro Pastel Swirls for Spring
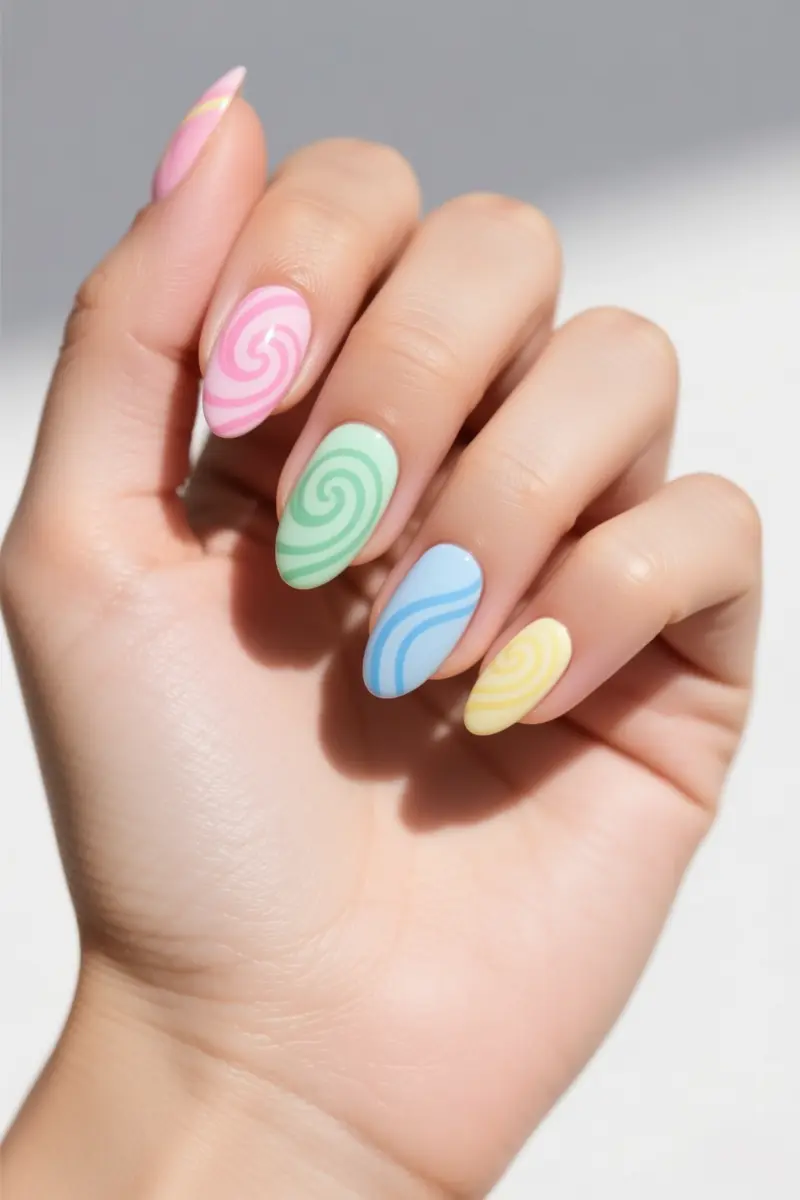
Retro pastel swirls for spring add playful, multi‑colored waves that brighten any almond nail.
The design uses solid pastel lacquer, pink, blue, yellow, or mint‑green, to trace dynamic curves that hug the nail bed and emphasize the almond shape.
When you glide the brush, smooth hand movements turn each line into a lively ripple, but cramming too many intersecting swirls can crowd a smaller nail bed and make the look feel cluttered.
How to create the swirls:
- Apply a thin gel base for extra gloss and durability.
- Thin your chosen pastel lacquer with a few drops of acetone; this keeps the pigment fluid enough for clean strokes.
Load a long striper brush, then, using a steady wrist motion, draw a single wave from cuticle to tip.
Rotate the brush angle slightly for each new swirl, allowing the previous line to dry before overlapping.
Finish with a gel top coat to lock in color and add shine, especially useful for spring parties.
Lighter pastel shades reveal dust and dye transfer more quickly, so regular cleaning of the nail surface and a quick top‑coat touch‑up every two to three days keep the design fresh.
This look works best on almond‑shaped nails; those with a short, wide nail bed may prefer fewer, broader swirls to avoid visual overload.
4. Delicate Daisy Accents for Summer
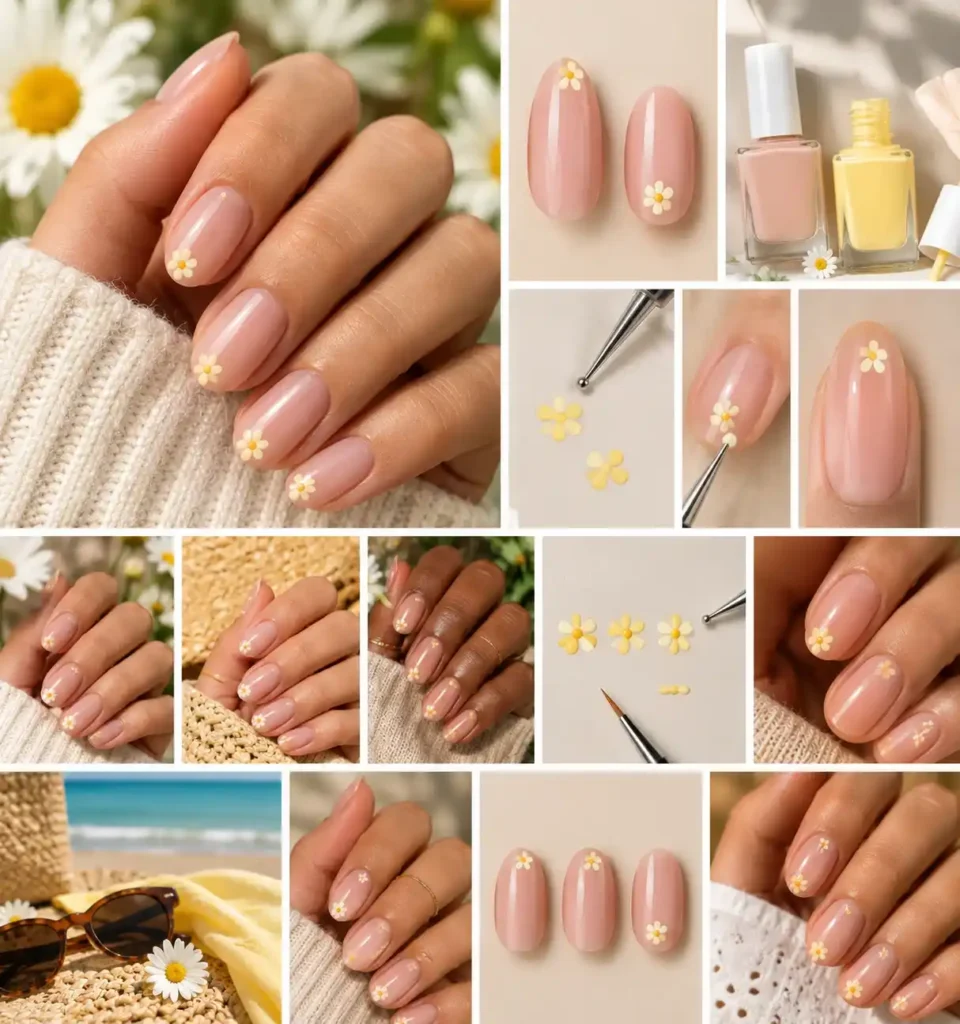
Delicate daisy accents add a fresh, summer vibe to oval nails without overwhelming their shape.
Start with a sheer nude or soft beige base to keep the negative space open, then place a tiny butter‑yellow daisy at the nail apex or just above the cuticle.
Positioning the flower near the tip creates a visual lift, while a cuticle‑level bloom balances the oval curve and preserves symmetry.
A fine‑point dotting tool is the safest DIY option; it deposits just enough pigment to form the petal without building up a thick layer.
Many people find that excessive product at the tip lifts the polish early, especially on acrylic overlays.
For a salon finish, ask the technician to use a single‑stroke brush for the daisy outline, which reduces bulk and extends wear time.
Low‑maintenance summer nails stay short and simple, so the design holds longer on gel polish or short acrylics.
Natural nails benefit most from this look because the negative space highlights the nail’s own shape.
On acrylic overlays, the daisy may chip sooner if the overlay is too thick. Keep the design minimal, and the daisy will stay bright throughout the season.
5. Soft Lavender Glaze for Spring Transitions
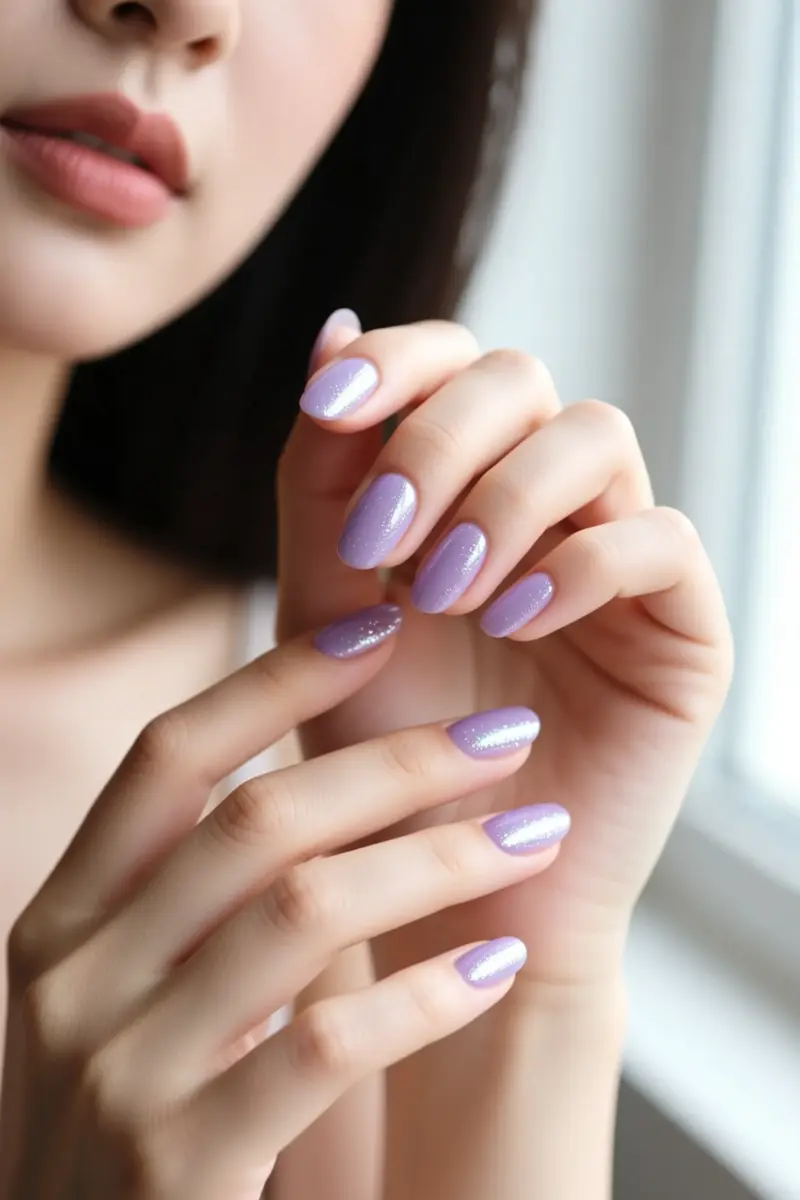
A soft lavender glaze with a subtle chrome or pearlescent finish creates a spring‑ready manicure that feels light yet polished.
Start with a sheer lavender base; cool, blue‑based lavender suits cool undertones, while warm, pink‑based lilac polish flatters warm or olive tones. Apply a non‑wipe gel top coat and cure for 30 seconds under an LED lamp.
While the coat is still tacky, dust fine chrome powder over the nail, then cure for another 30 seconds to lock the powder in place.
Lightly brush away any stray particles and finish with a quick wipe of cleanser for a smooth sheen.
The result is a milky lavender chrome look that reads as a dusty, reflective glaze without the heavy shine of a full‑glazed donut nail.
This technique works best on short nails, especially squoval or round shapes, because the glaze stays even and the color doesn’t pool.
Deep skin tones benefit from a more saturated lavender; pale lavender may wash out on richer pigmentation.
A common mistake is choosing a blue‑based lavender for warm or olive undertones, which can appear dull.
For casual summer days, opt for a jelly finish, while events call for the chrome dust, and the office favors an opaque cream version.
6. Bold Tomato Red for High-Summer
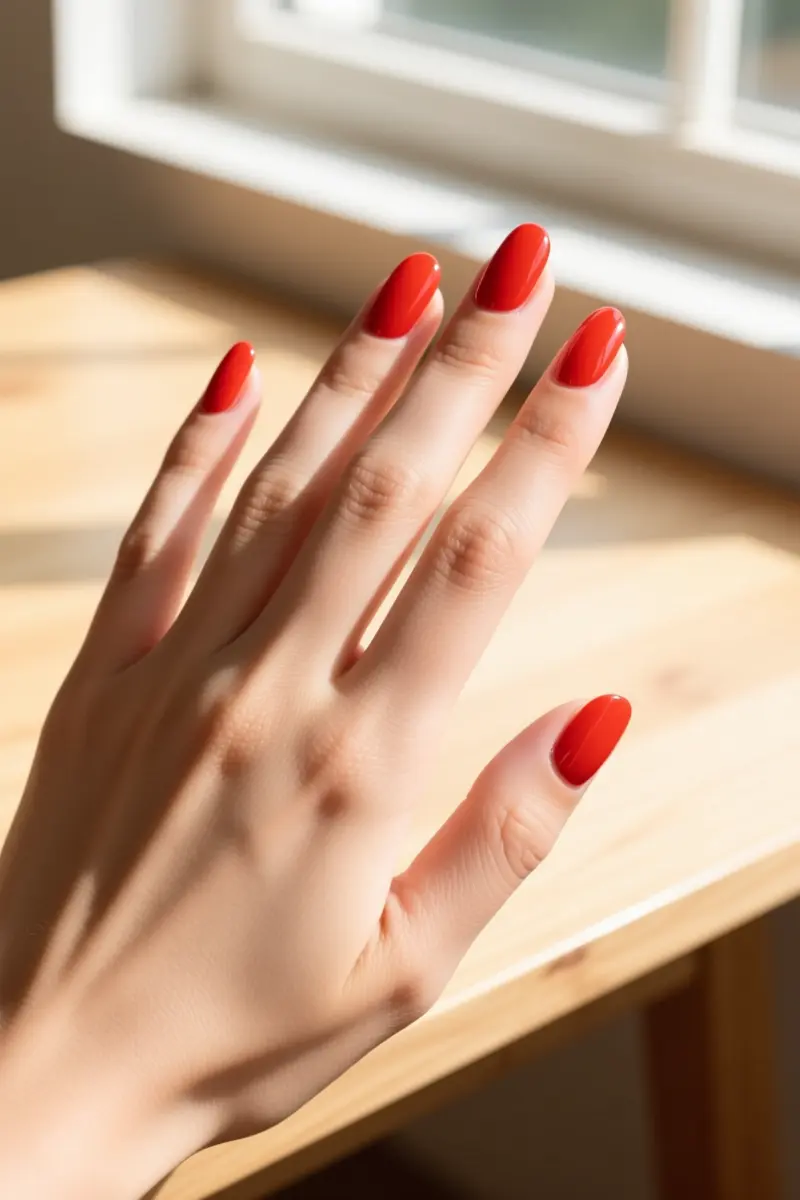
Bold tomato red is the ideal high‑summer shade for medium‑length oval nails. The warm undertone of the hue creates a high‑energy vibe that many associate with confidence and passion.
Psychologically, a punchy red draws attention and can lift mood, making it a go‑to for events under the sun.
Tomato‑red nails are described as versatile, sexy, elegant, and perfect for warm weather wear, but the bright pigment also shows chipped paint instantly.
Traditional nail polish in this shade typically lasts three to four days before the first noticeable chip, while a gel polish extension can push wear time to ten‑plus days.
Many people find the gel’s durability worth the extra salon time when they want the color to survive a busy summer schedule.
A practical tip: seal the free edge by capping the tip with a thin layer of gel or top coat before the final cure.
This extra barrier stops early wear‑and‑tear from typing or handling objects, keeping the tomato pop intact longer.
The trade‑off is a slightly higher cost and the need for a proper gel removal routine to avoid damage.
7. Muted Olive Green with Matte Finishes
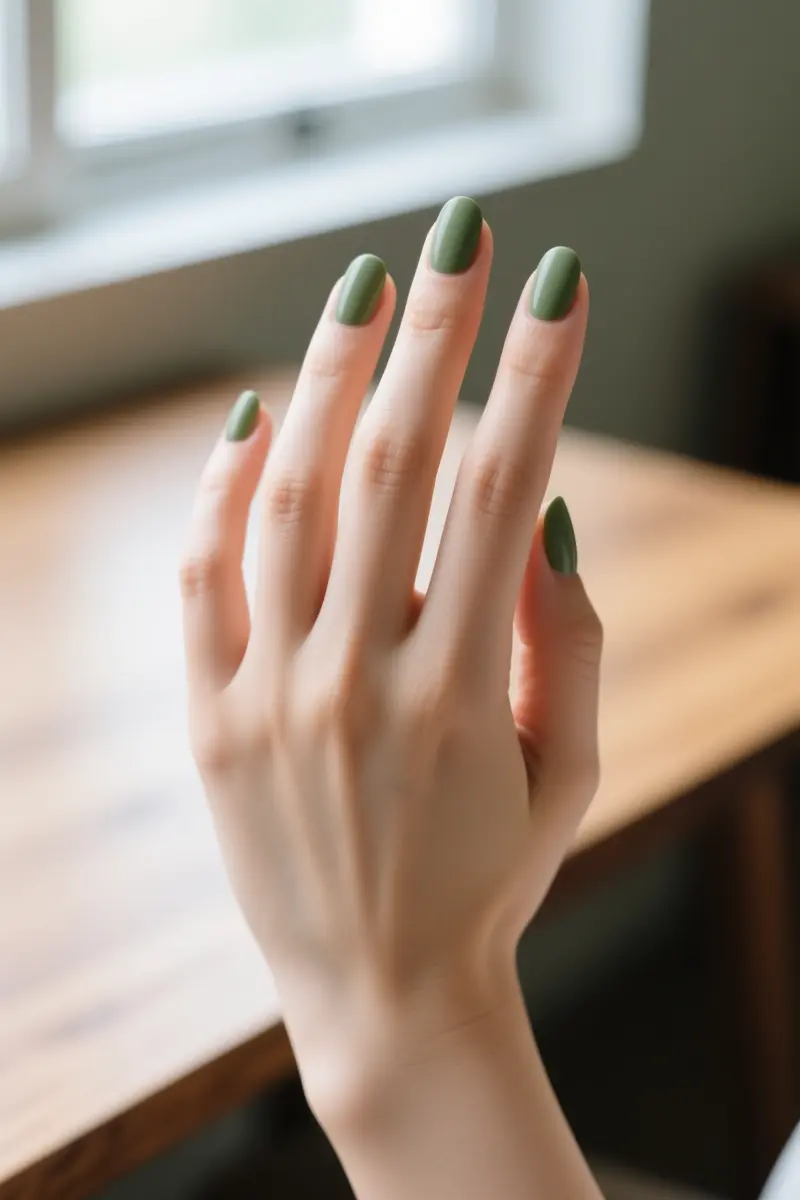
Muted olive green with a matte finish offers a sophisticated autumn nail option.
The hue sits between earthy tones and classic jewel colors, making it a natural choice for olive and warm skin tones.
A matte top coat creates a velvety texture that feels different from high‑gloss; the surface is soft to the touch and diffuses light for a subtle depth.
Many people find matte finishes attract oils and stains more easily than gloss, so regular cleaning with rubbing alcohol keeps the color looking fresh.
Pair the shade with cuticle oil or a lightweight hand cream to maintain hydration, especially when the matte top coat can draw moisture away from the nail plate.
A user reported that the base colour is a gorgeous green gel polish that complements her skin tone perfectly, confirming the shade’s flattering power.
This look works best on those with olive or warm undertones; cooler complexions may appear washed out.
For a polished everyday vibe, choose a matte top coat priced around $12‑$18 and schedule a quick wipe‑down with rubbing alcohol every few days.
The result is an elegant, wearable design that feels seasonally appropriate without demanding constant salon visits.
8. Cozy Tortoiseshell Accent Nails for Winter
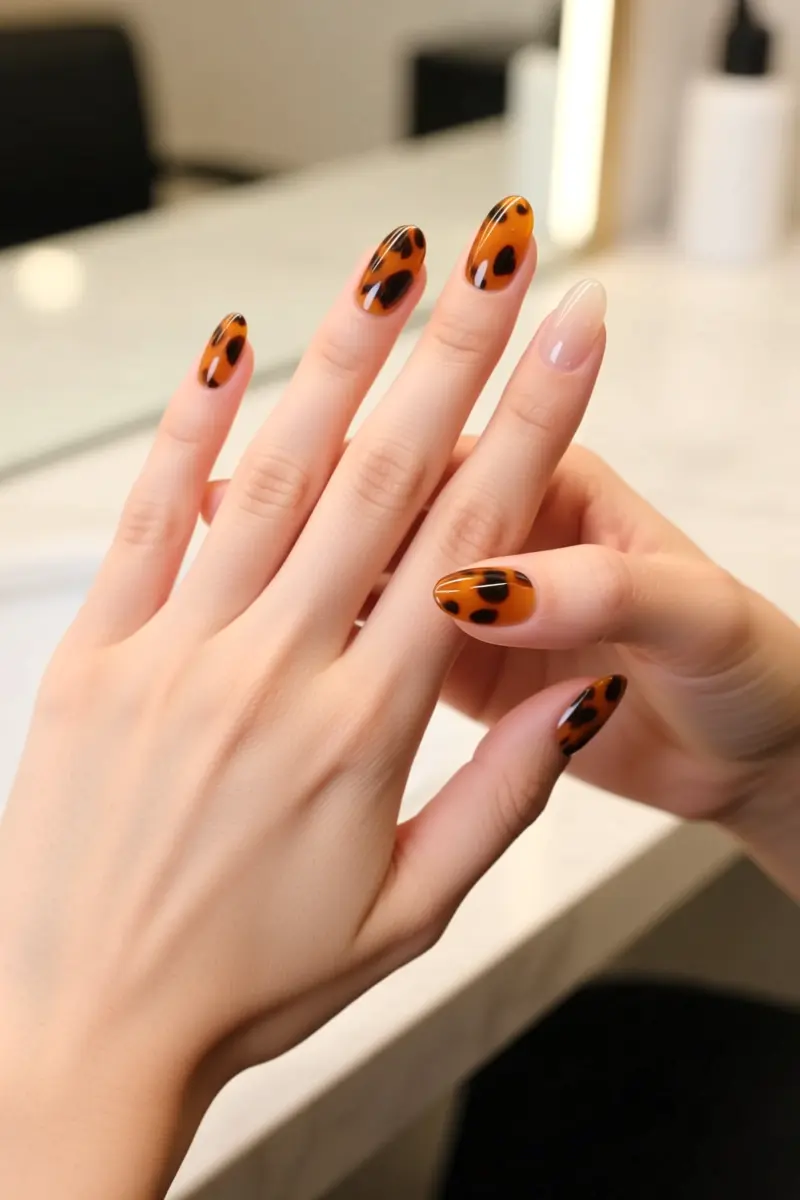
Cozy tortoiseshell accent nails add winter warmth while staying wearable.
The design builds depth by layering an amber base with brown and black specks, then blending a translucent jelly polish on top. This creates the classic semi‑translucent shimmer that mimics real tortoiseshell.
Achieving the effect requires a blooming gel technique, where wet‑on‑wet mixing of pigments is done on the nail surface.
The nail technician applies the amber base, then quickly swirls brown and black gels before the bloom settles. A final jelly polish seal locks in the glossy finish.
Many people find the process intricate; a skilled nail technician is usually needed.
Salon pricing reflects the labor. Expect $45‑$70 for a full set of oval nails with tortoiseshell, but a single accent nail drops the cost to $12‑$20. Using one accent keeps the look luxe without breaking the budget.
Because the design relies on multiple gel layers, touch‑ups are more frequent than with solid colors. A common downside is the higher upkeep cost compared to simpler polishes.
Winter tortoiseshell never looked so good, yet it works best for those comfortable with regular salon visits and a modest price tag.
9. Velvet Magnetic Cat-Eye Oval
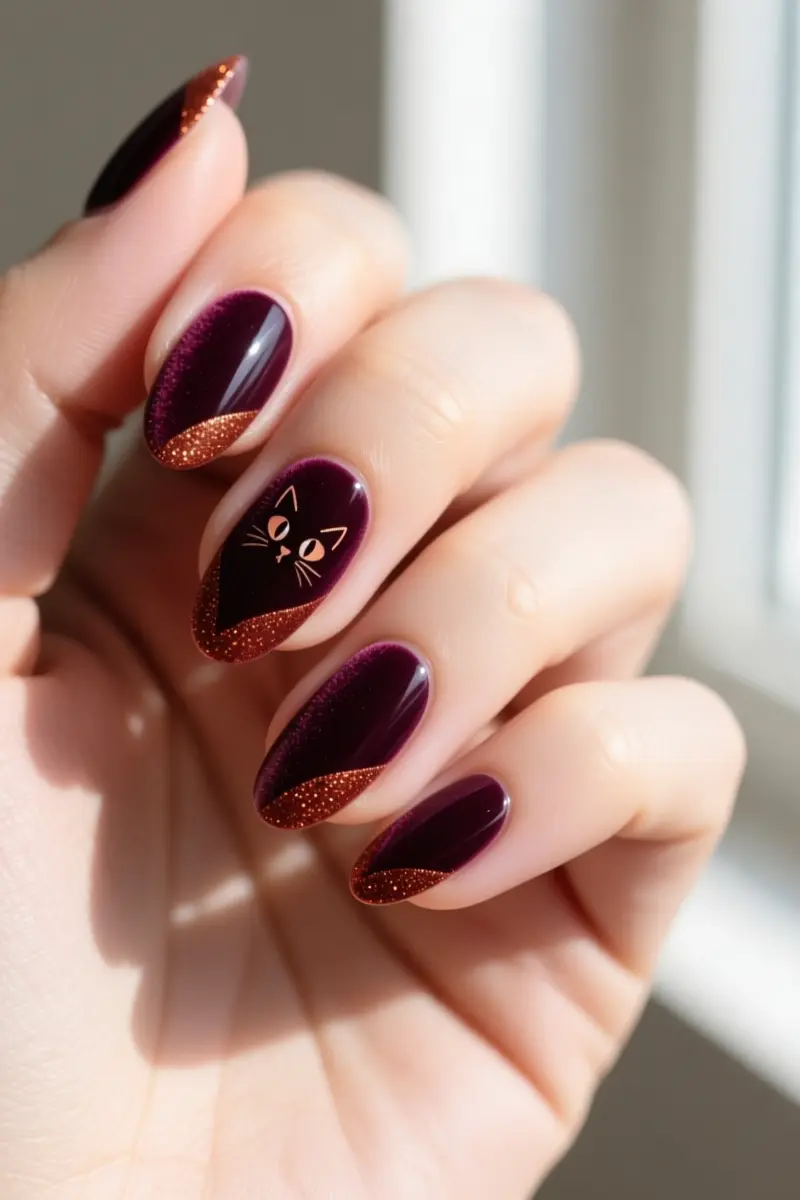
The Velvet Magnetic Cat‑Eye Oval uses a dimensional magnetic gel to give the nail a velvet‑like shimmer while extending the visual length of the oval shape.
Oval nails are filed into an egg‑shaped silhouette with gently tapered sides that mirror the natural cuticle line and a smooth, rounded free edge, allowing the reflective particles to travel along the curved free edge and create an illusion of extra length.
A dual‑ended magnetic wand sweeps across the wet cat‑eye gel; the parallel motion spreads iron‑oxide particles into a diffuse, all‑over sparkle instead of a single line.
The wand must move quickly, and the gel is cured under an LED lamp within seconds so the pattern locks before the particles disperse.
This speed is essential; slower curing lets the shimmer fade and ruins the velvet effect.
Regular air‑dry magnetic polishes lack the rapid polymerization needed to capture the pattern, so they often leave a patchy, uneven finish.
A sealed gel velvet manicure typically lasts two to three weeks without chipping, but harsh knocks can break the alignment, and a fresh top coat every 1-2 weeks is recommended to keep the shine.
The finish works year‑round: dark jewel tones suit autumn and winter, while champagne, silver, or icy blue complement spring and summer.
Because the oval shape distributes visual weight evenly, the velvet shimmer moves smoothly across the nail, enhancing depth without stressing the nail edges.
10. Milky Negative Space Minimalist Ovals
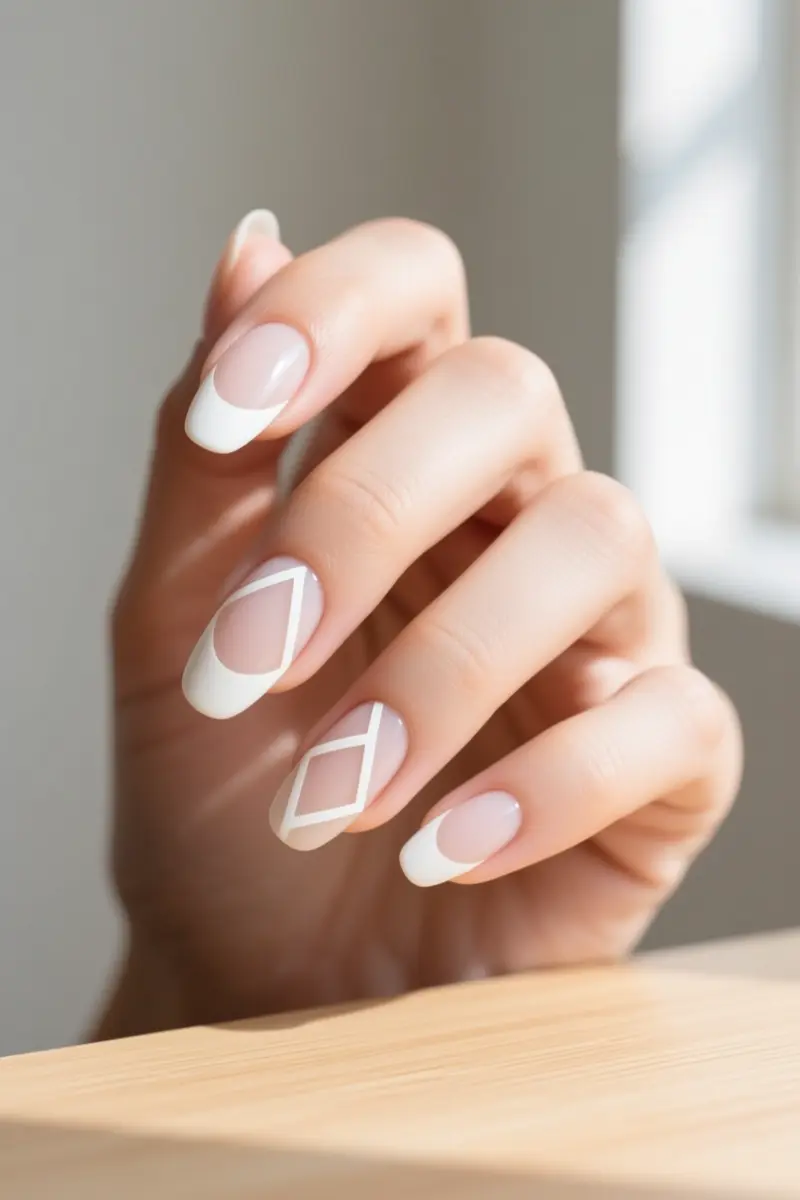
Milky negative space minimalist ovals hide nail growth while looking sleek.
A sheer, milky‑white base covers the whole nail, then unpolished geometric or curved gaps are left untouched for a high‑fashion vibe.
The open sections disguise regrowth because the sheer tint blends with new nail tissue, letting you stretch a salon visit to about four weeks.
Many people find this the lowest‑maintenance option among oval designs.
The look works best on natural nails that are well‑shaped, as the negative space relies on clean lines.
If your nails are prone to splitting, a Gel Builder Overlay (≈ $60) before applying the milky polish can add strength without sacrificing the airy feel.
A common drawback is that the sheer finish chips faster than opaque colors, so a quick top coat is advisable.
Pro tip: choose a milky formula labeled “sheer polish” rather than “chalky milk” to avoid streaks.
Apply the base in thin layers, let each dry fully, then use a fine‑tip brush to carve out the gaps. Finish with a clear, non‑yellowing top coat for extra shine and protection.
This approach delivers a classy, cute oval that stays fresh through seasonal changes without constant touch‑ups.
Your Next Nail Moment Awaits
Start with a well‑prepped base coat to lock in color and prevent lifting.
For extra durability, apply a thin layer of builder gel over the tip before shaping the oval.
Swap seasonal hues by using a sheer, tinted top coat that complements your skin tone.
The builder gel layer can feel thicker and may require extra filing if you prefer a natural feel.
With those basics, oval nails stay low‑maintenance and elegant for any season.
Save this guide for your next salon visit or share it with a friend who hates nail chips. A quick touch‑up with clear polish will keep the shine alive between appointments.
Frequently Asked Questions
What are the current trends in oval nail designs?
Current trends focus heavily on minimalist variations, including micro-French tips, sheer glazed finishes, negative space designs, and rich earth tones like espresso and olive green that emphasize the natural shape of the nail.
Are oval nails stronger than square nails?
Yes, oval nails are structurally more resilient than square nails because they lack sharp corners, which distribute daily impact forces evenly across the free edge and prevent snagging.
Can you do oval nails on short fingers?
Oval nails are highly recommended for short fingers because the rounded, tapered tip creates an uninterrupted line that visually elongates the fingers and flatters the overall hand shape.
How do you shape natural nails into an oval at home?
To shape an oval nail at home, file the side walls straight up, then round the file from the side margins toward the center in one fluid direction, avoiding sawing motions that weaken the nail wall.
How long do gel oval nails typically last before chipping?
A professionally applied gel manicure on oval nails typically lasts between two to three weeks, as the absence of sharp corners reduces the friction that causes premature chipping.